Welcome to the CYC Makerspace Technology Center — Here you'll find your guide to using our machines: 3D printers, scanners, laser cutters, CNCs, and more.️
Snapmaker Artisan - CNC Engraving and Cutting
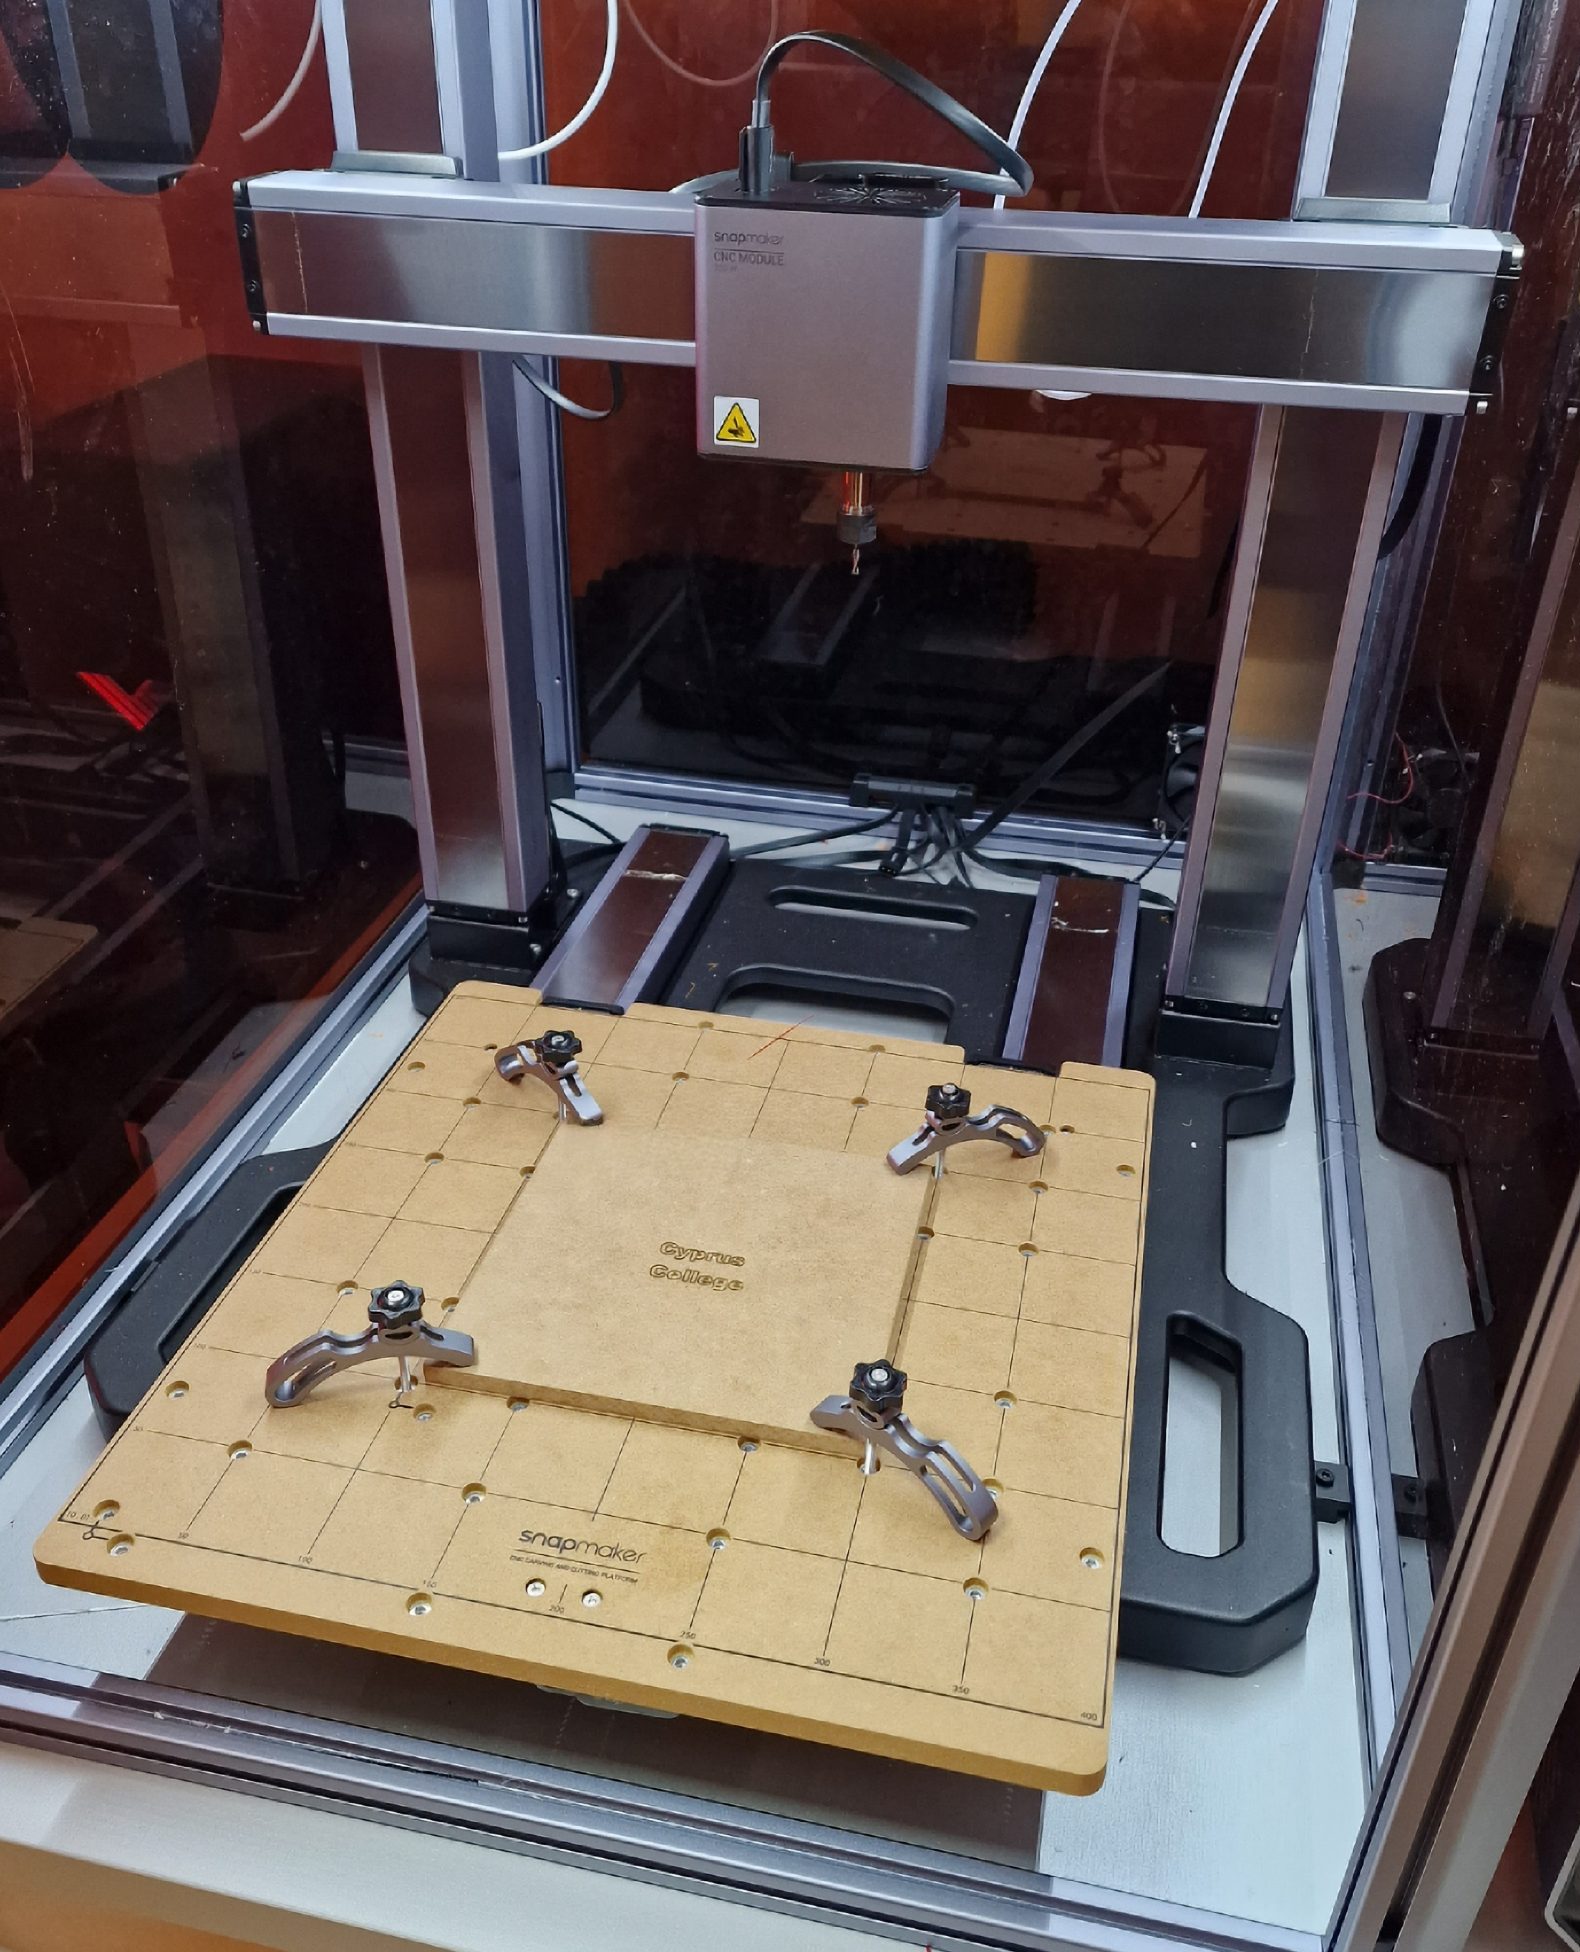
The third tool head you can fit to the Snapmaker Artisan is a CNC router (Computer Numerical Control), and the machine ships with three different router bits. It’s a 200W module that spins at up to 18,000 RPM, allowing you to speed through up to 3000mm/min and 2mm step down (depending on the material you’re cutting).
Step 1
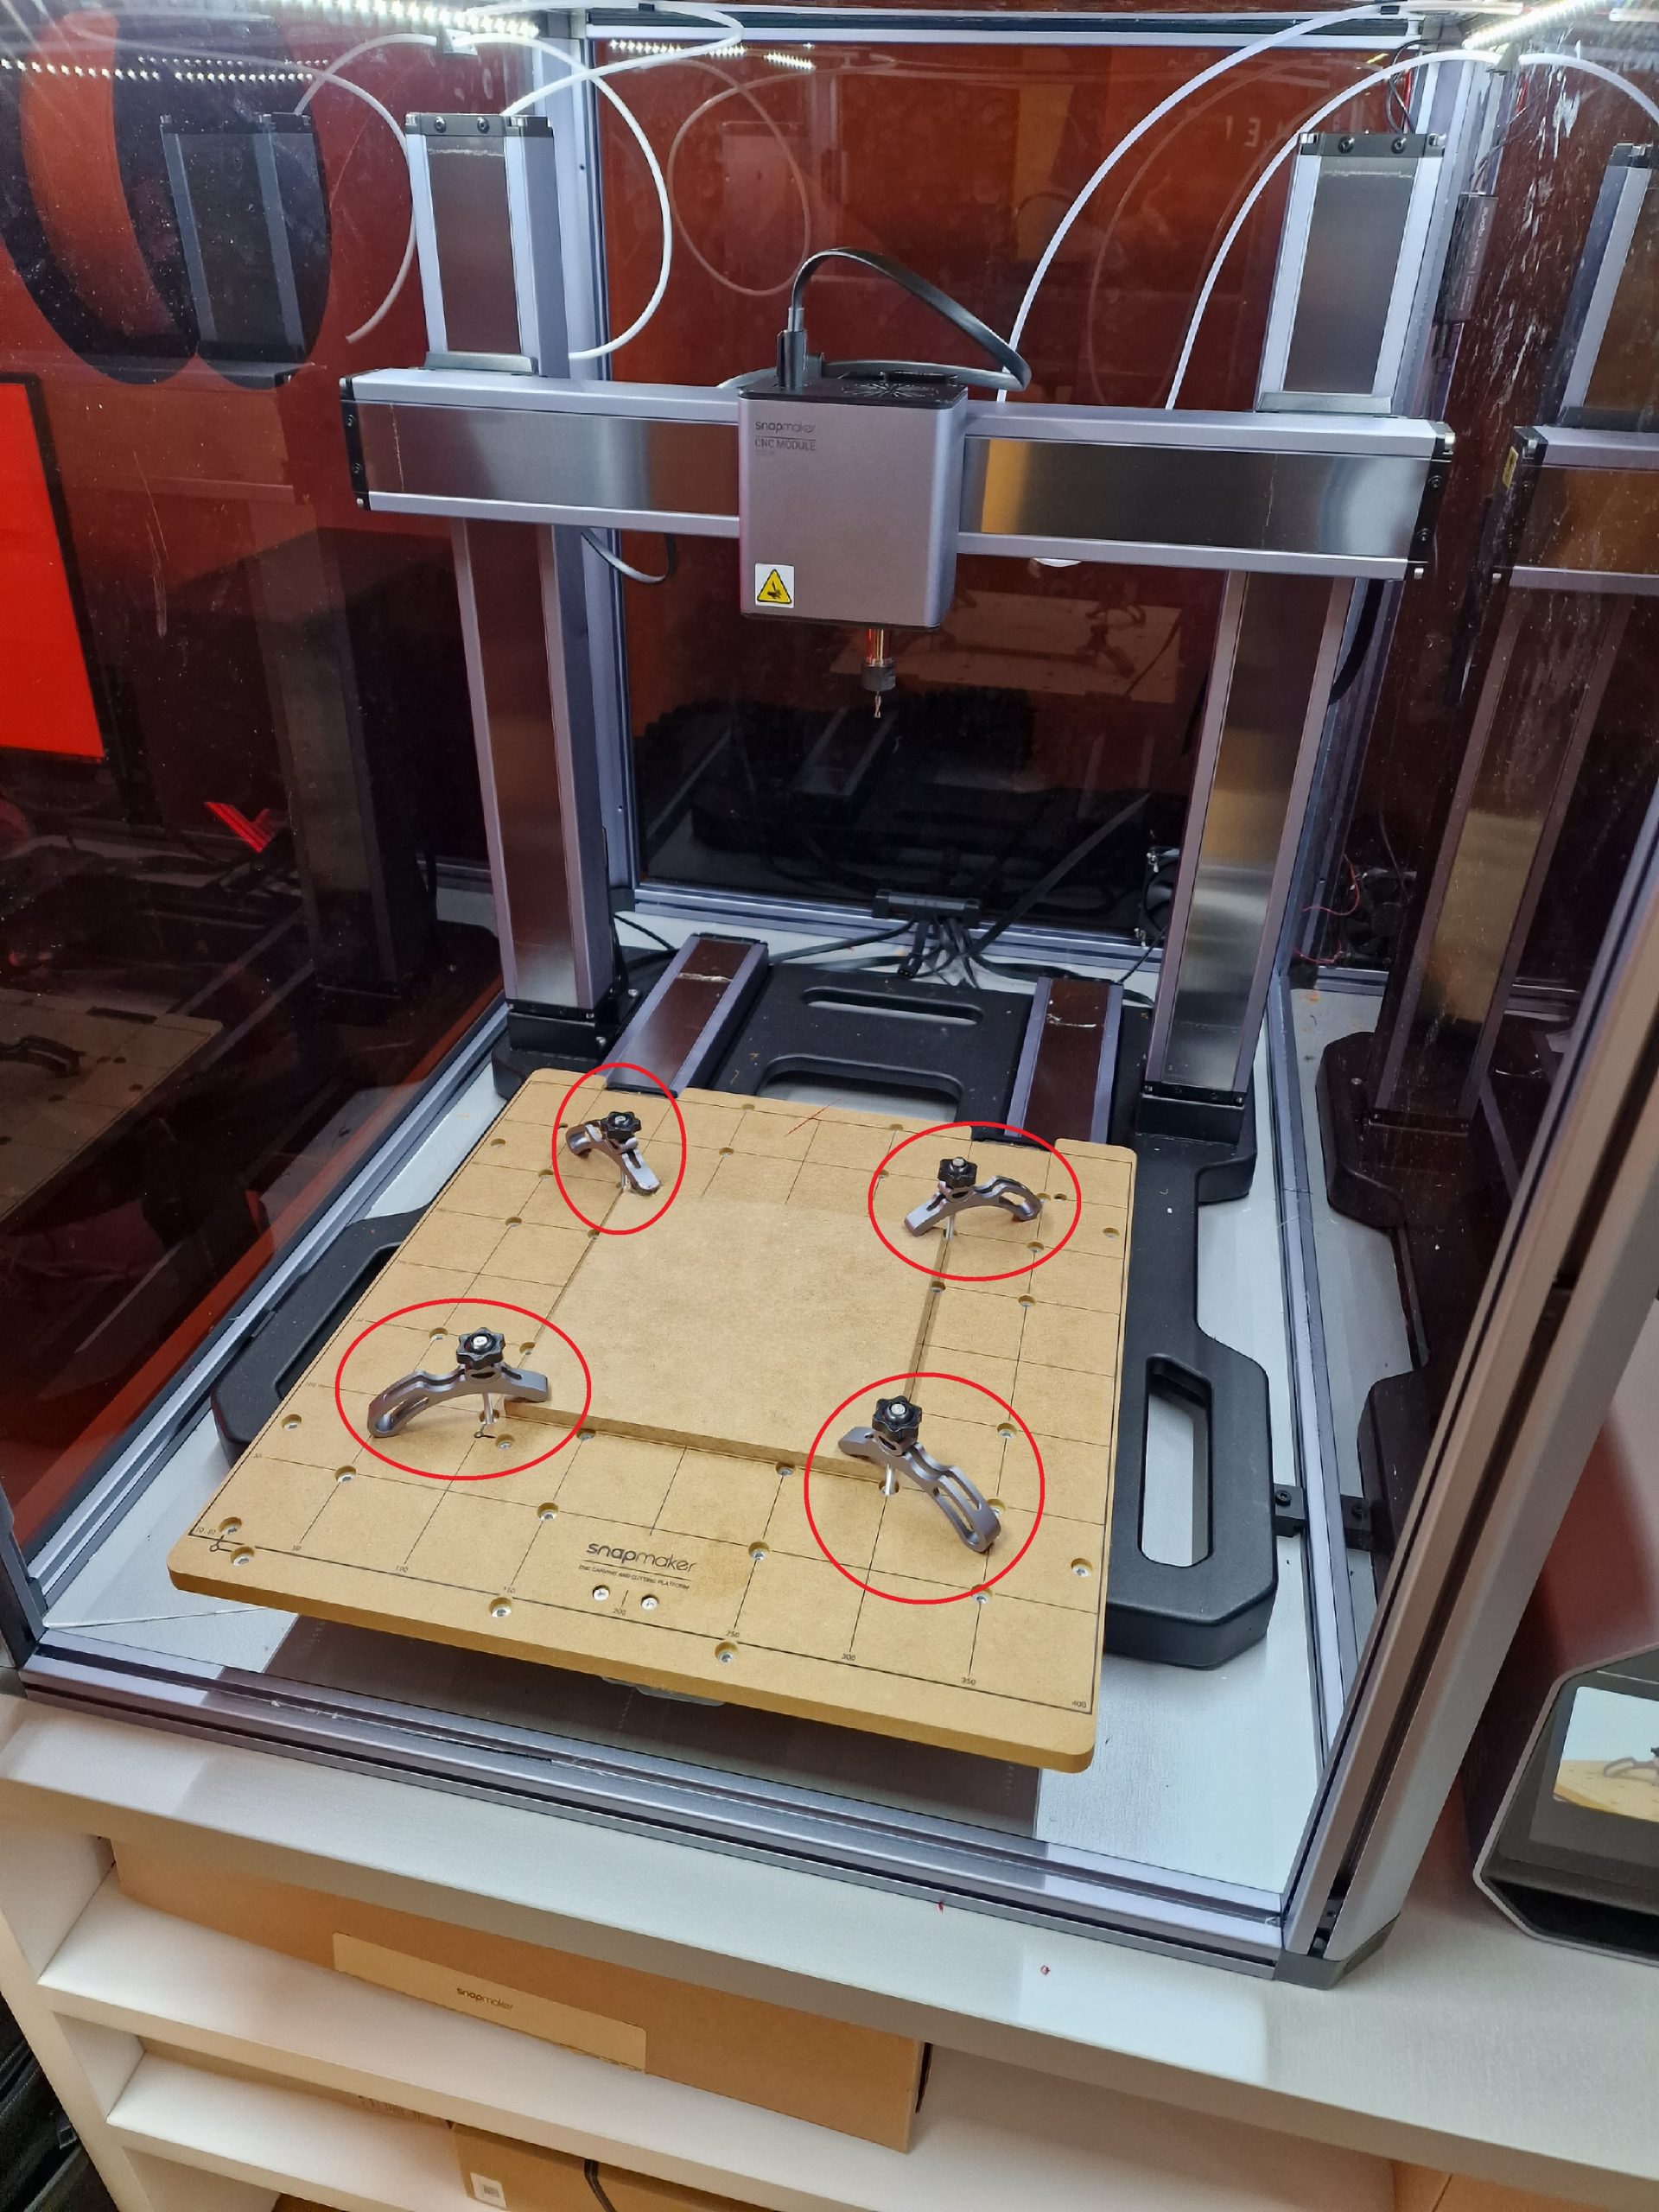
Place your material in the machine and you wedge it so that it does not move during the time of engraving – cutting.
Step 2
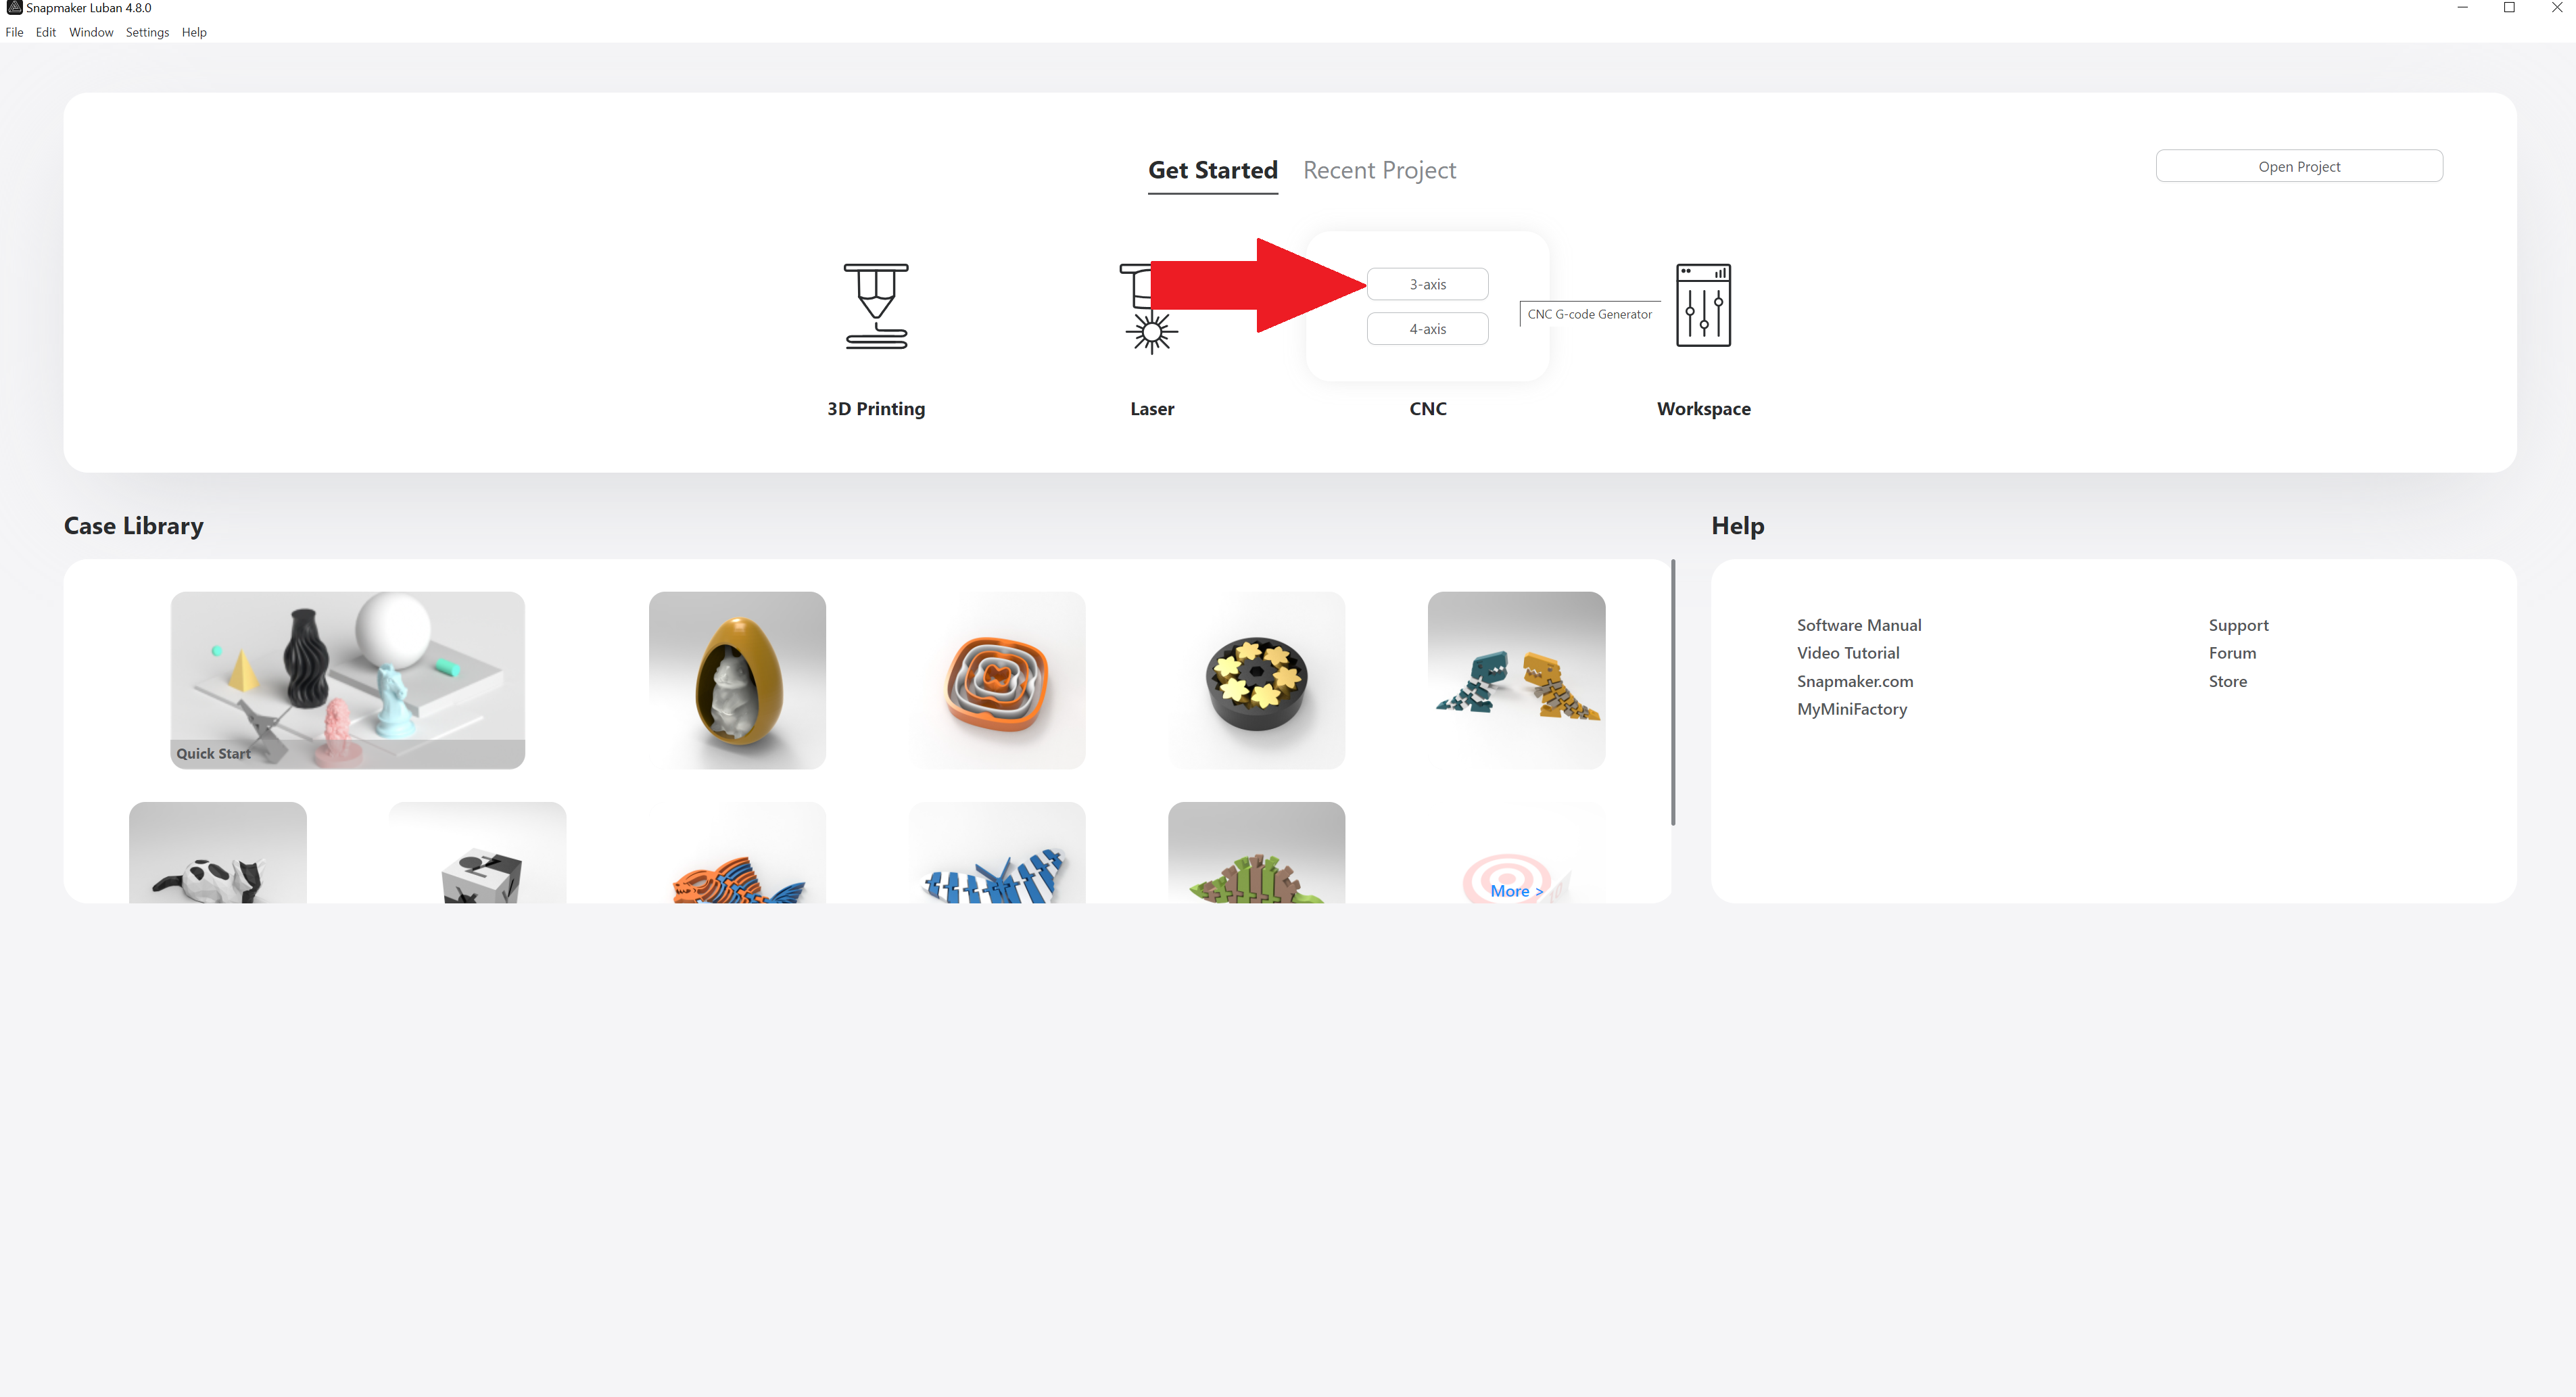
Go to the Snapmaker Luban software and on CNC option, select 3 axis.
Step 3
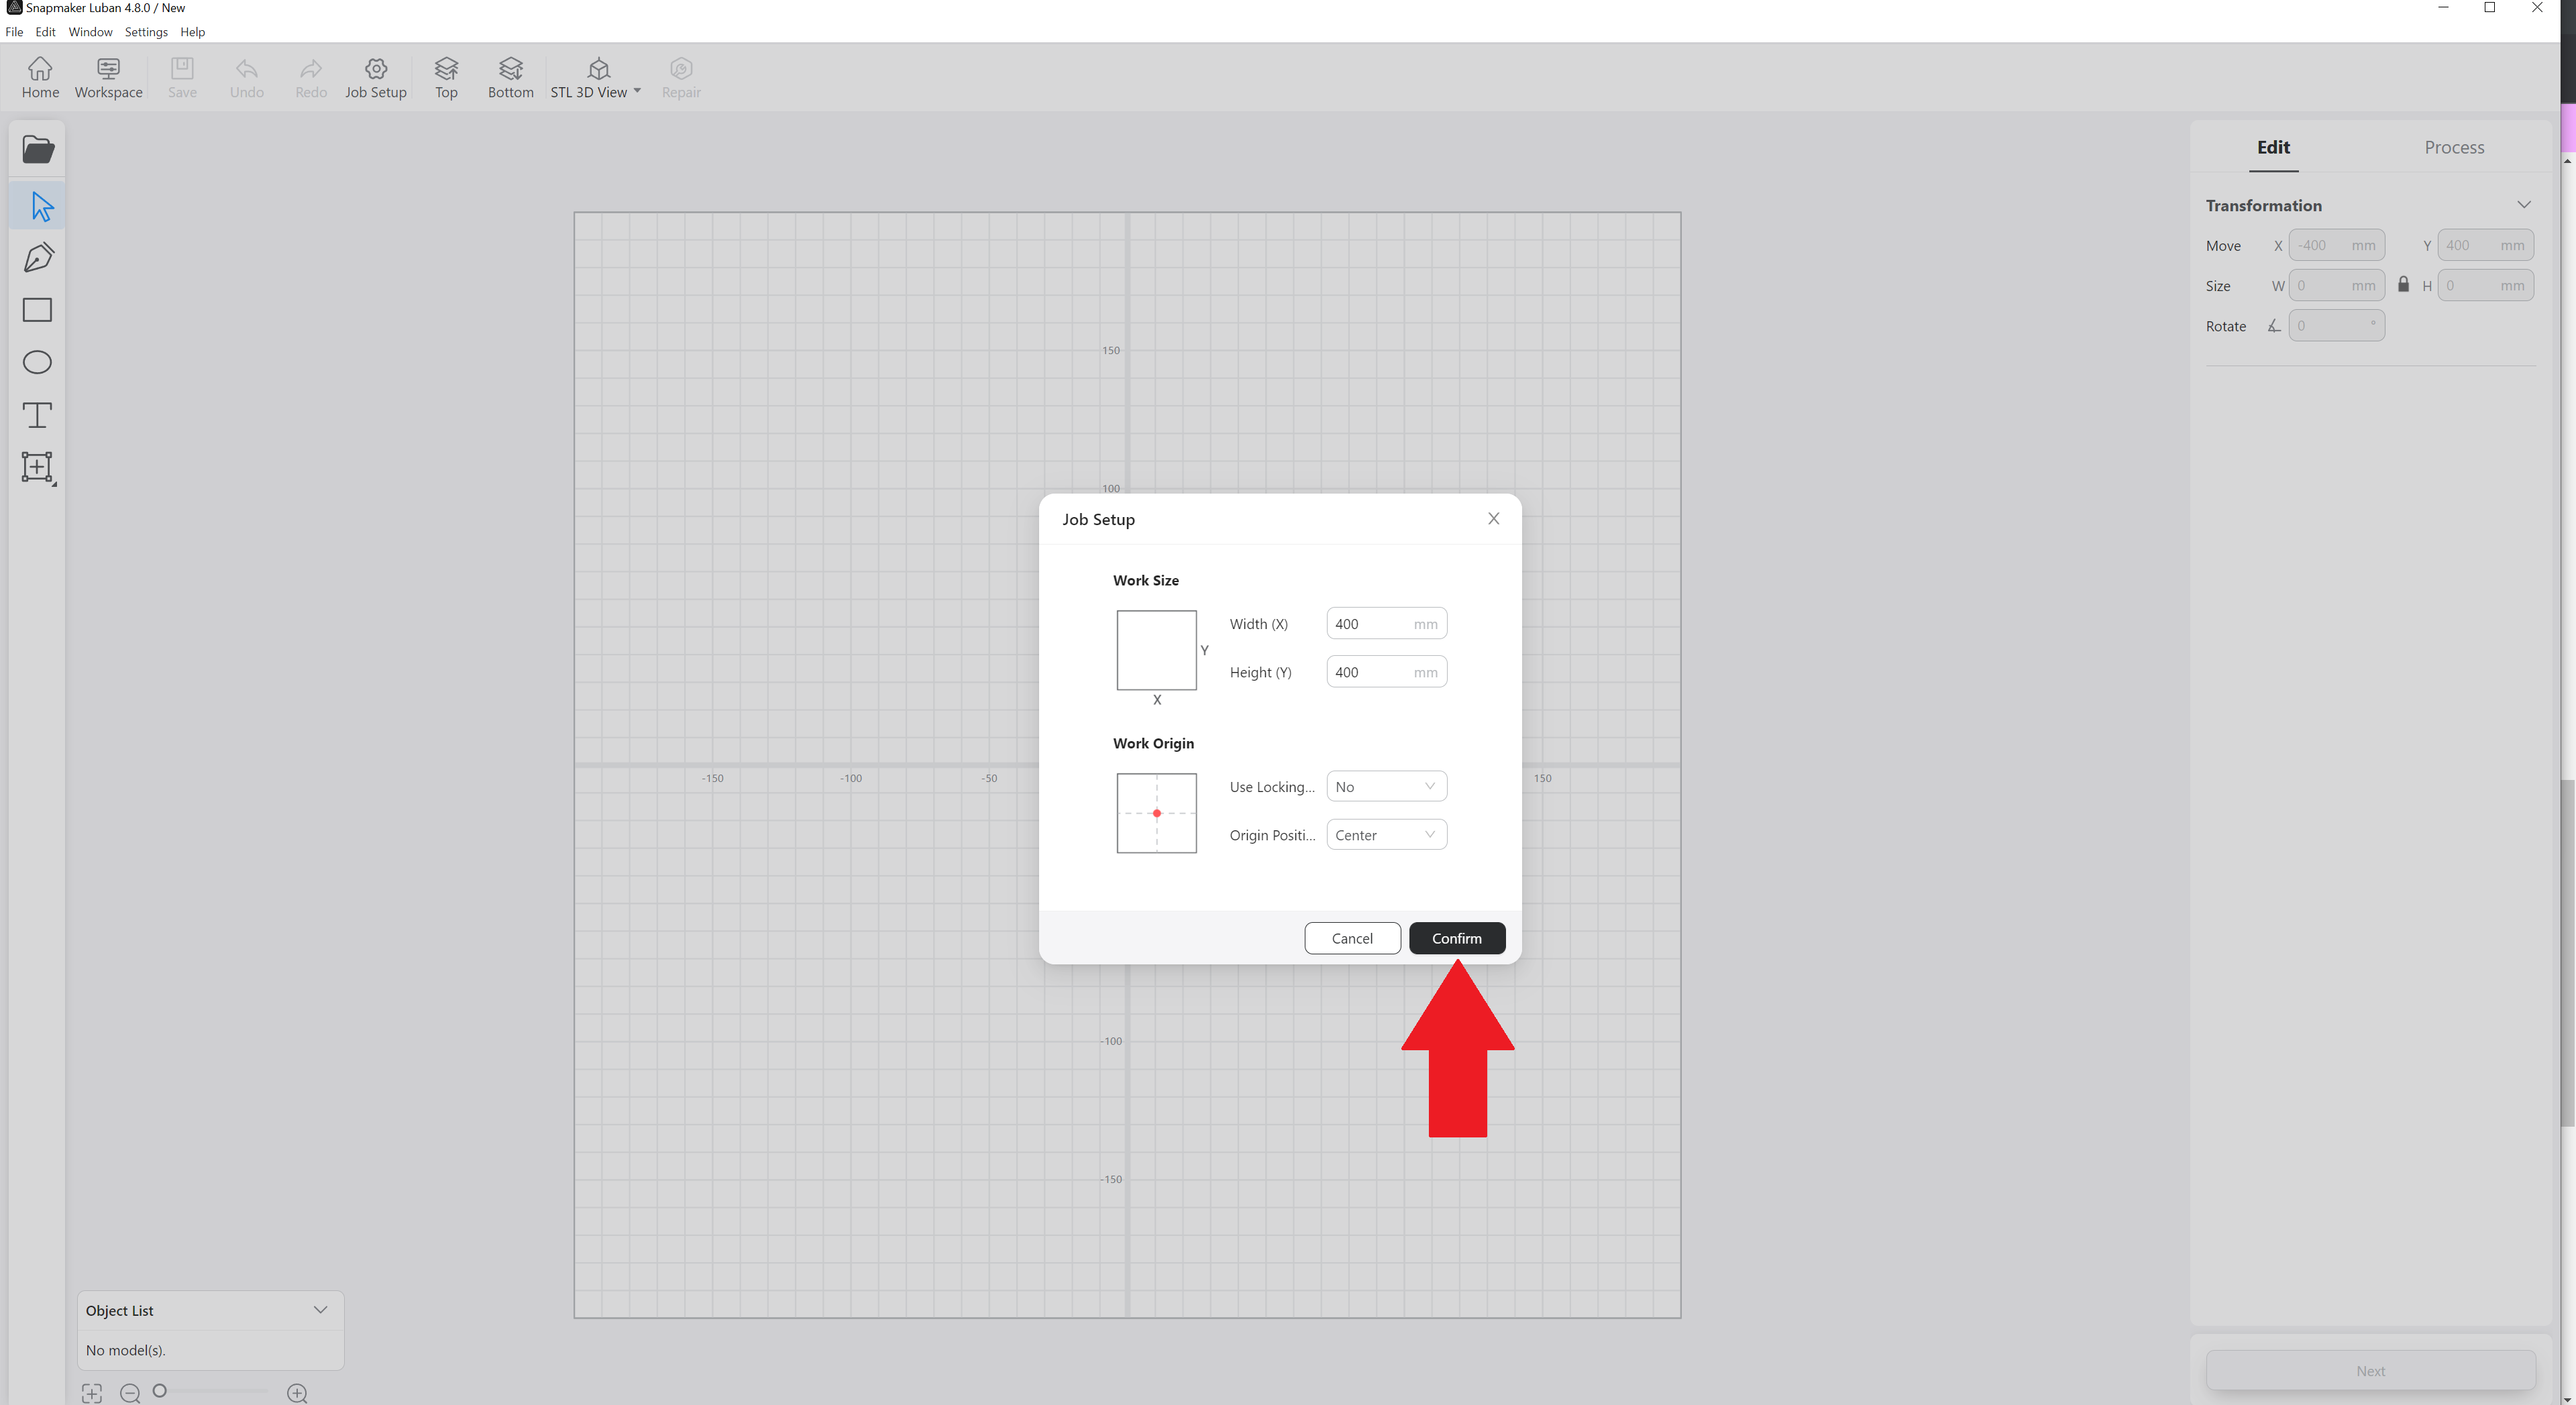
Press the Confirm button.
Step 4
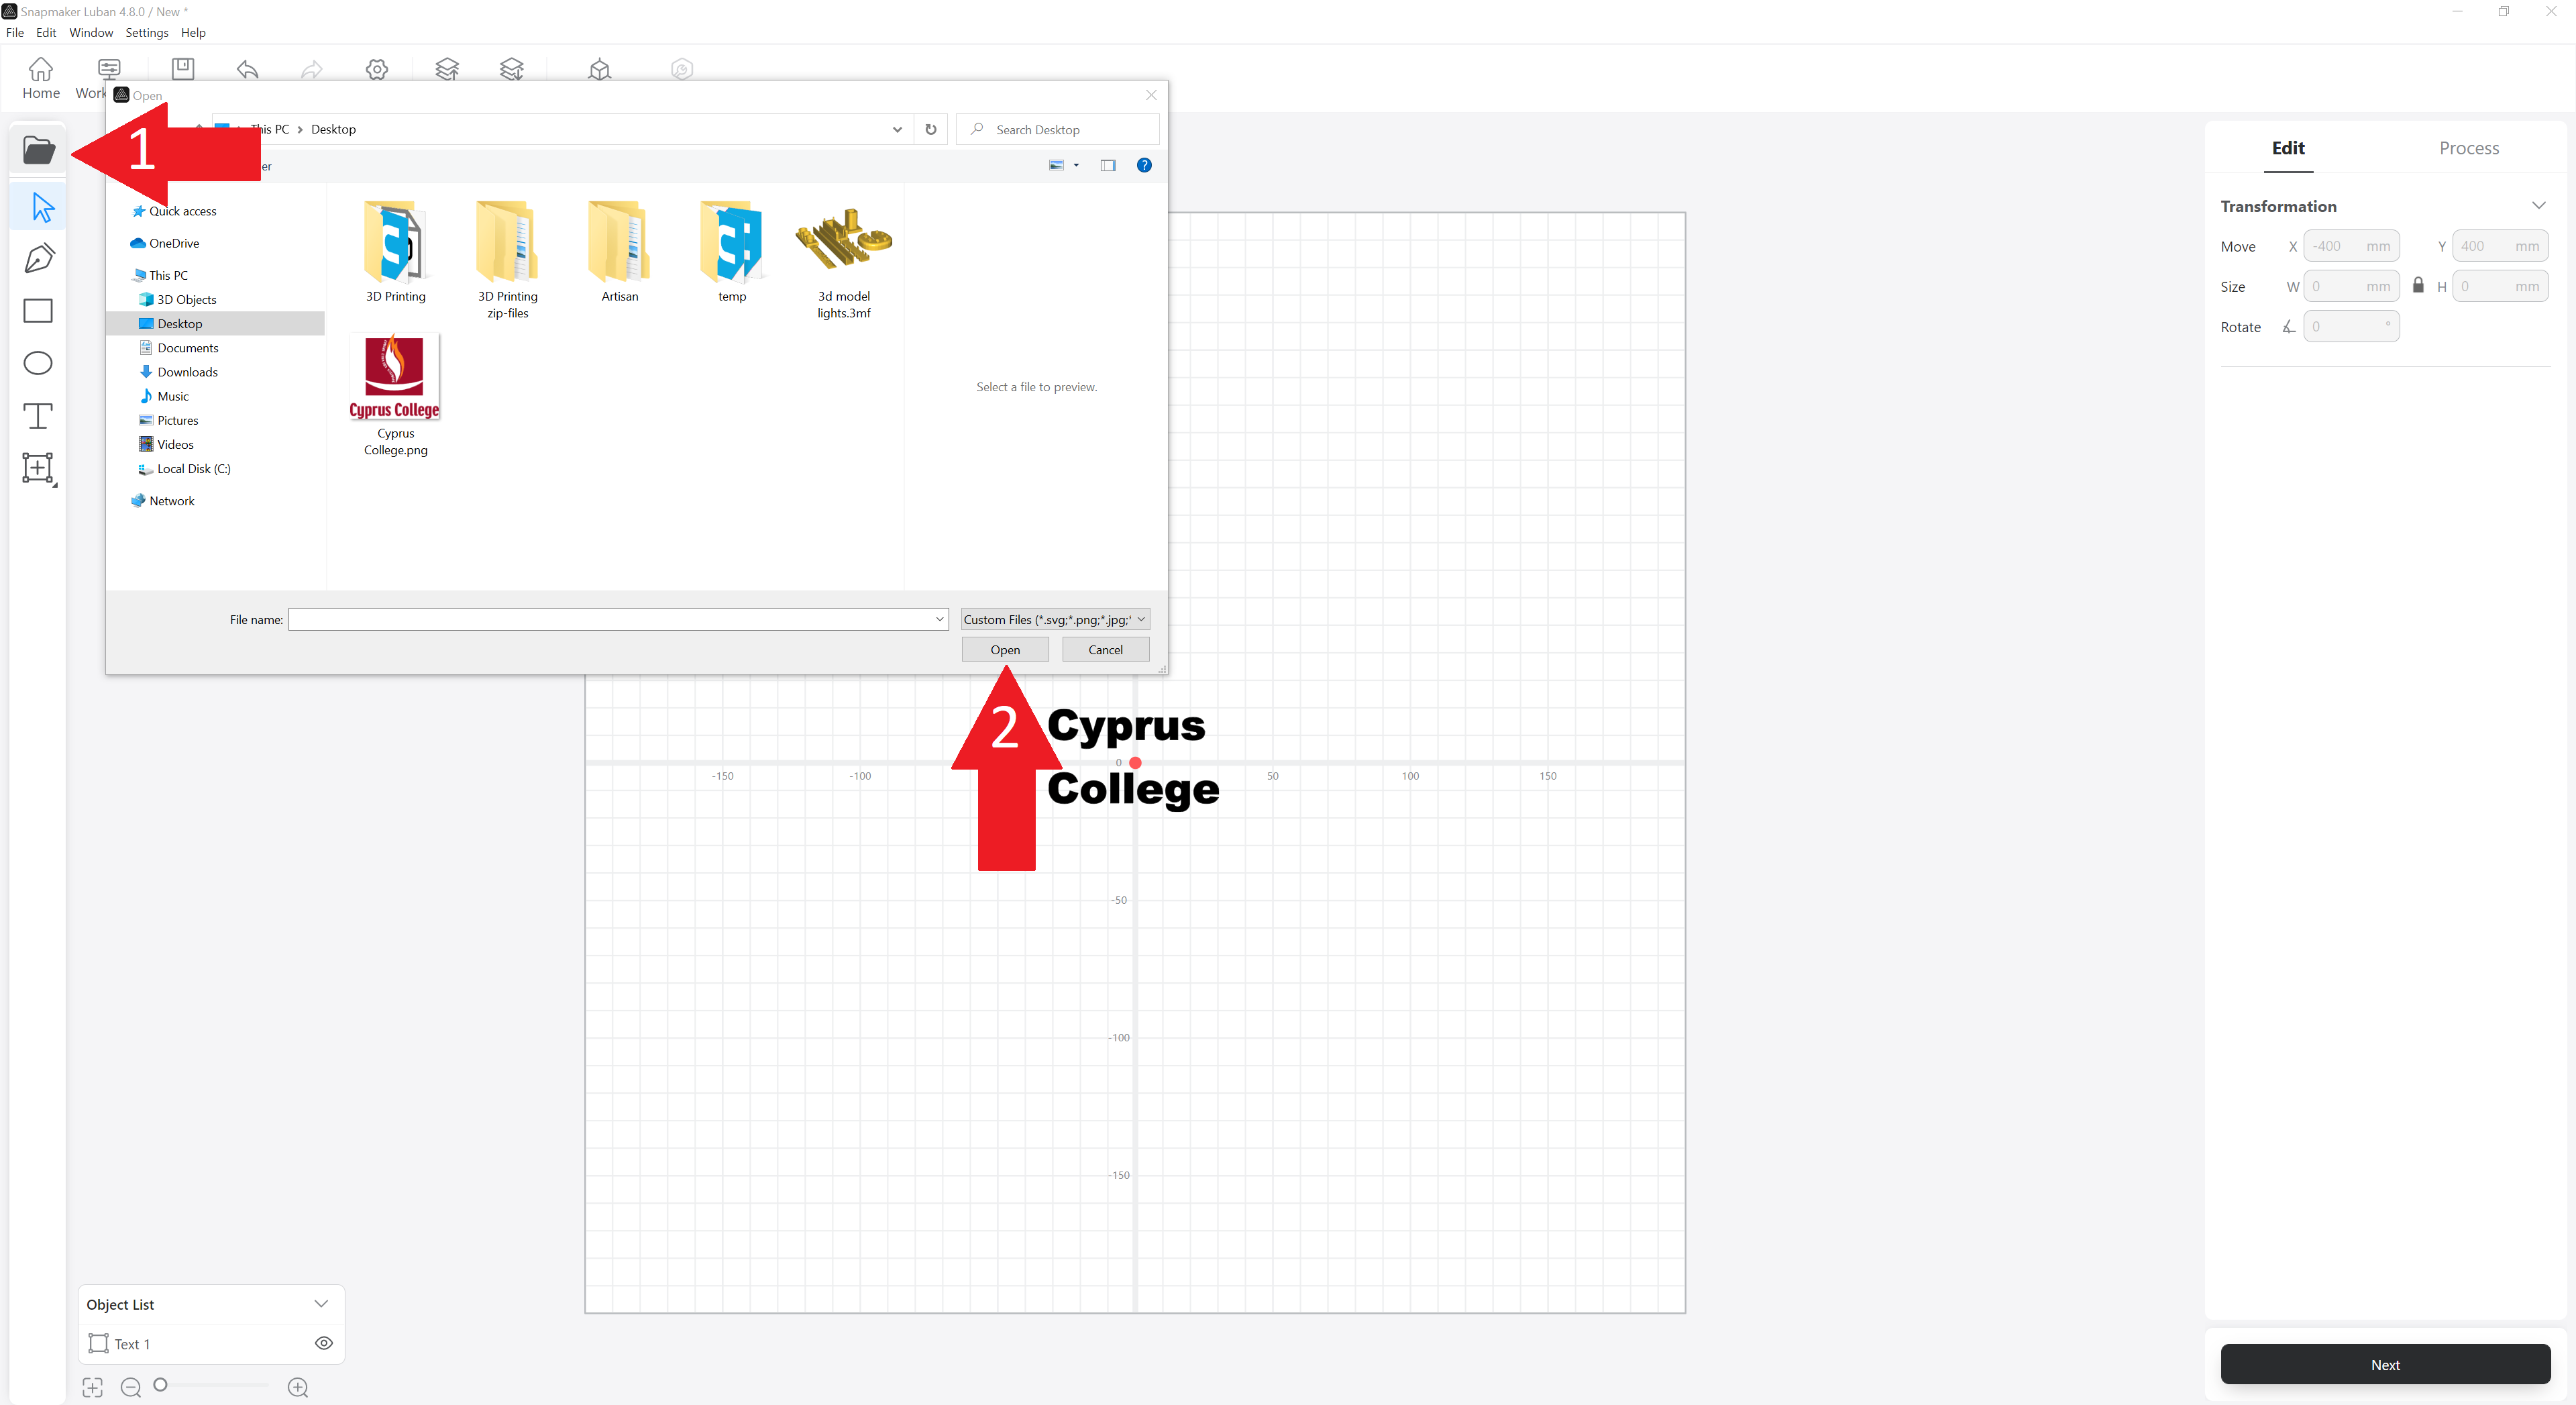
Import your file.
Step 5
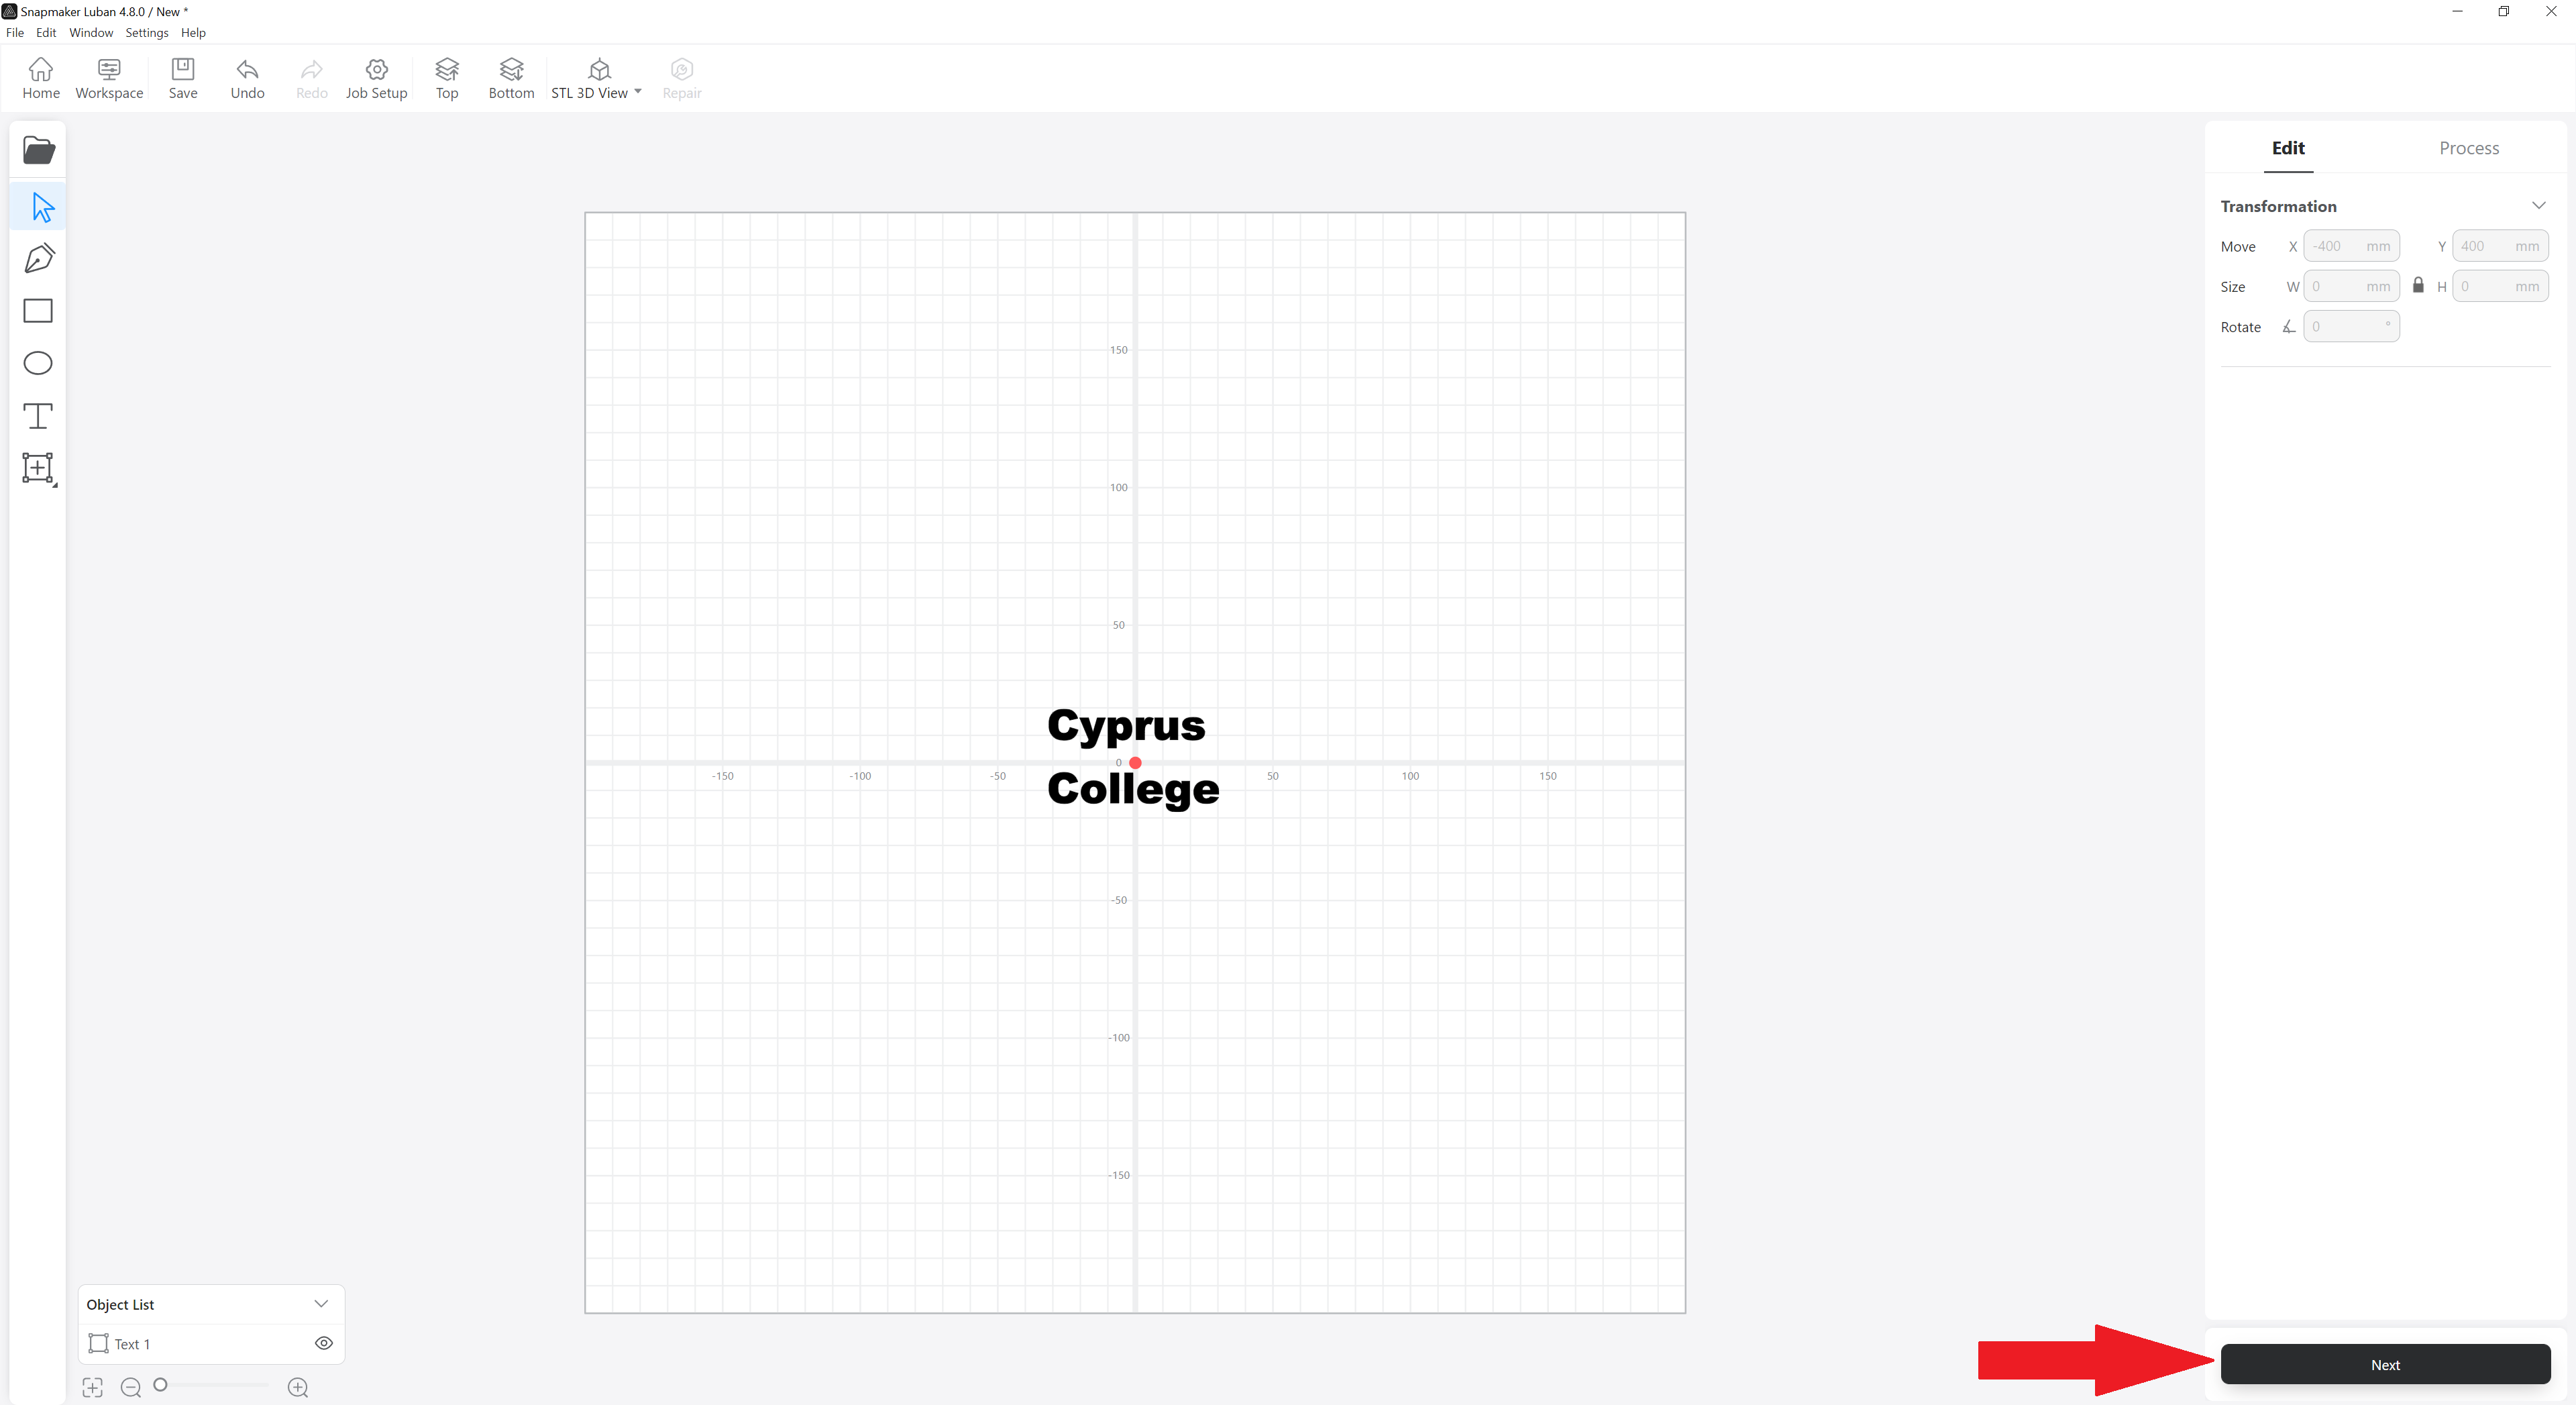
Make the necessary settings, if needed and click on Next button.
Step 6
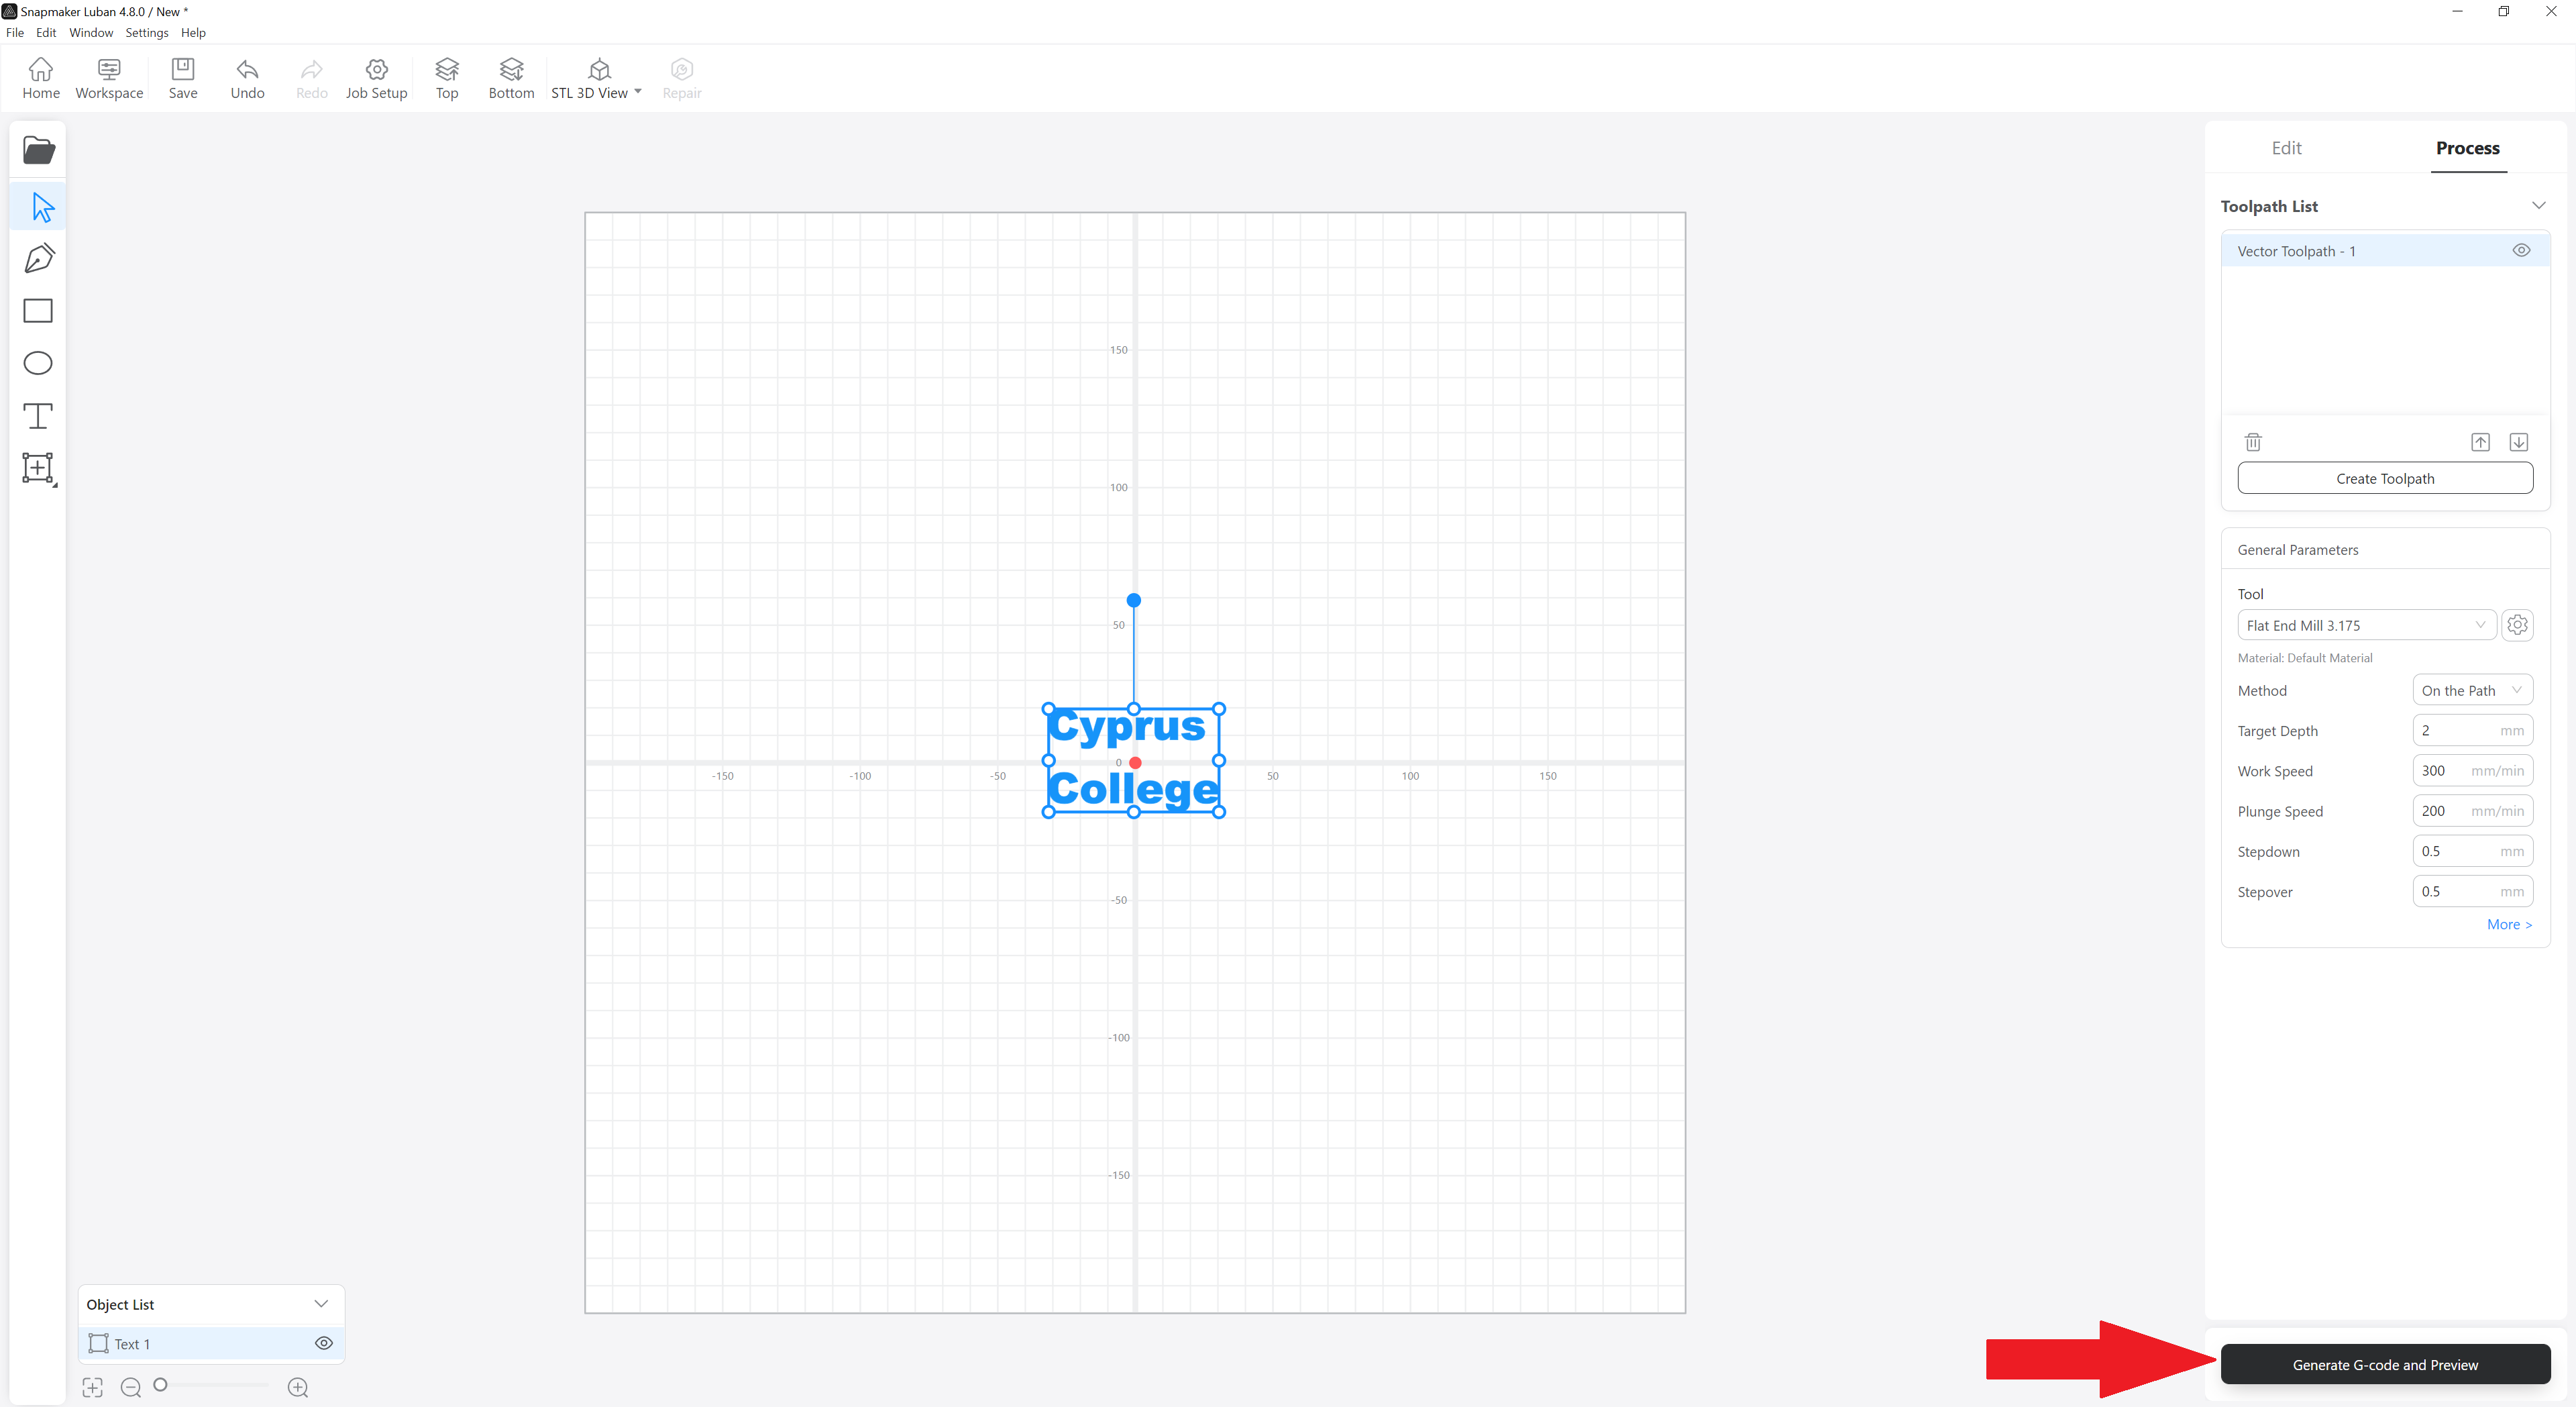
a. Click on Create Toolpath and
b. Make the settings you want (material and tool you will use, etc.) and click on Save.
Step 7
Click on Generate G-code and Preview.
Step 8
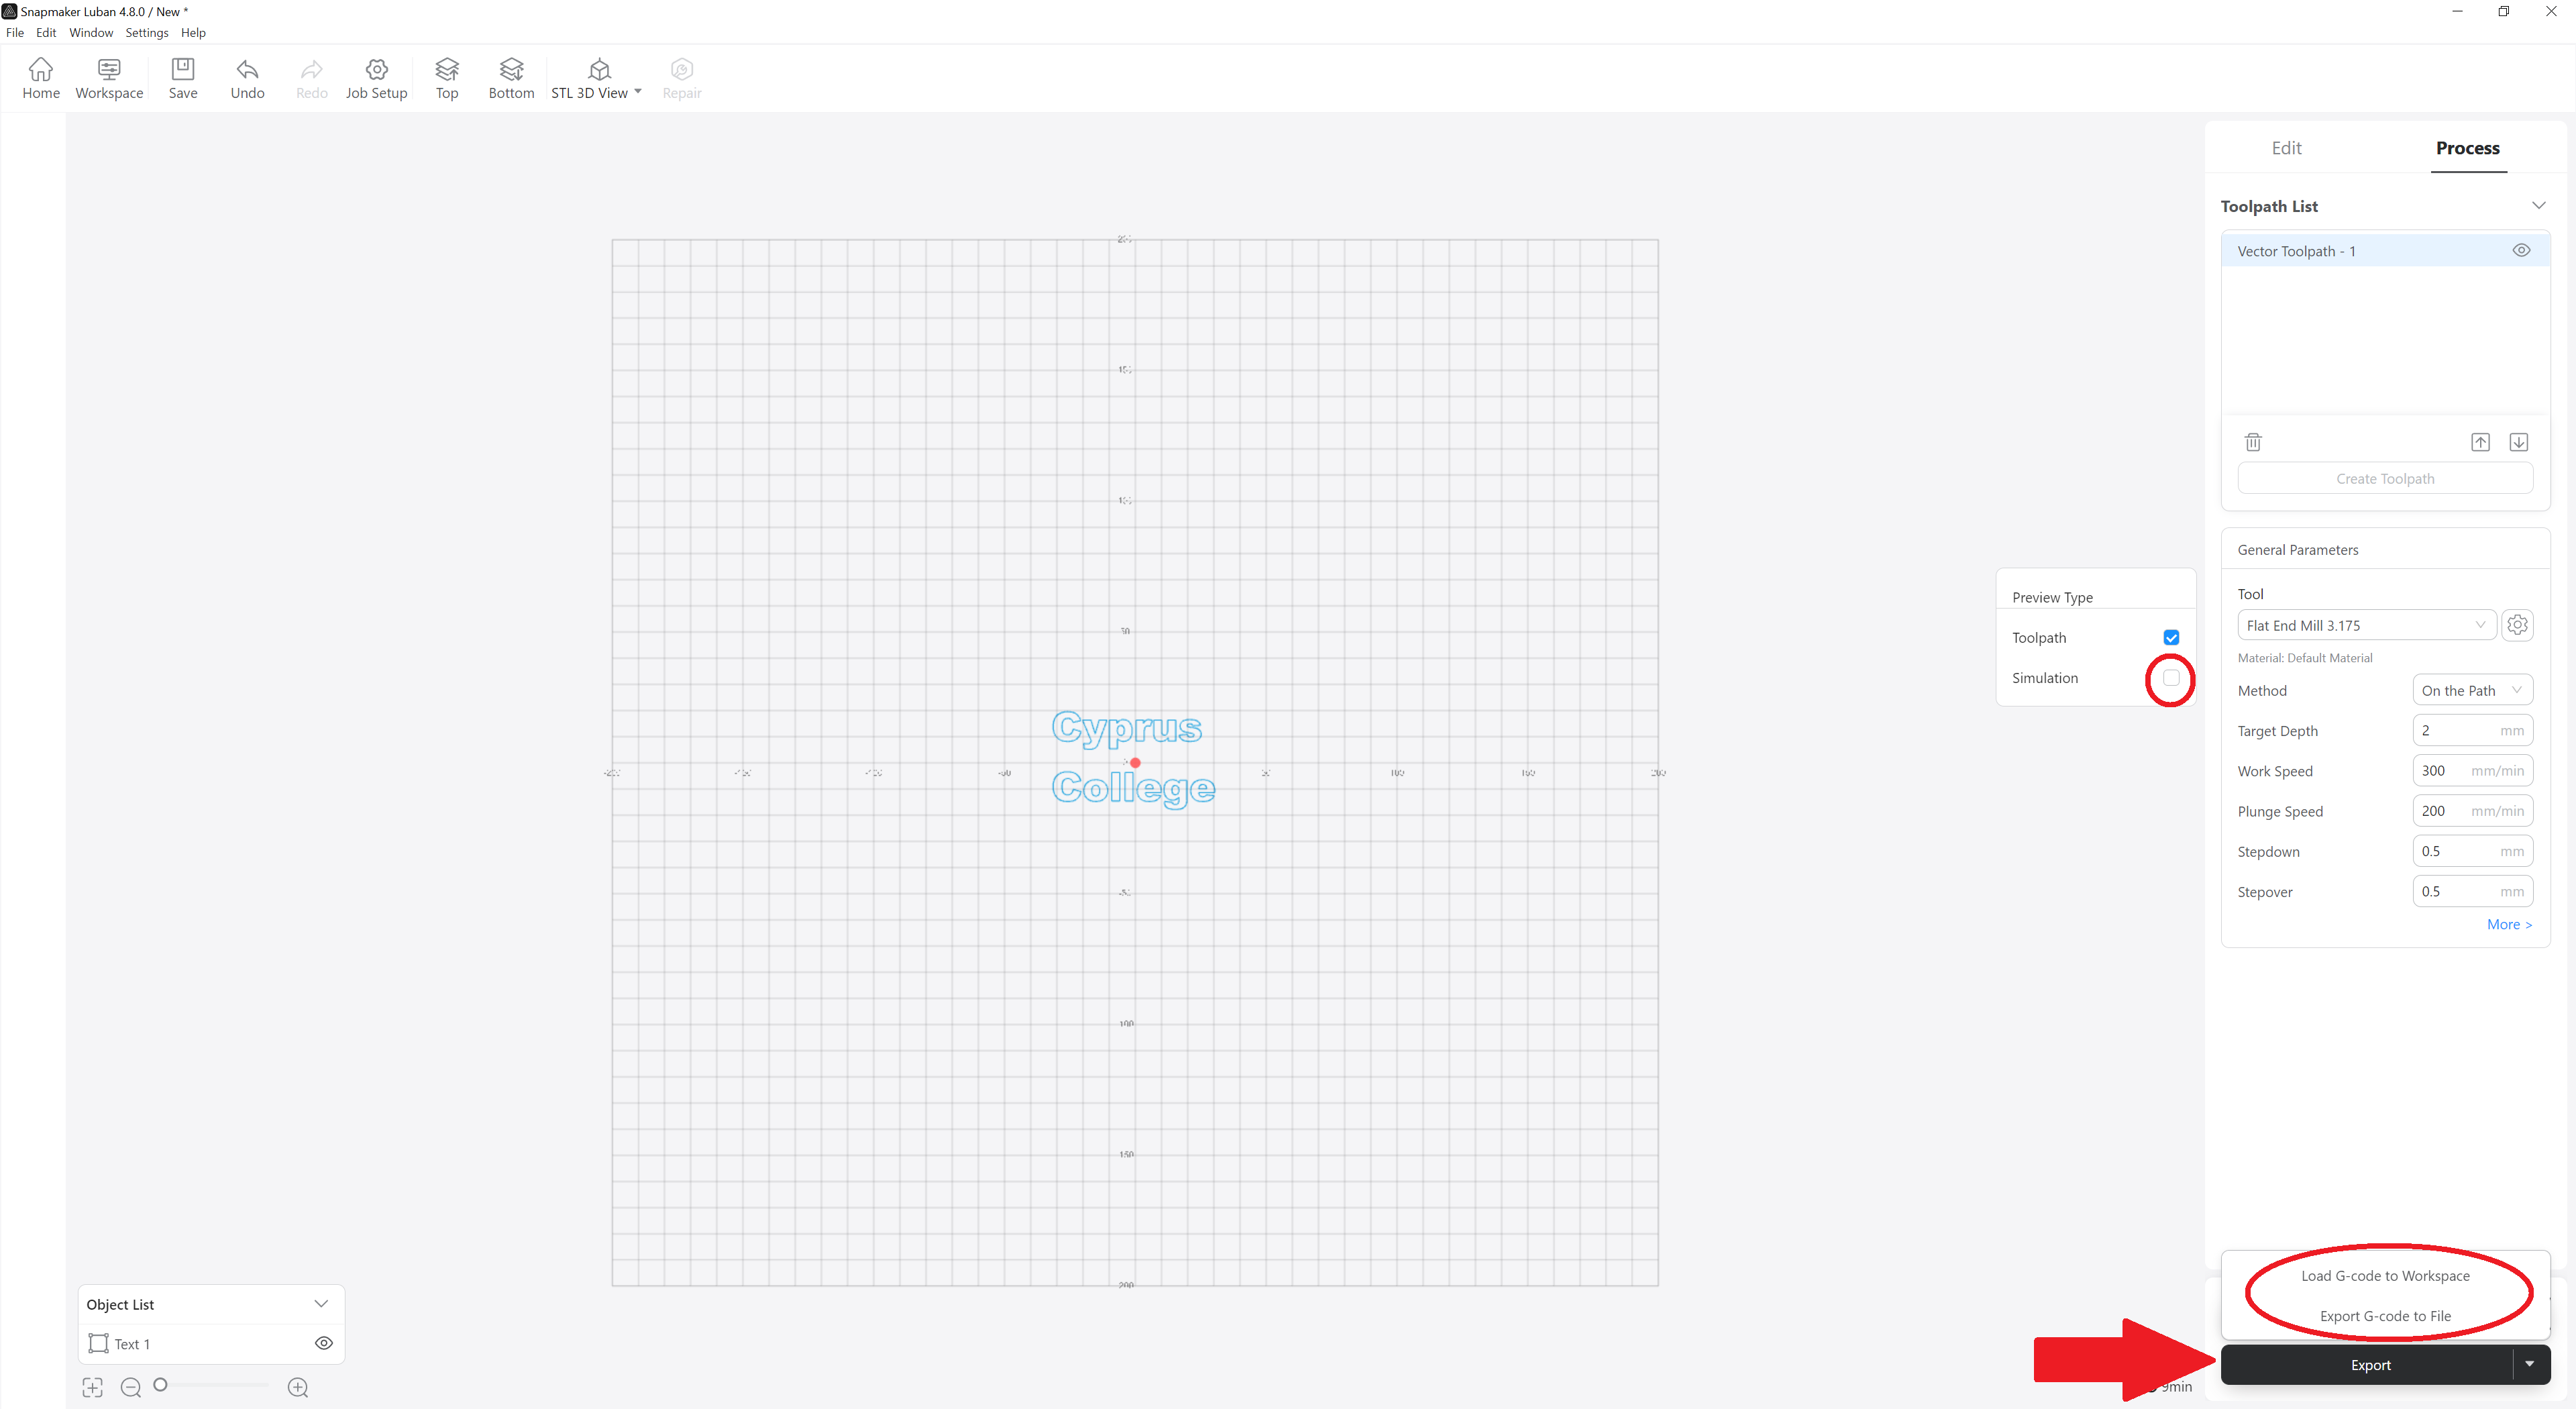
Tick the Simulation if you want to see how it will be in real life.
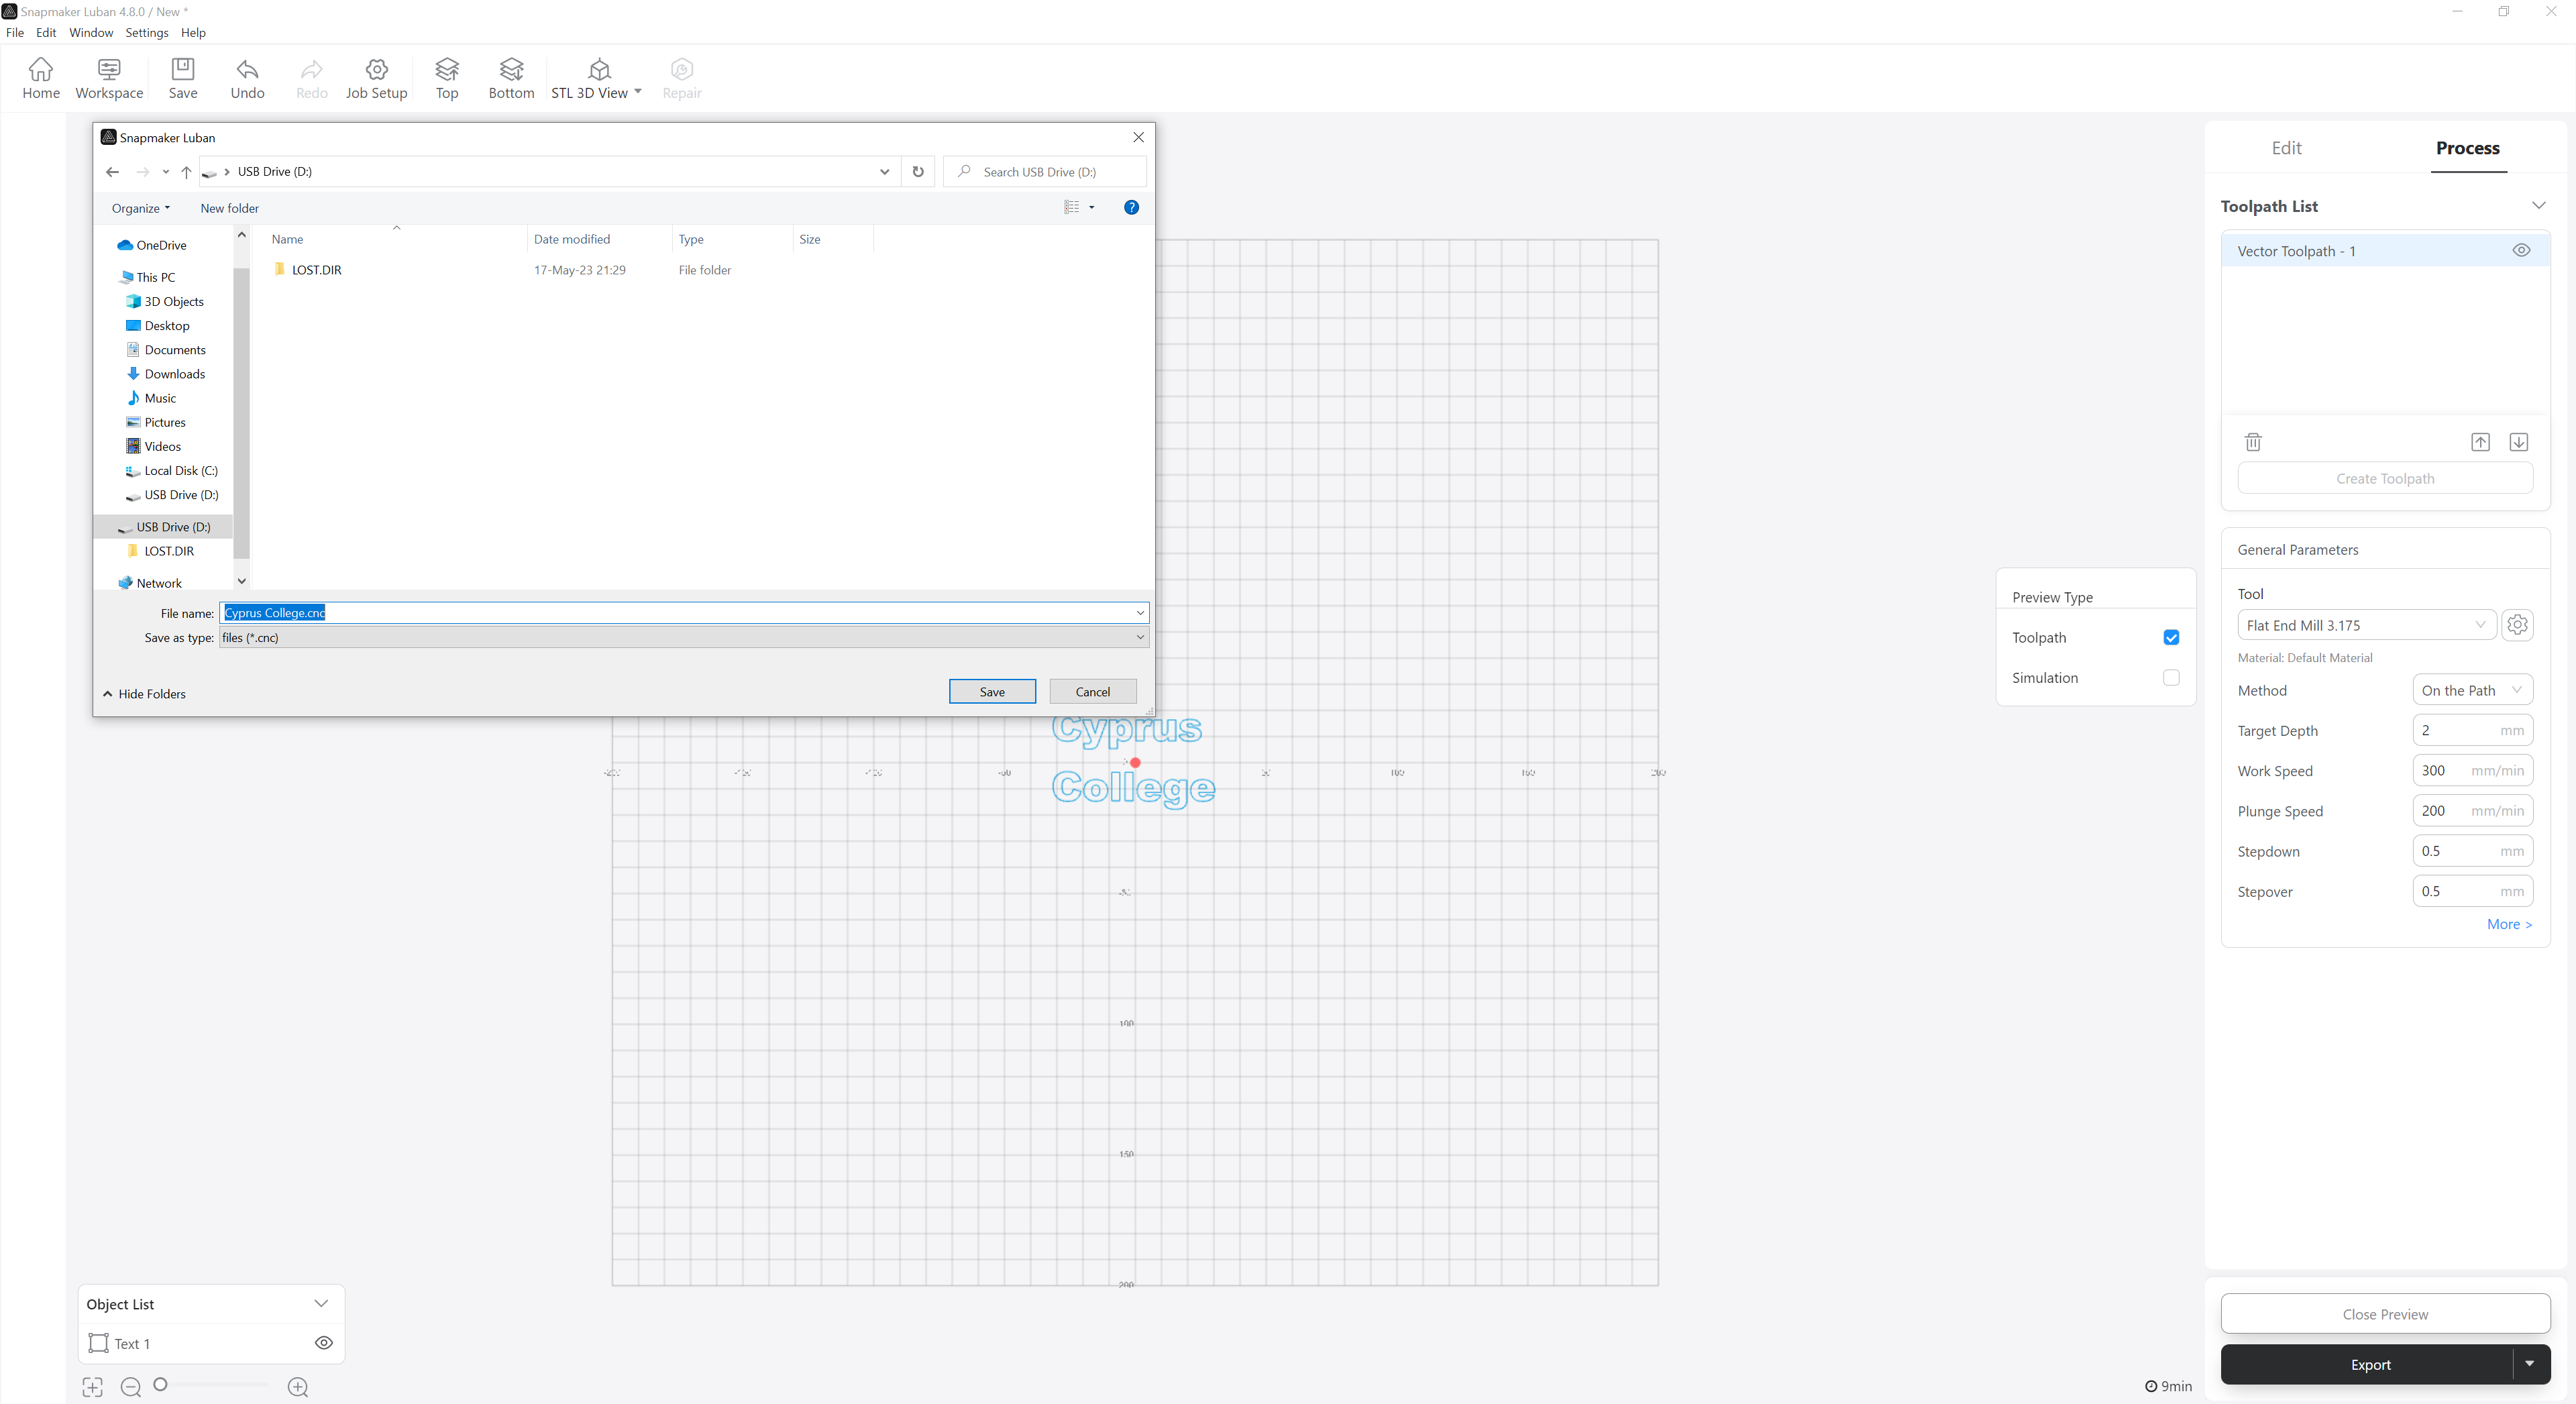
Press Export and then it gives you two options:
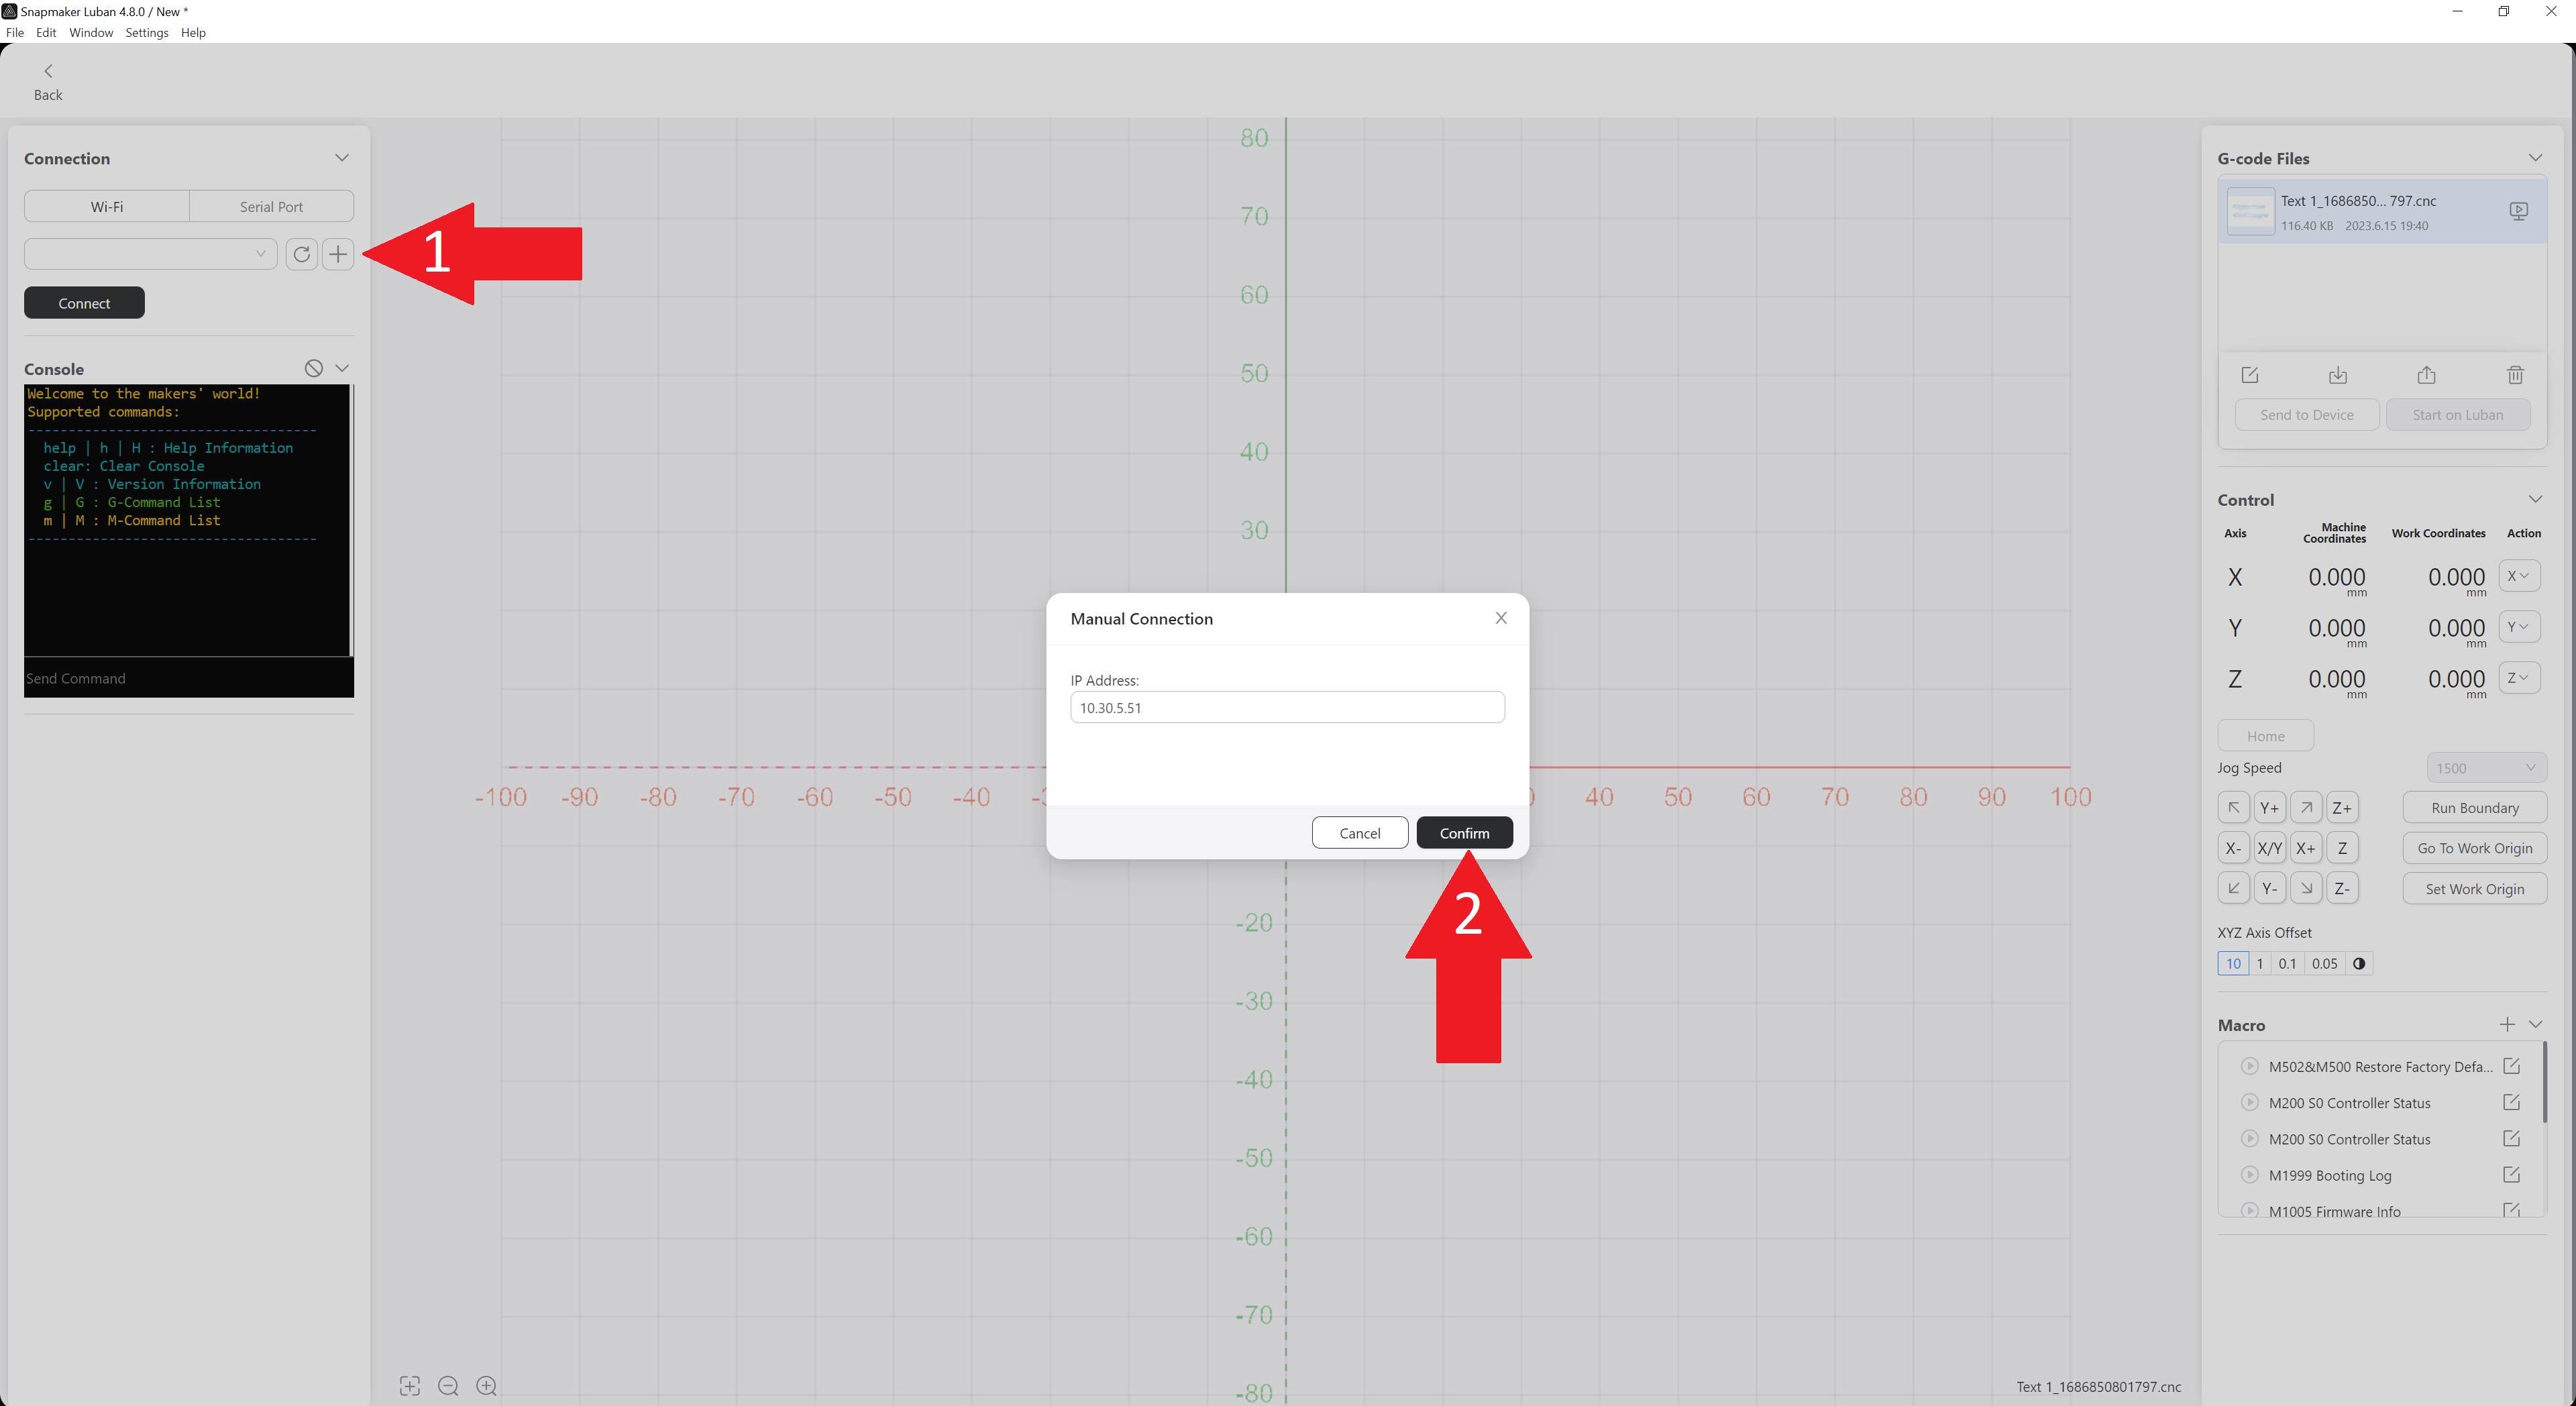
Load G-code to Workspace: If you choose this, a window will open in which you can connect to the Artisan via IP address and send the file for engraving or cutting.
Export G-code to file: This will create a file which will contain the G-code. You will save this file to the USB Stick and manually put it in the Artisan Controller for engraving or cutting.
*Follow the Steps 9 and 10 only if you selected Load G-code to Workspace.
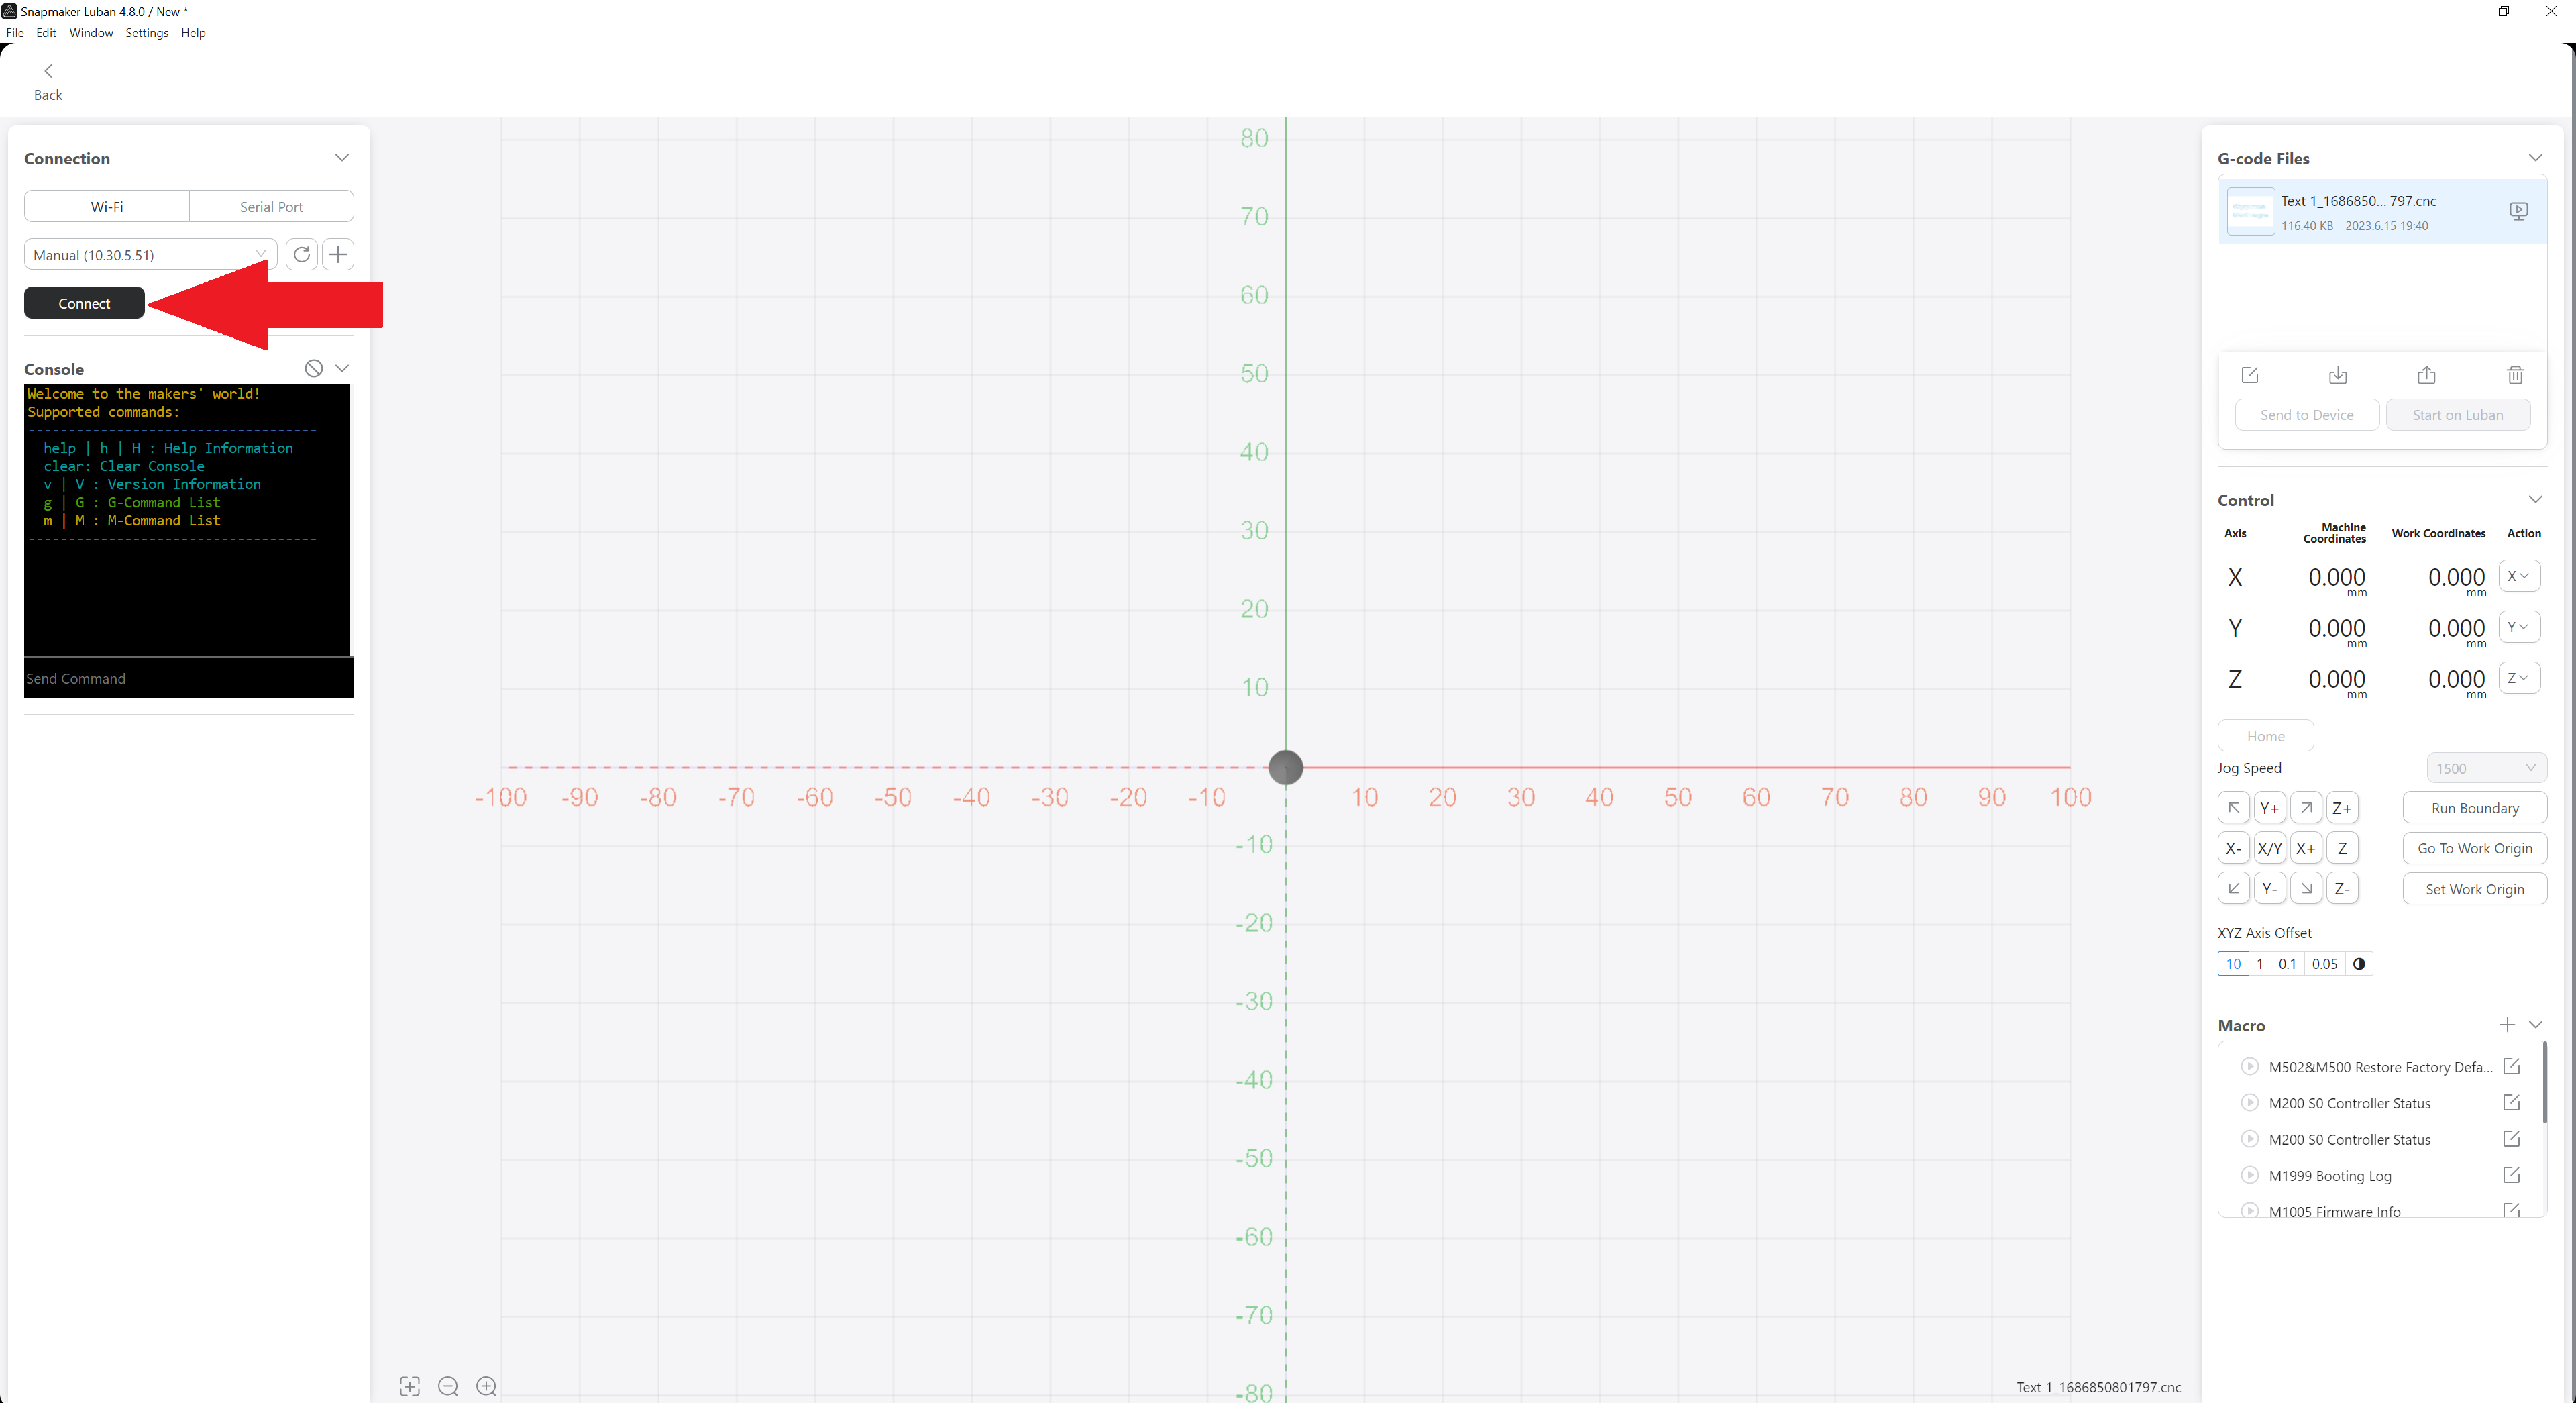
Step 9
Connect to Artisan.
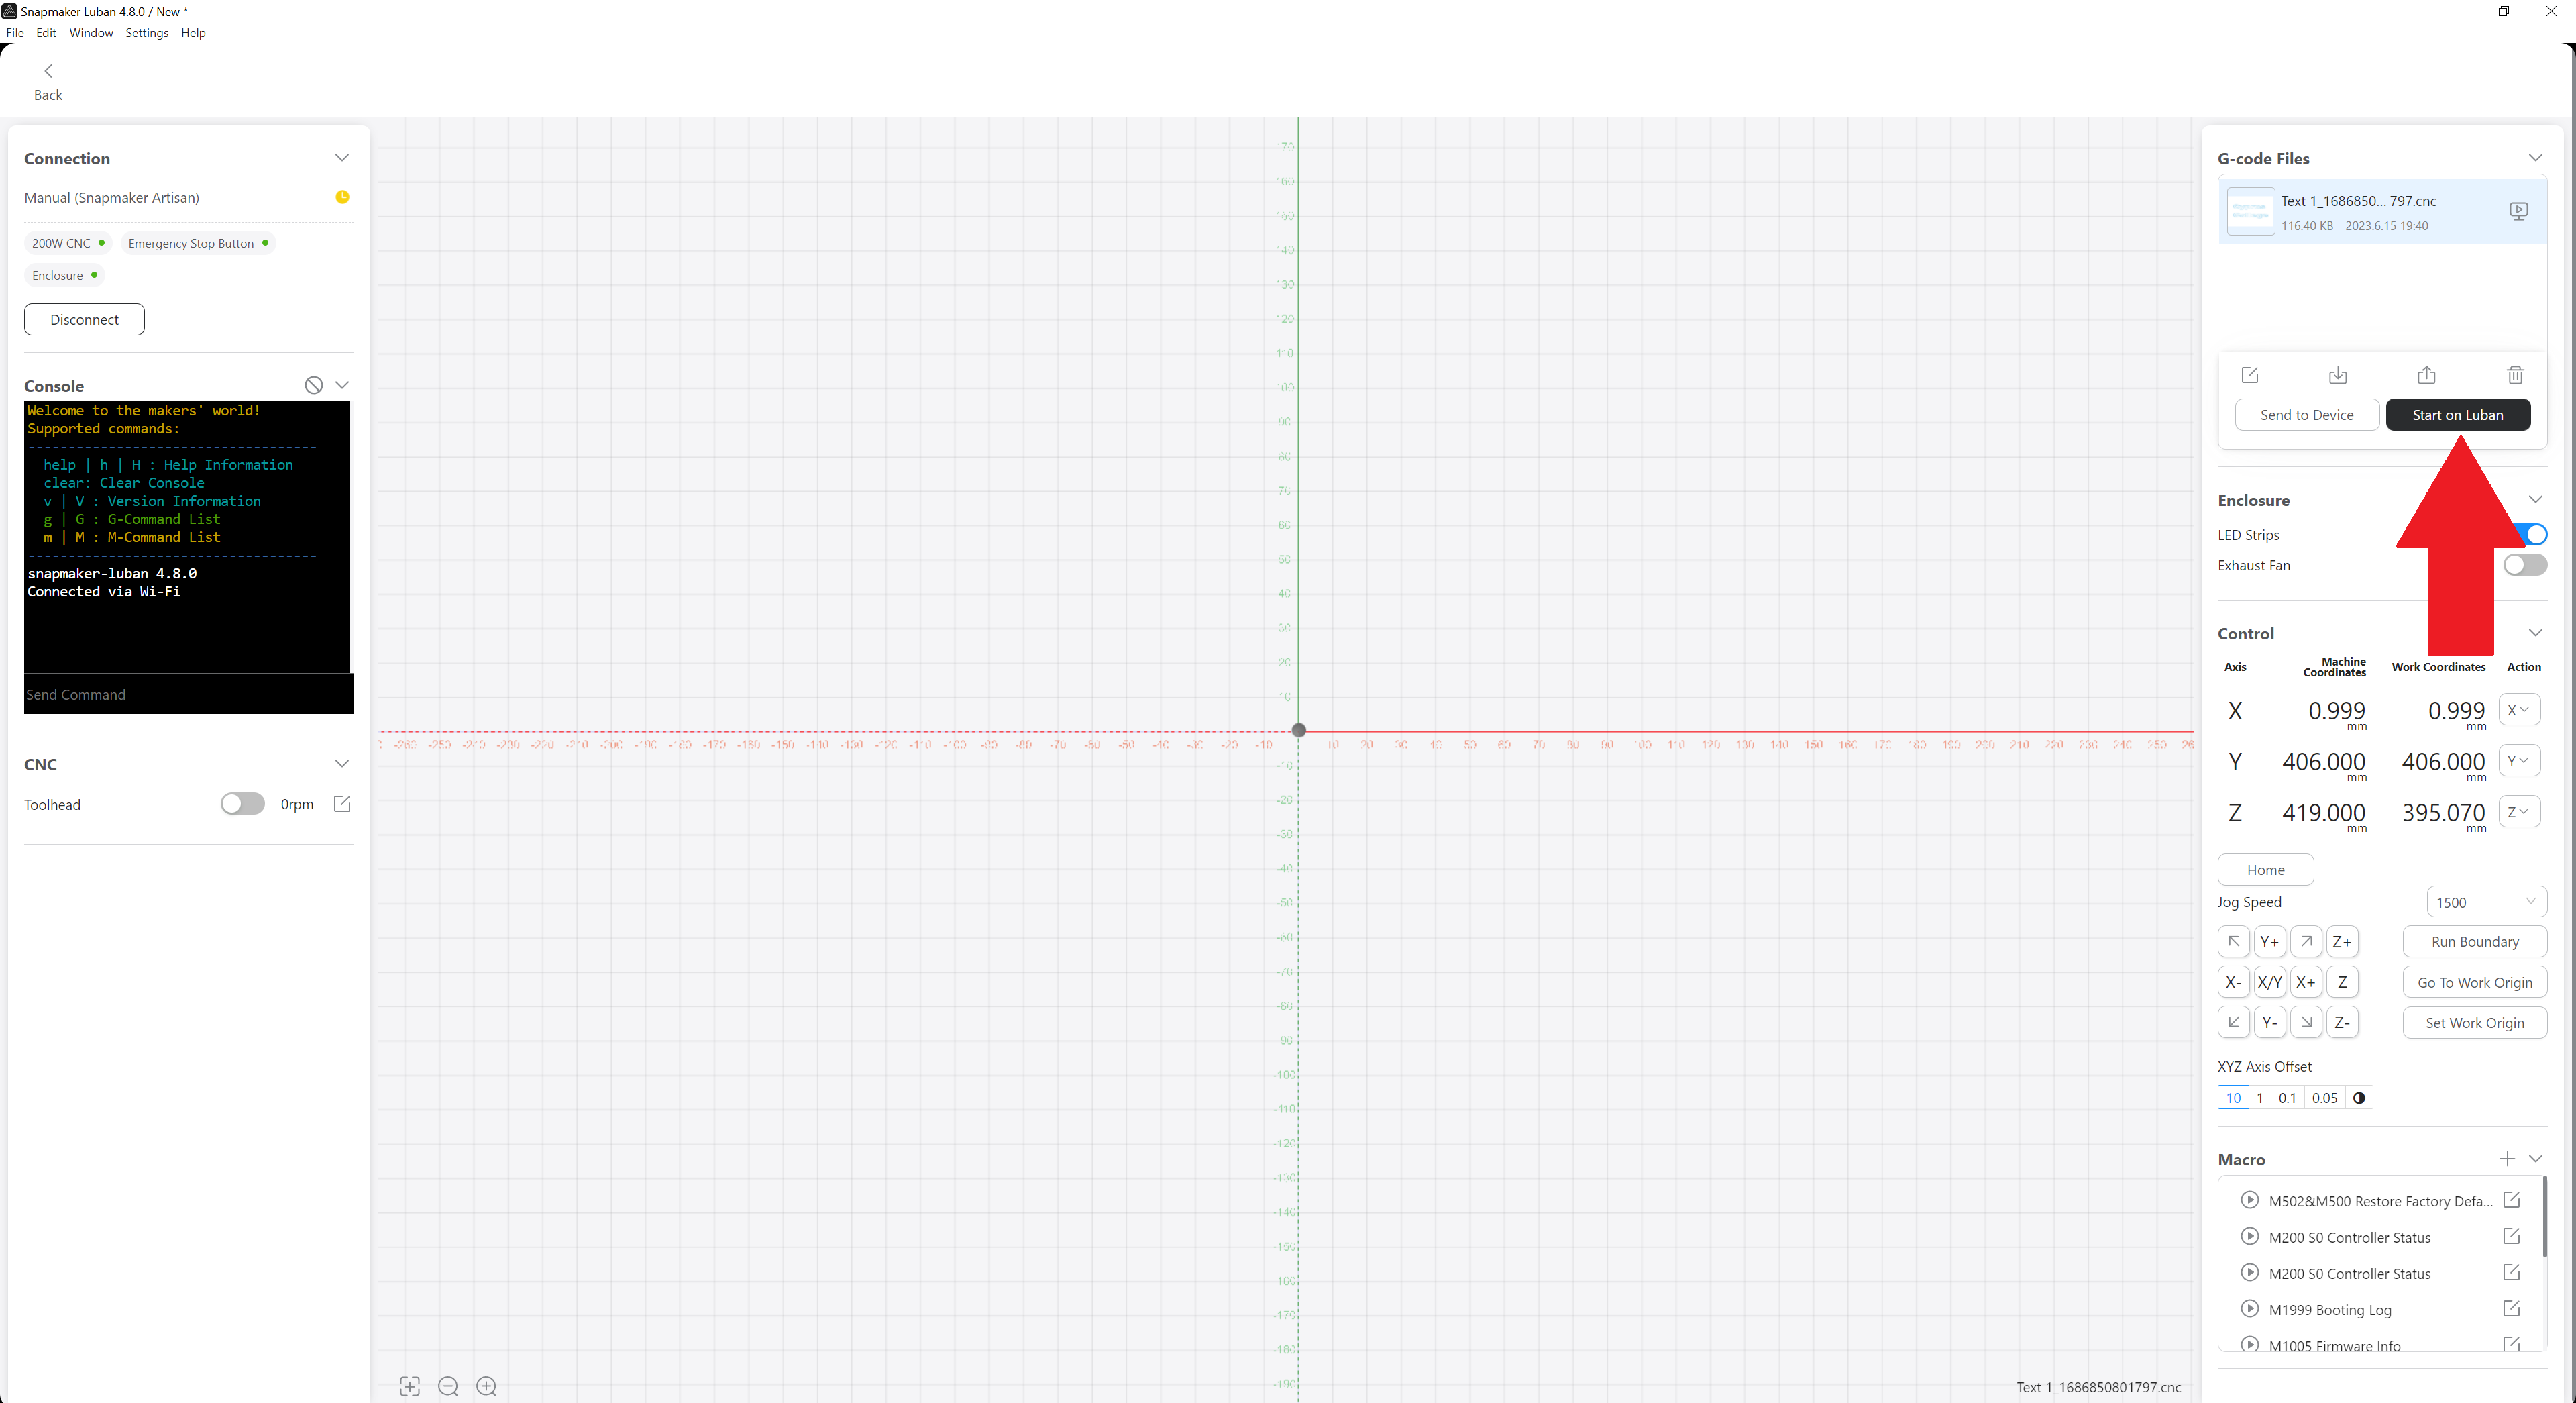
Step 10
Press the button Start on Luban and the engraving – cutting will start.
*Follow the Steps 11, 12 and 13 only if you selected Export G-code to file.
Step 11
Choose where you want to save the file and then move it to the USB Stick or save it directly to the USB Stick.
Step 12
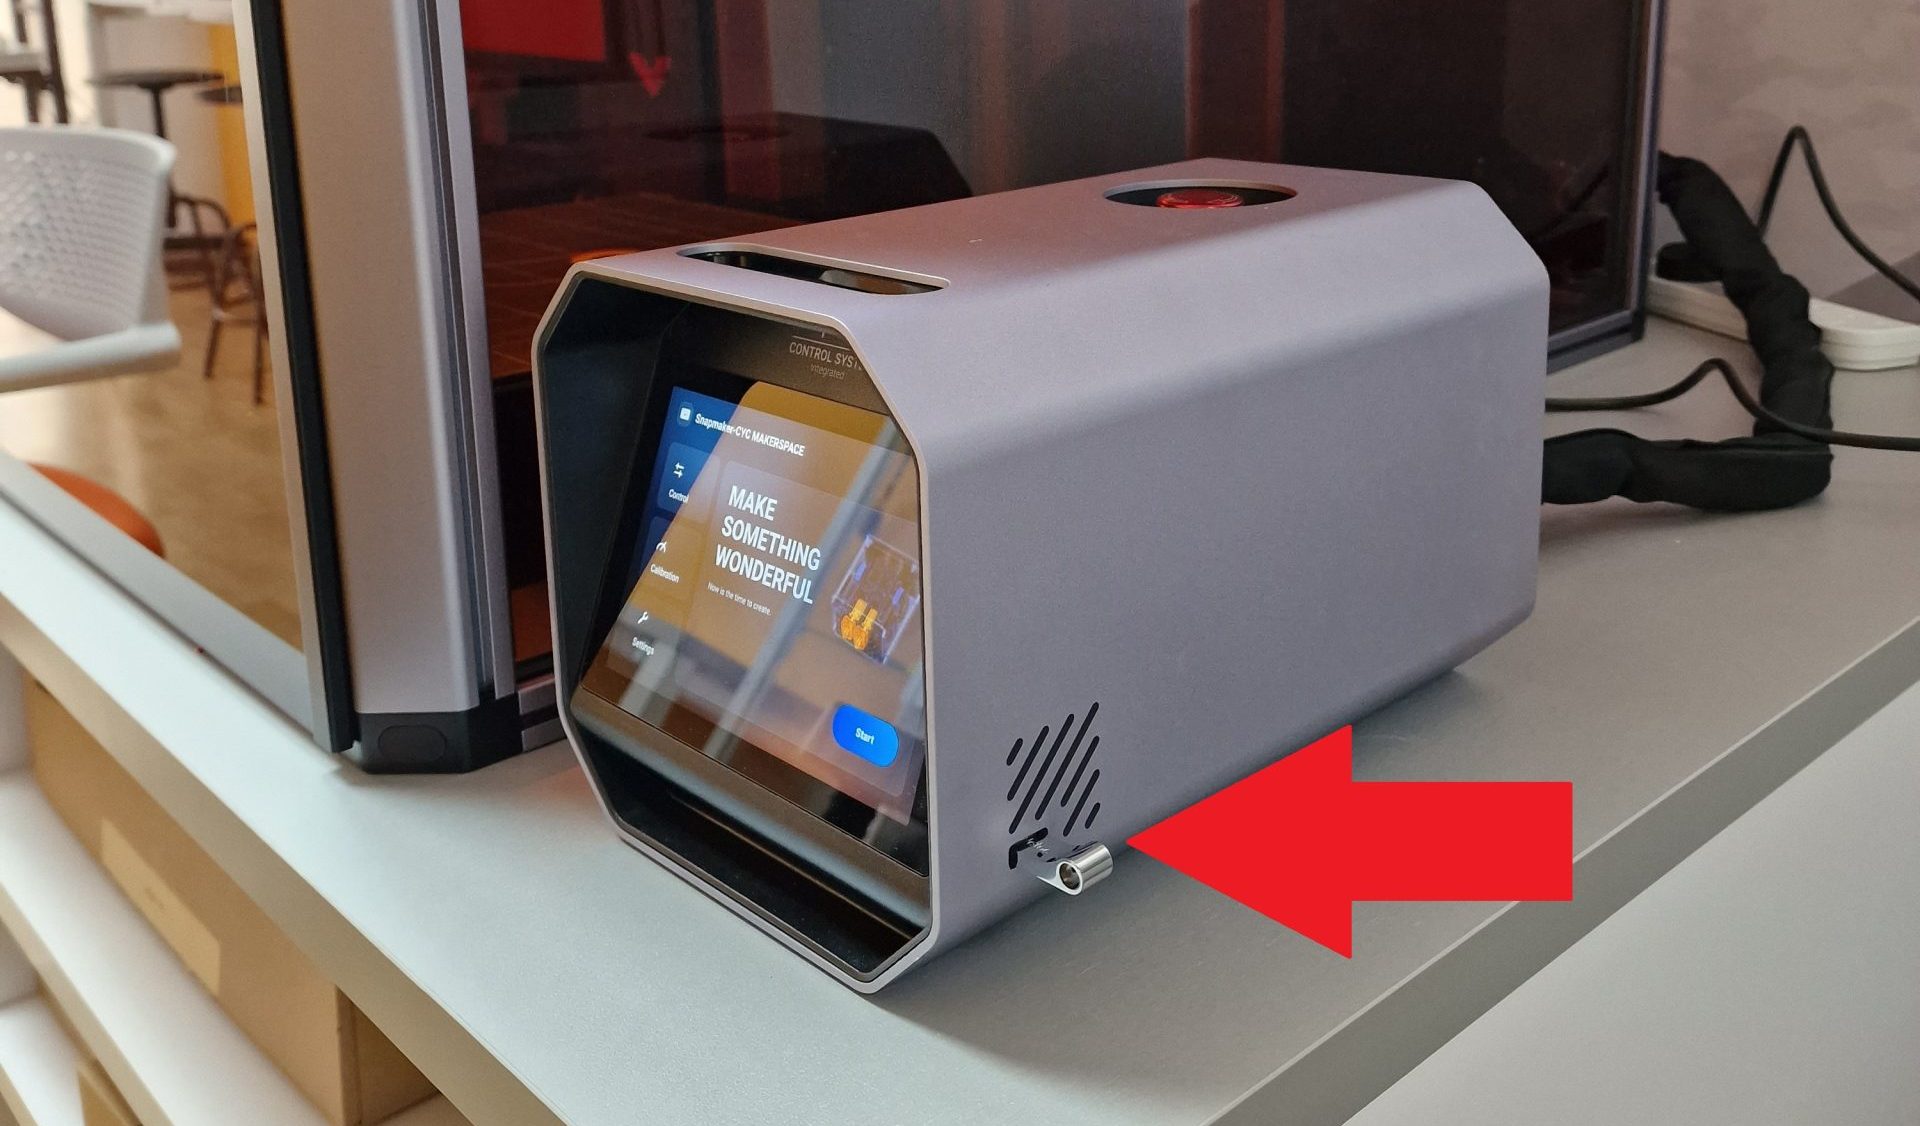
Insert the USB Stick in the Artisan Controller System.
Step 13
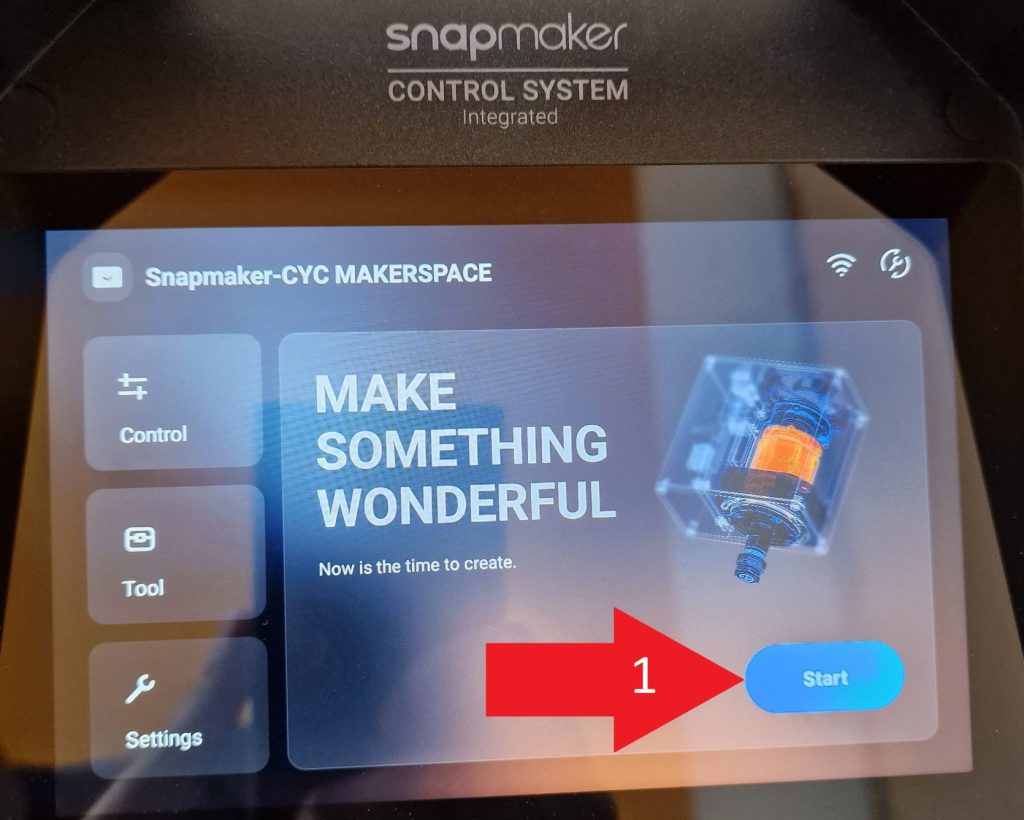
Click on Start button.
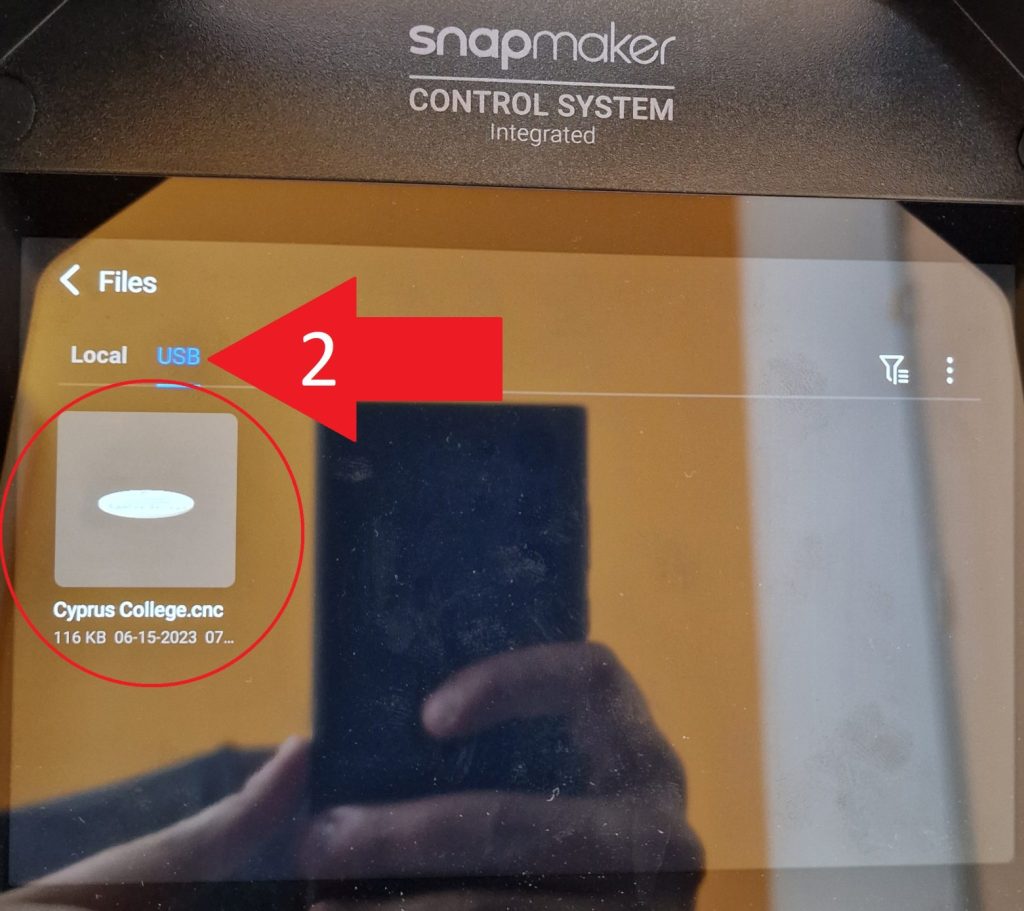
Select the USB option and click on your file.
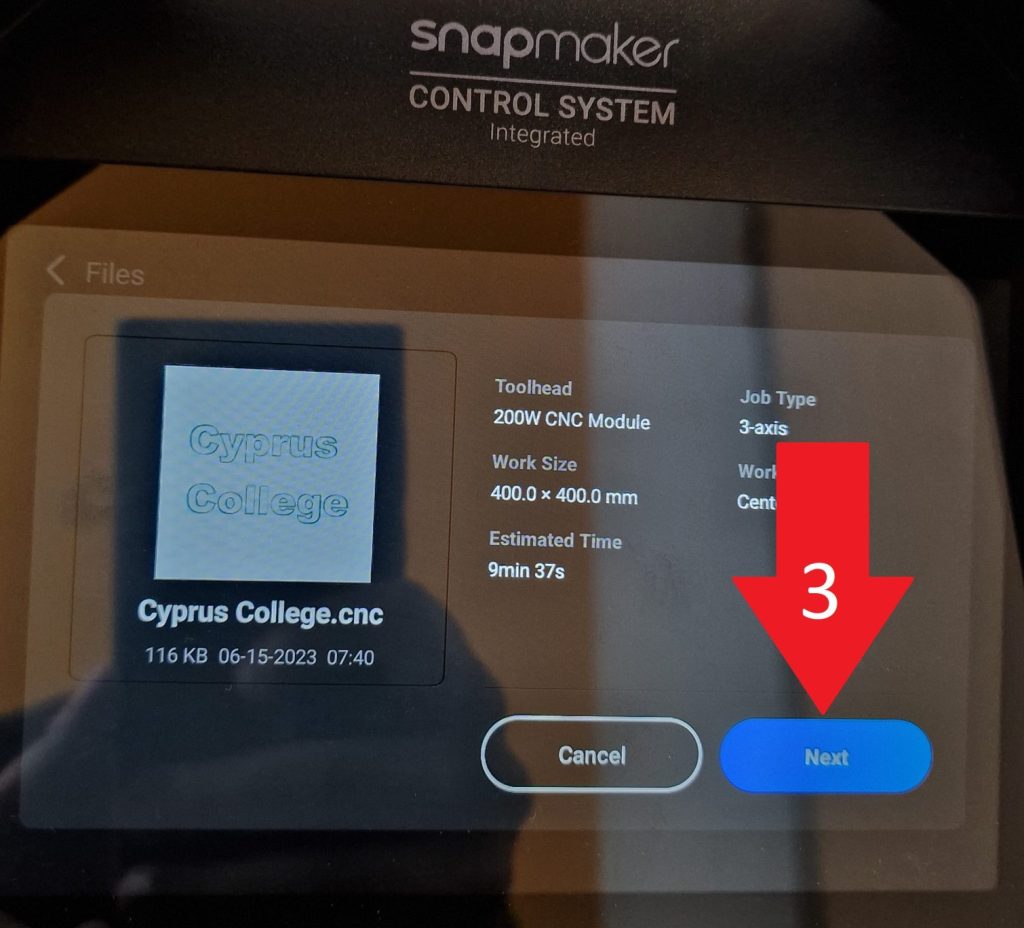
Click on Next button.
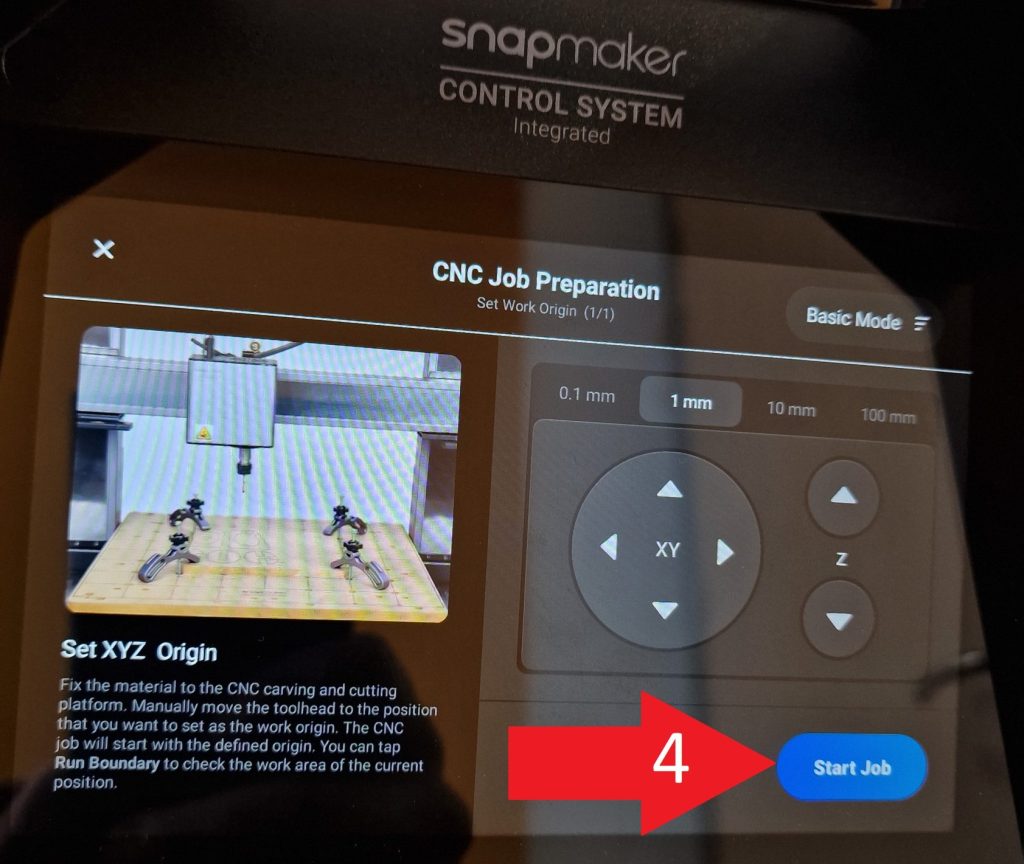
Click on Start Job and the engraving – cutting will start.