Snapmaker Artisan - Laser Engraving and Cutting
Snapmaker Artisan lets you turn your ideas into reality. You can engrave on dozens of materials like paper, plywood, MDF, hardwood, leather, fabric, sticker, and even food like cookie!
Step 1
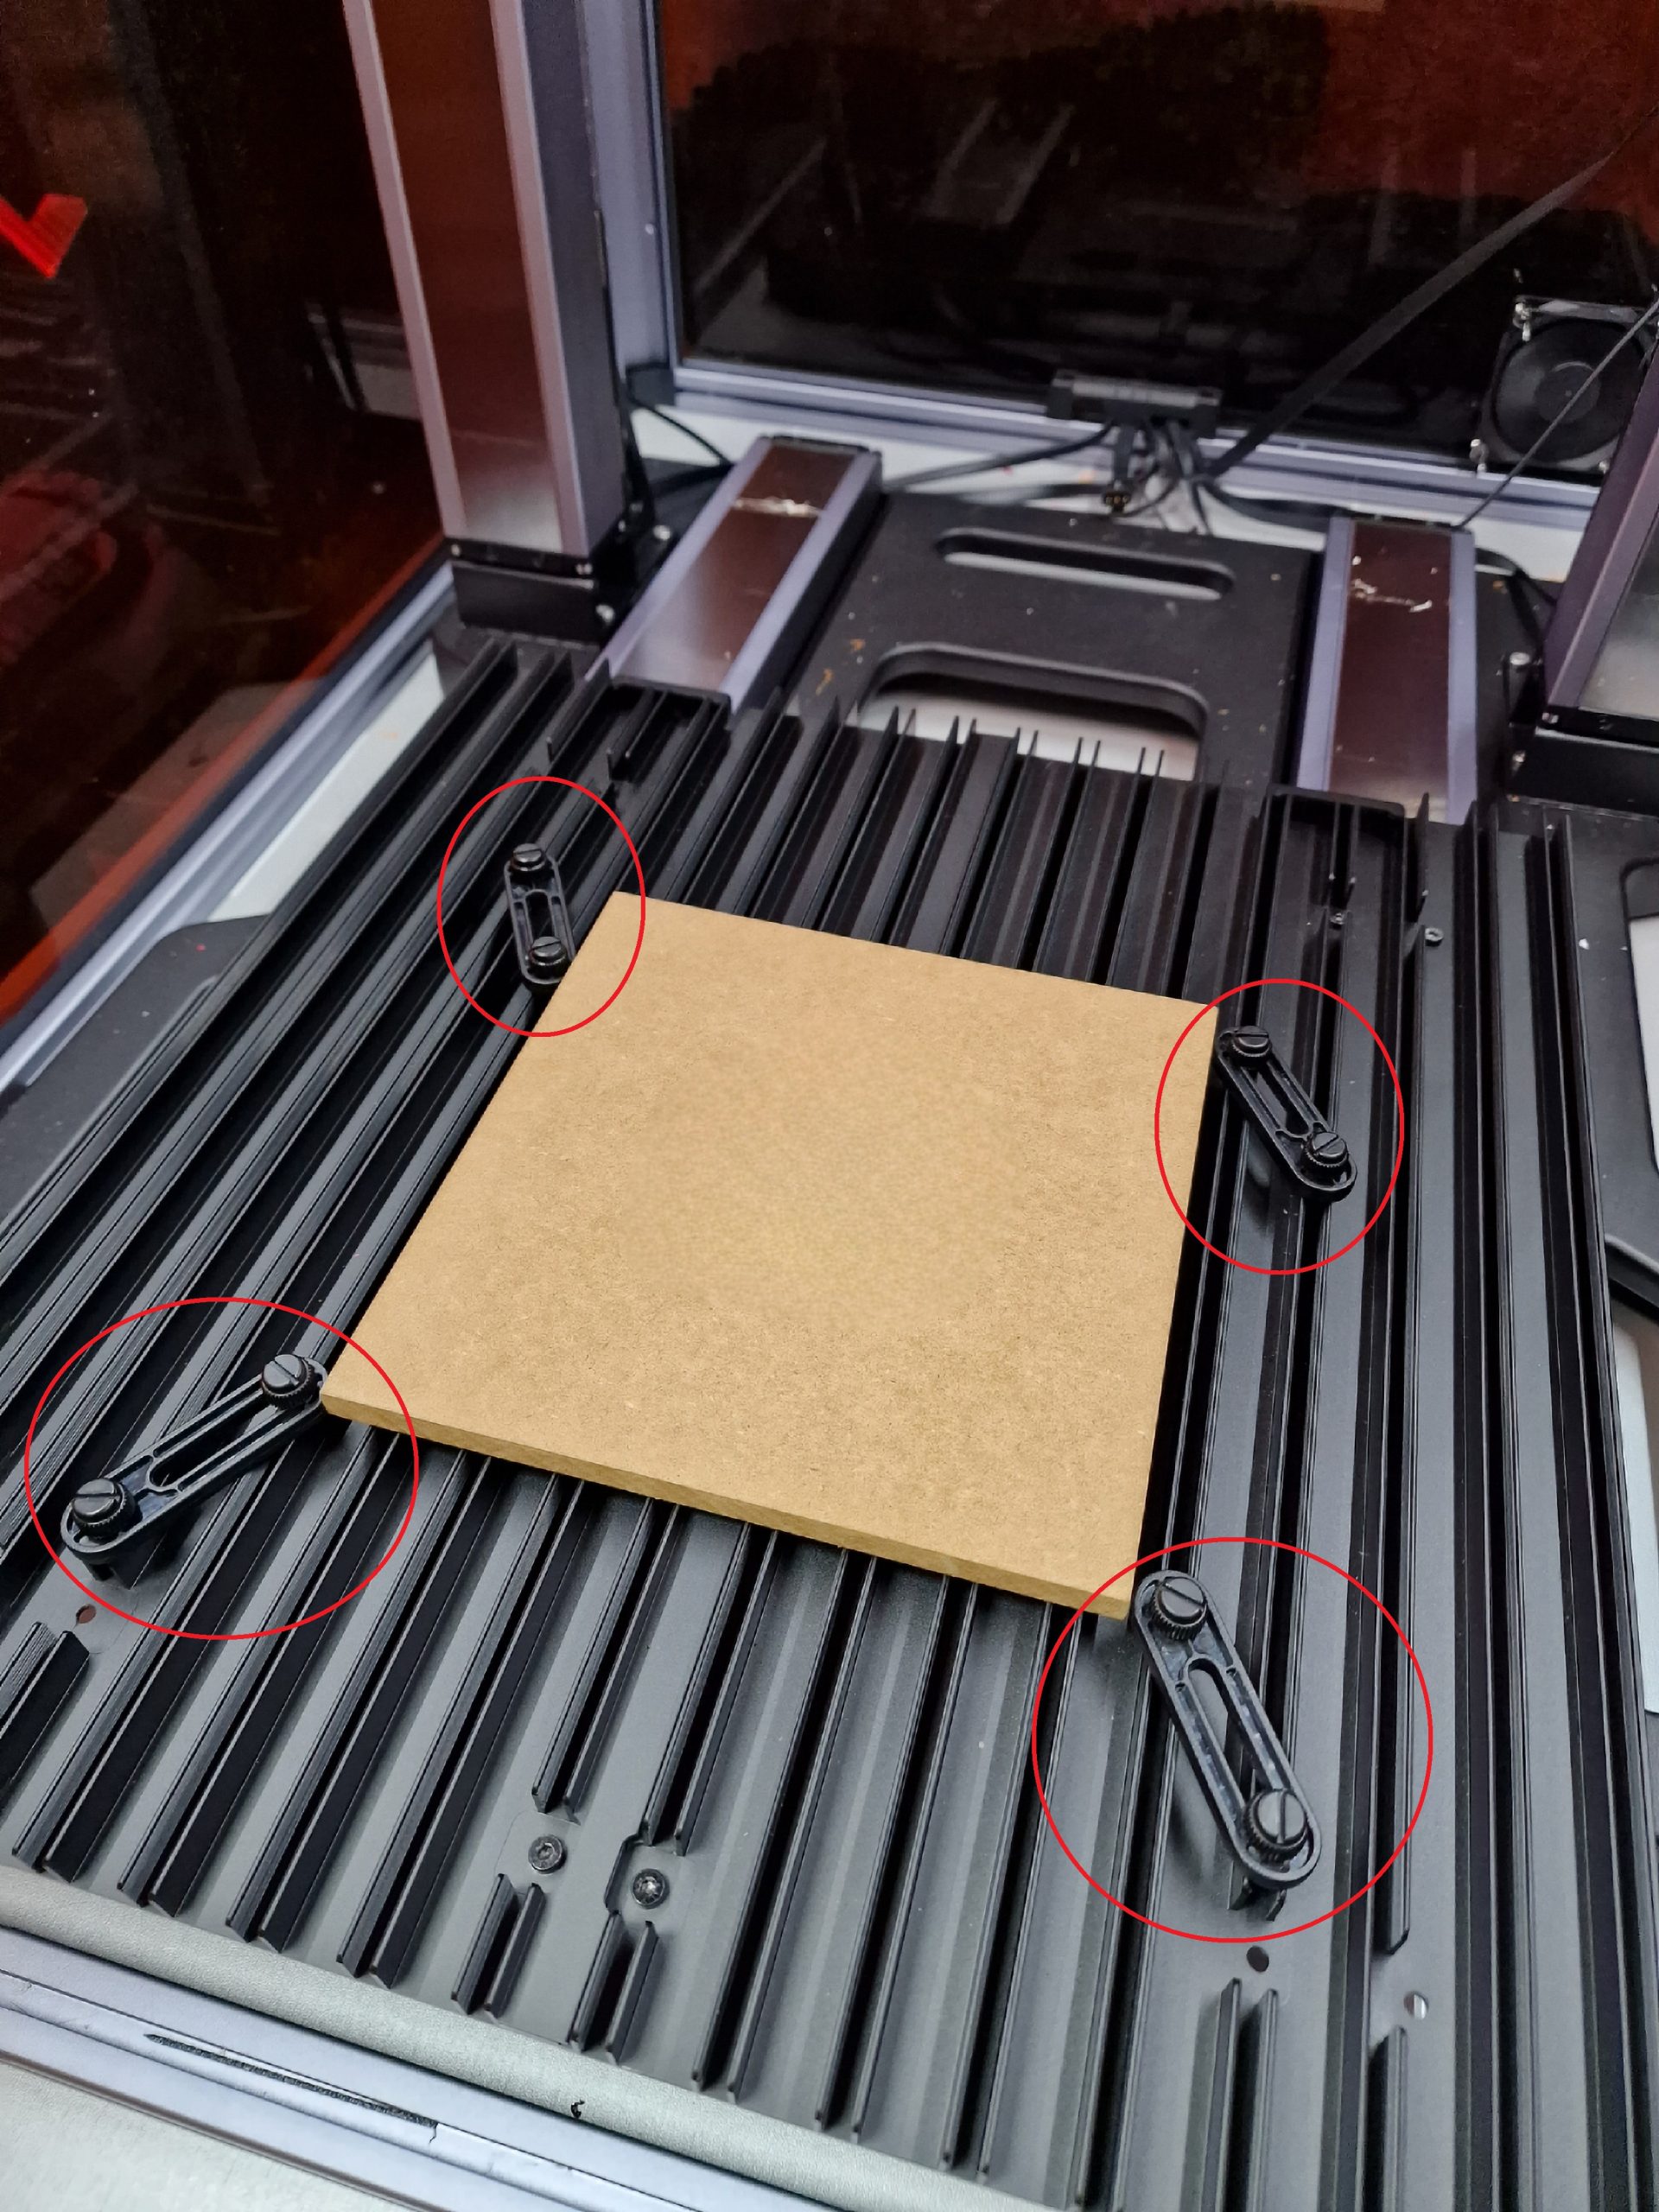
Place your material in the machine and you wedge it so that it does not move during the time of engraving – cutting.
Step 2
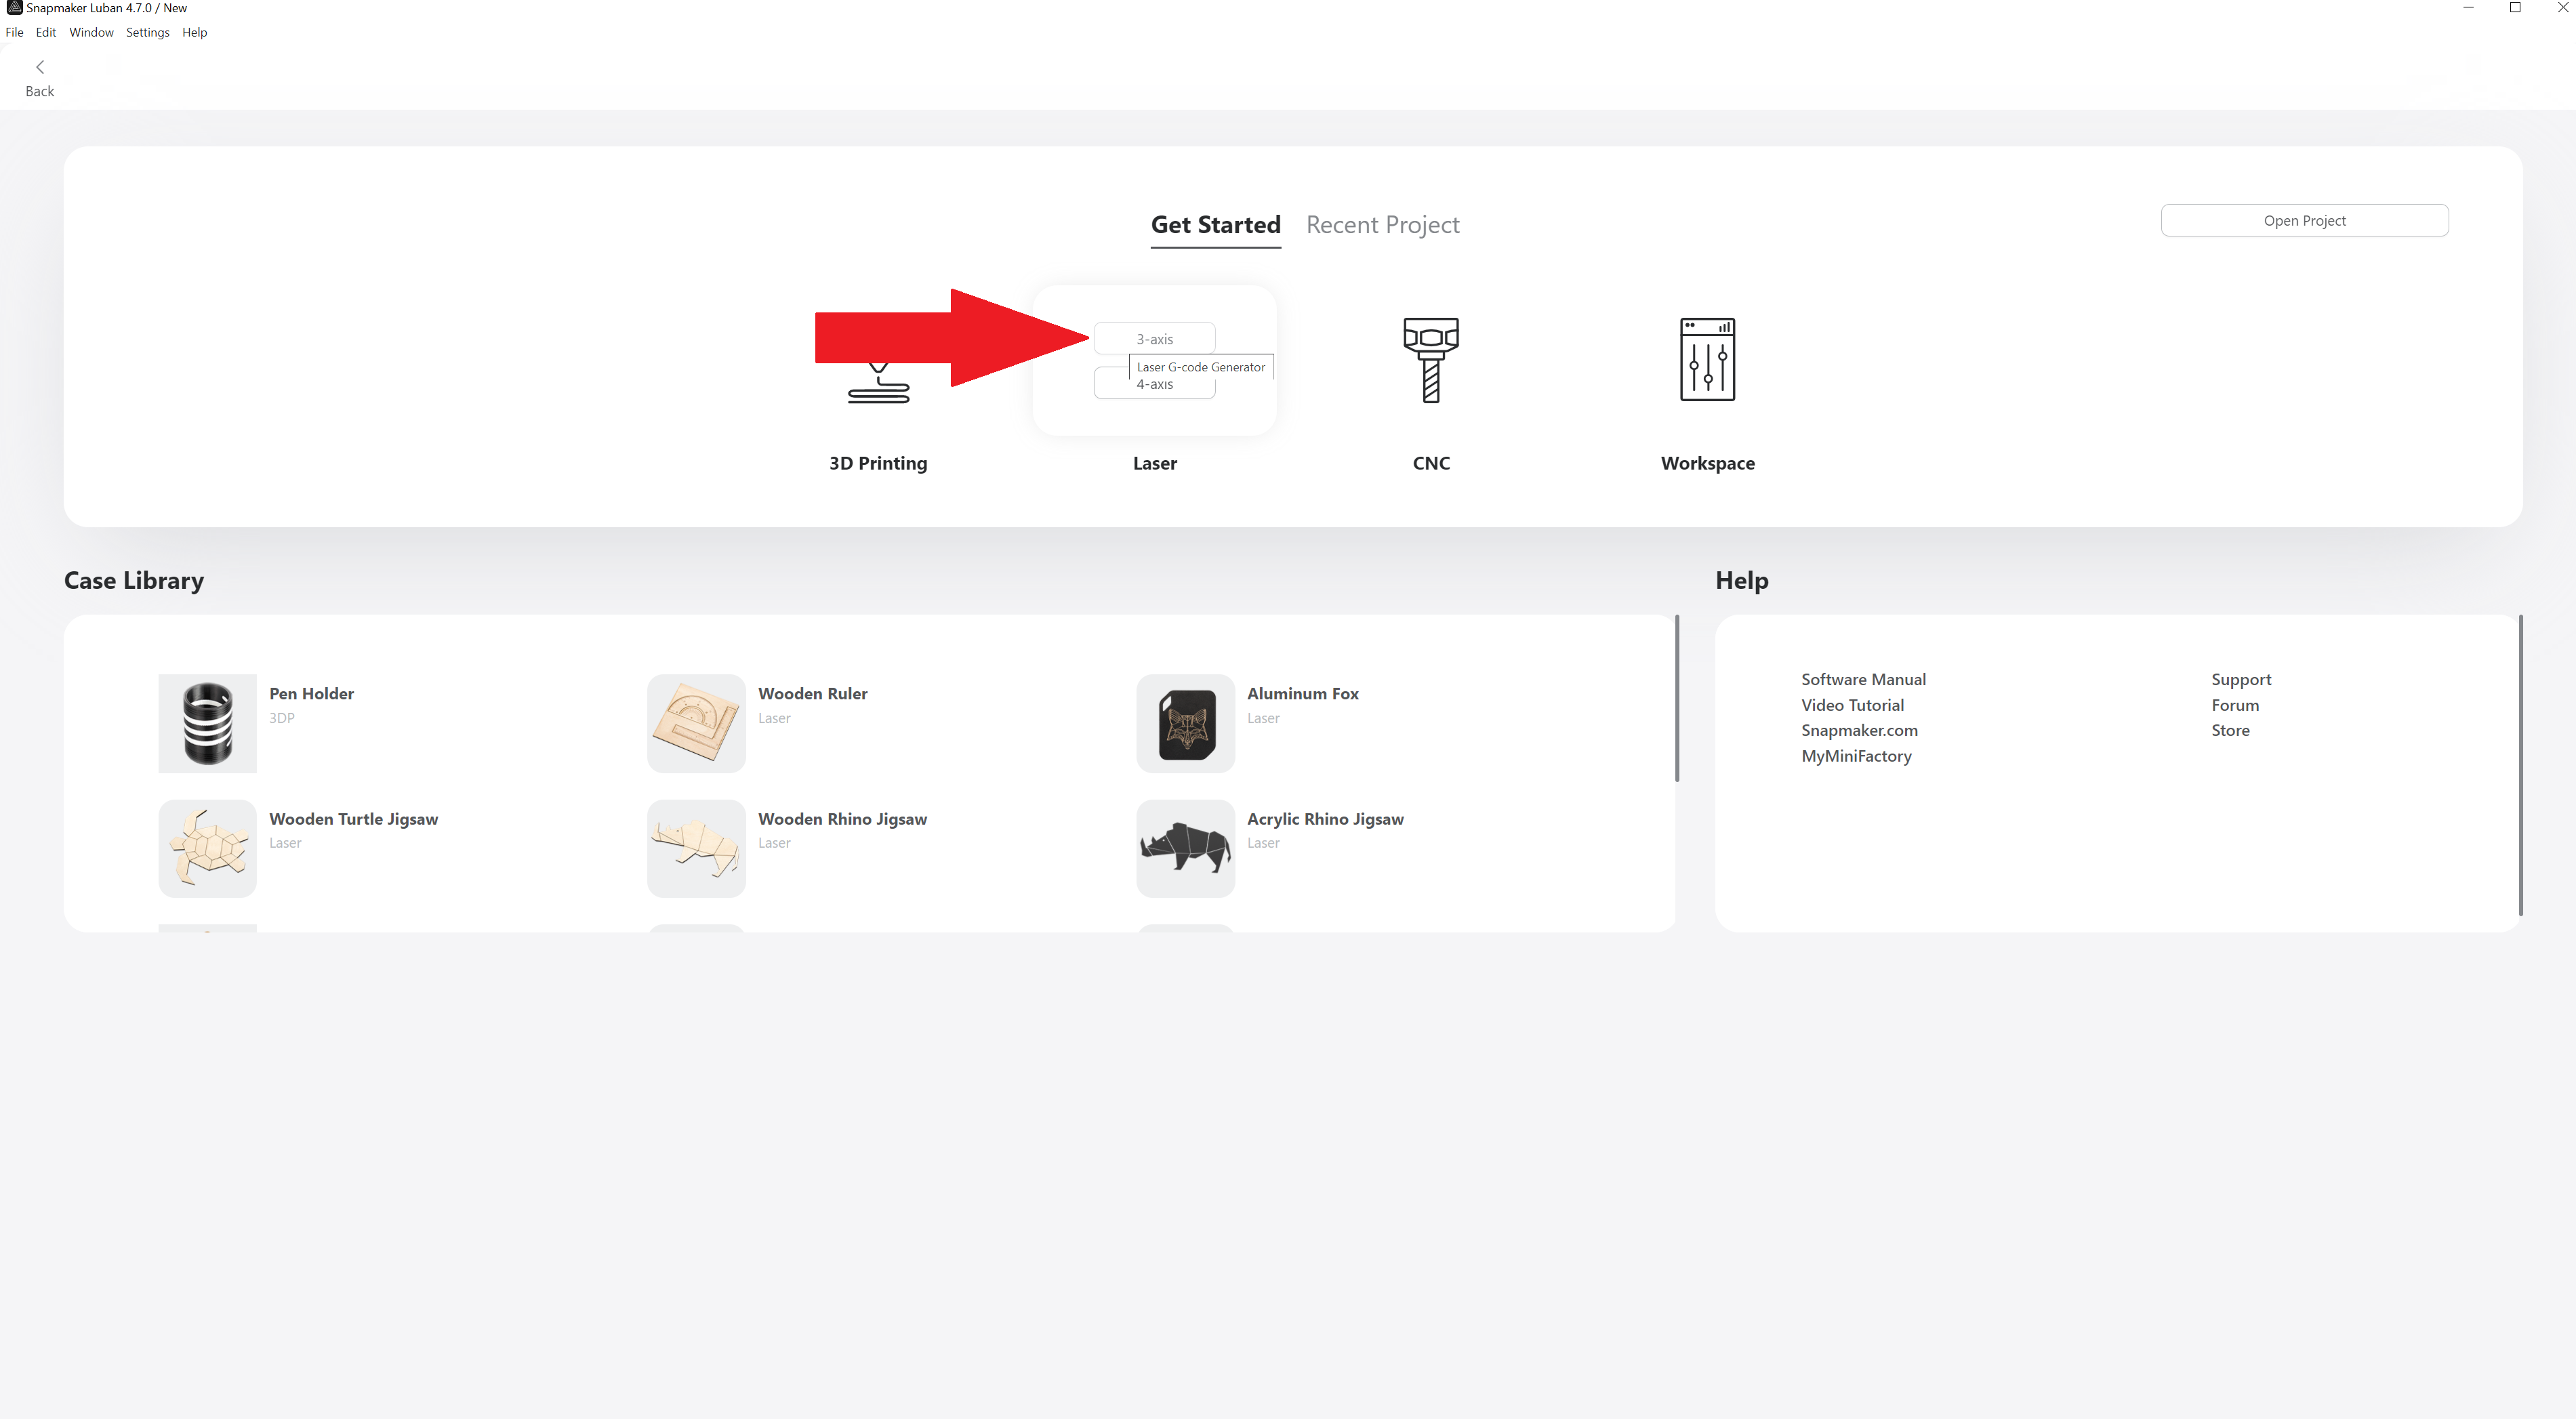
Go to the Snapmaker Luban software and on Laser option, select 3 axis.
Step 3
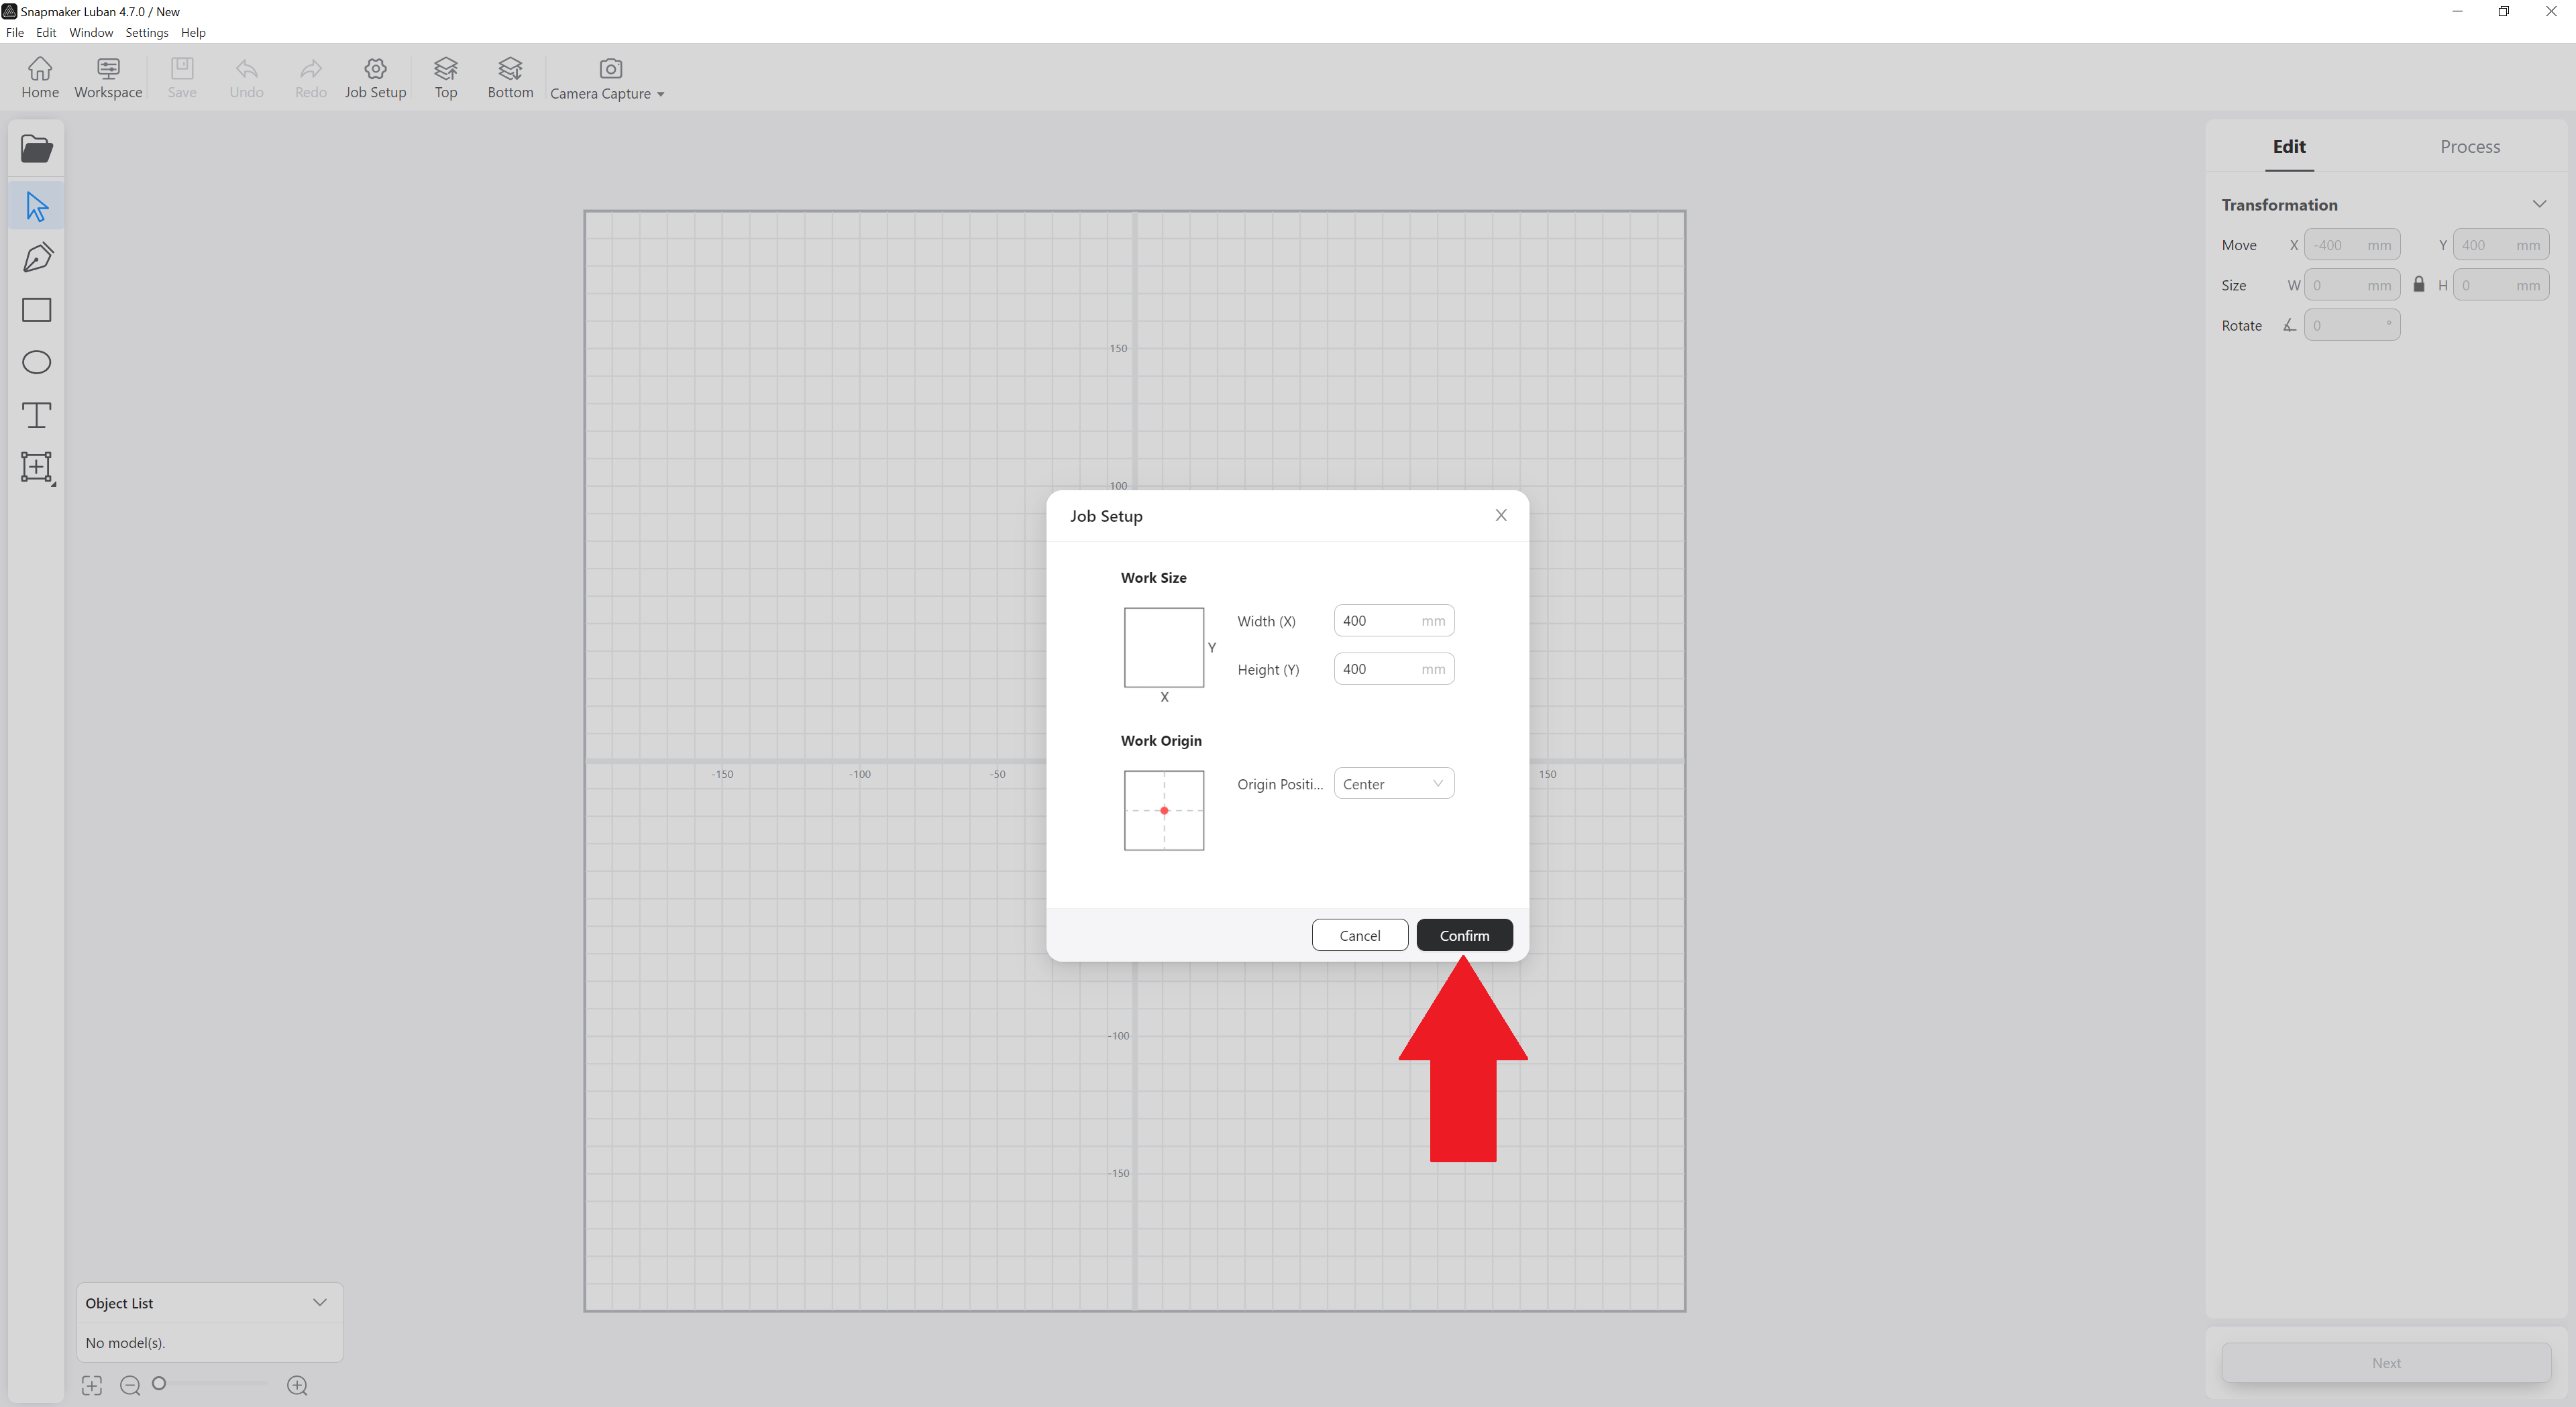
Press the Confirm button.
Step 4
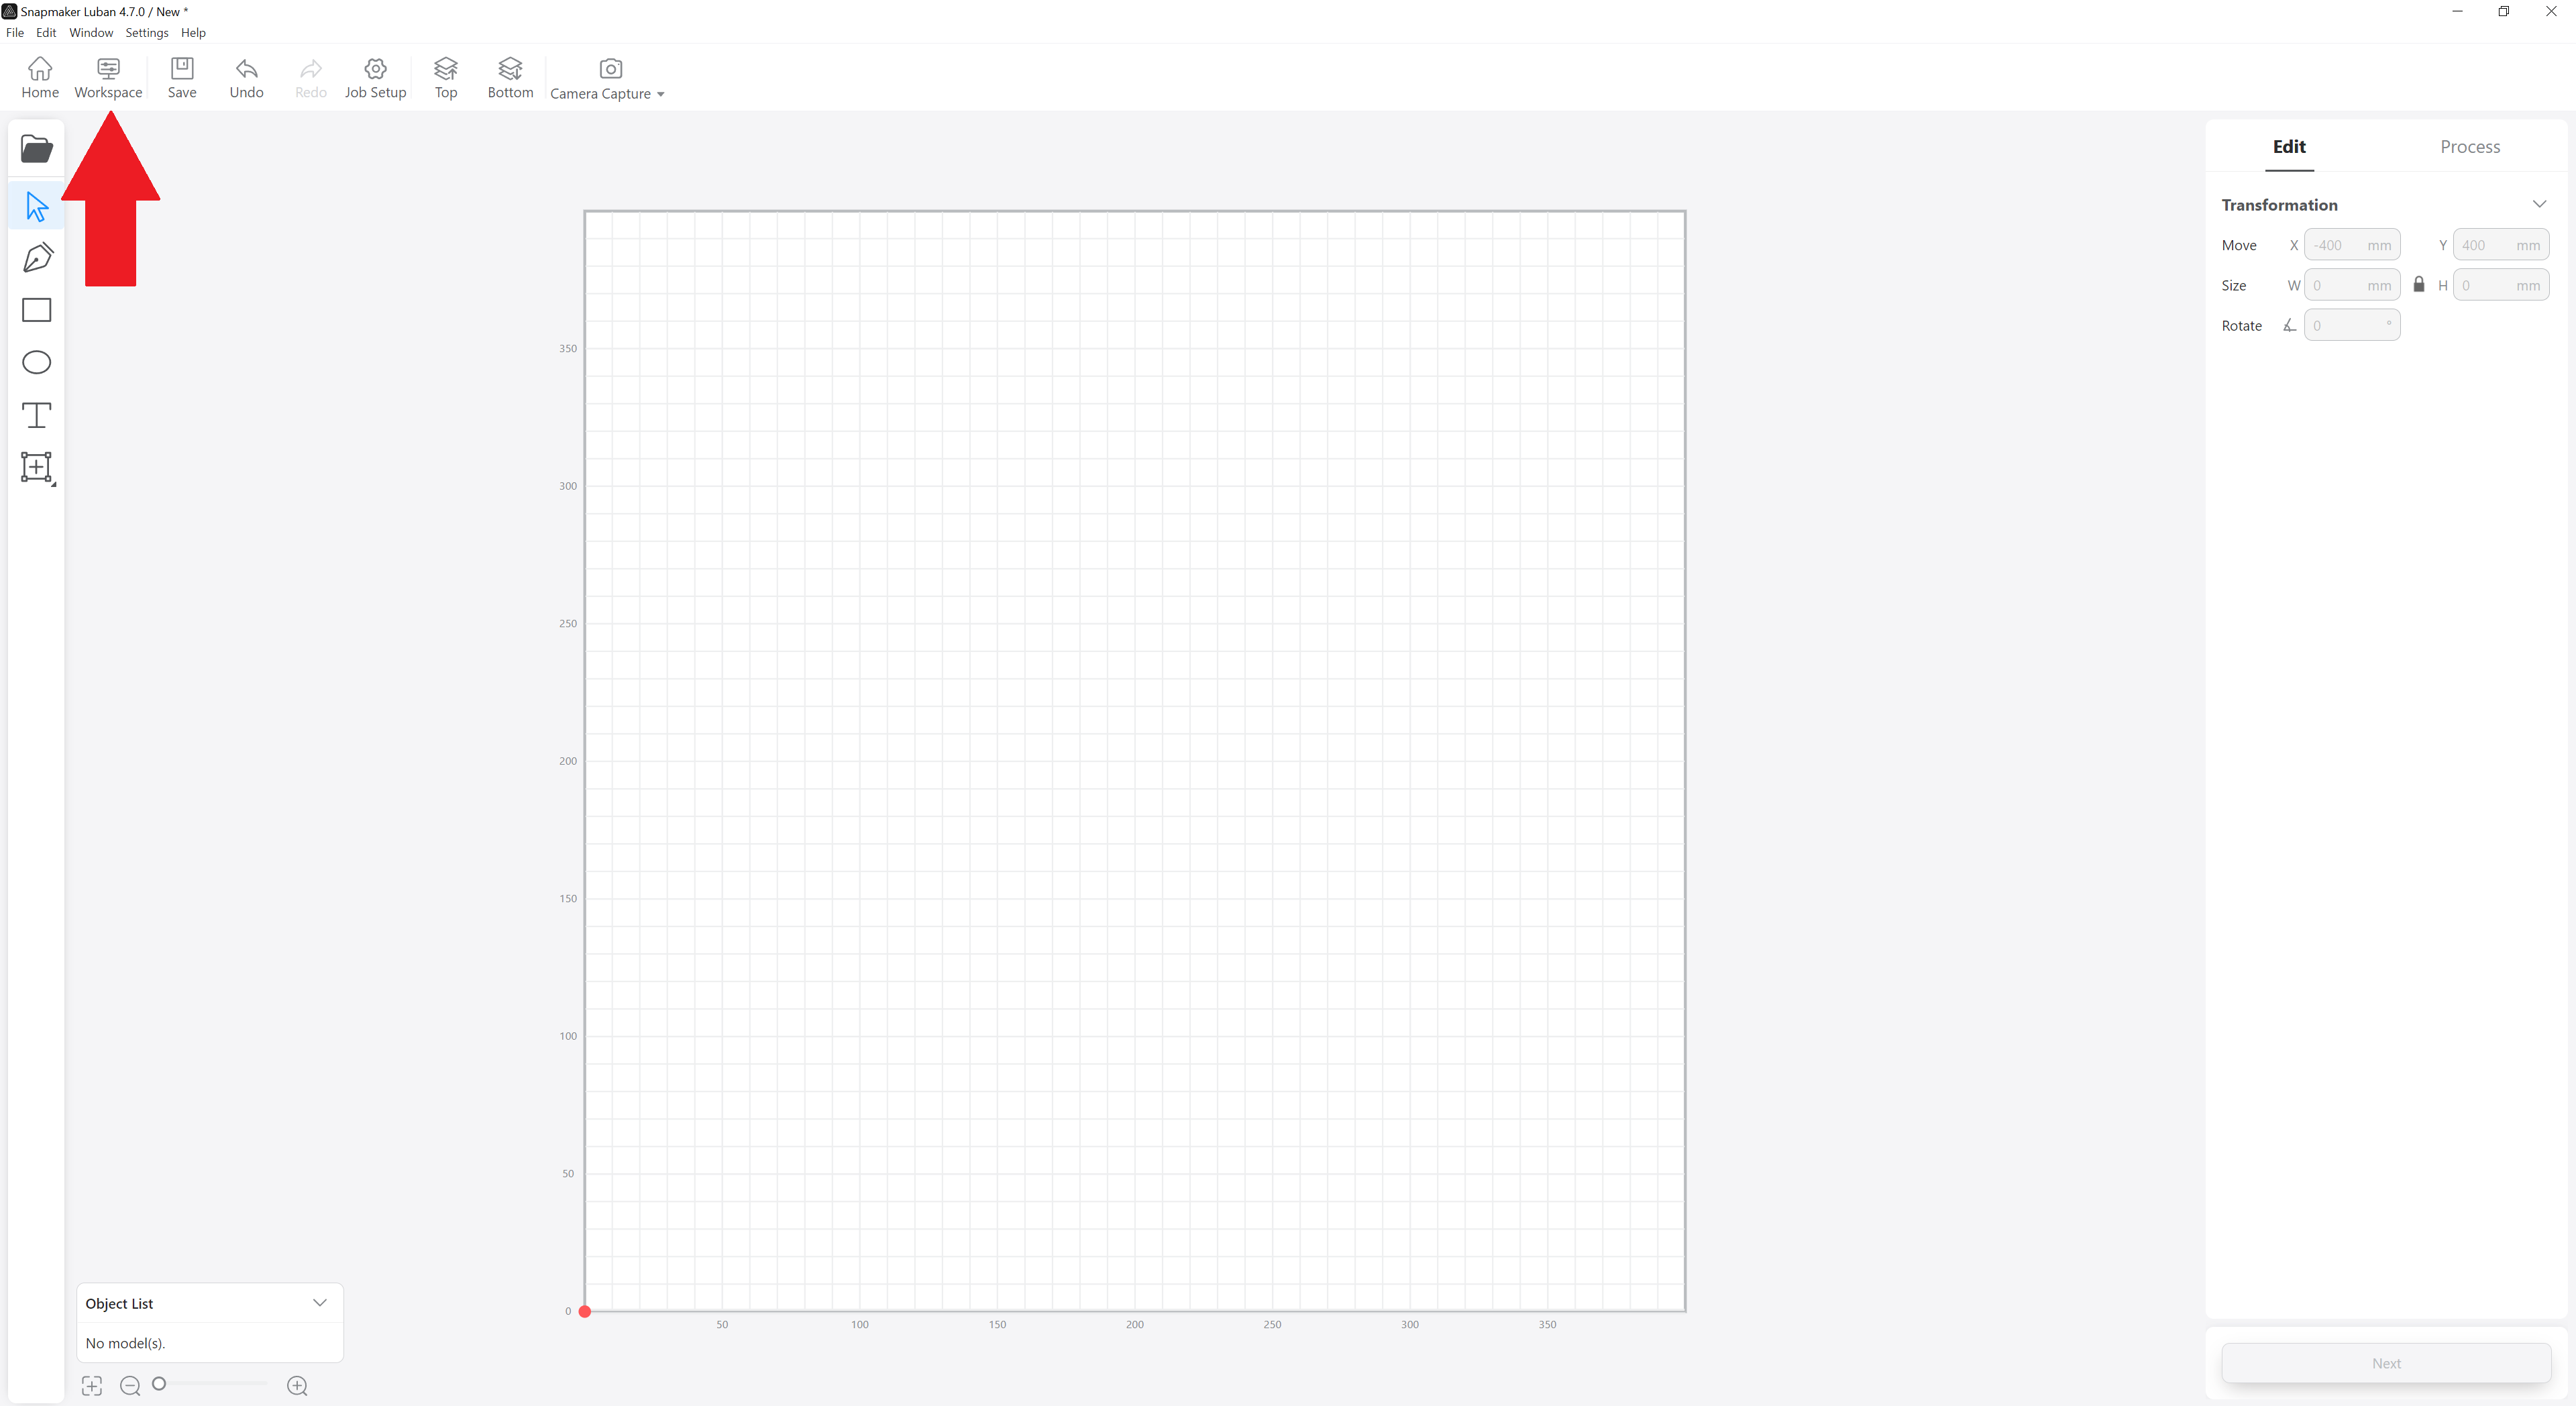
Go to Workspace.
Step 5
Connect to Artisan via IP Address
*If the IP Address is not in the label (like the screenshot below), then click on the + button and the IP will be displayed.
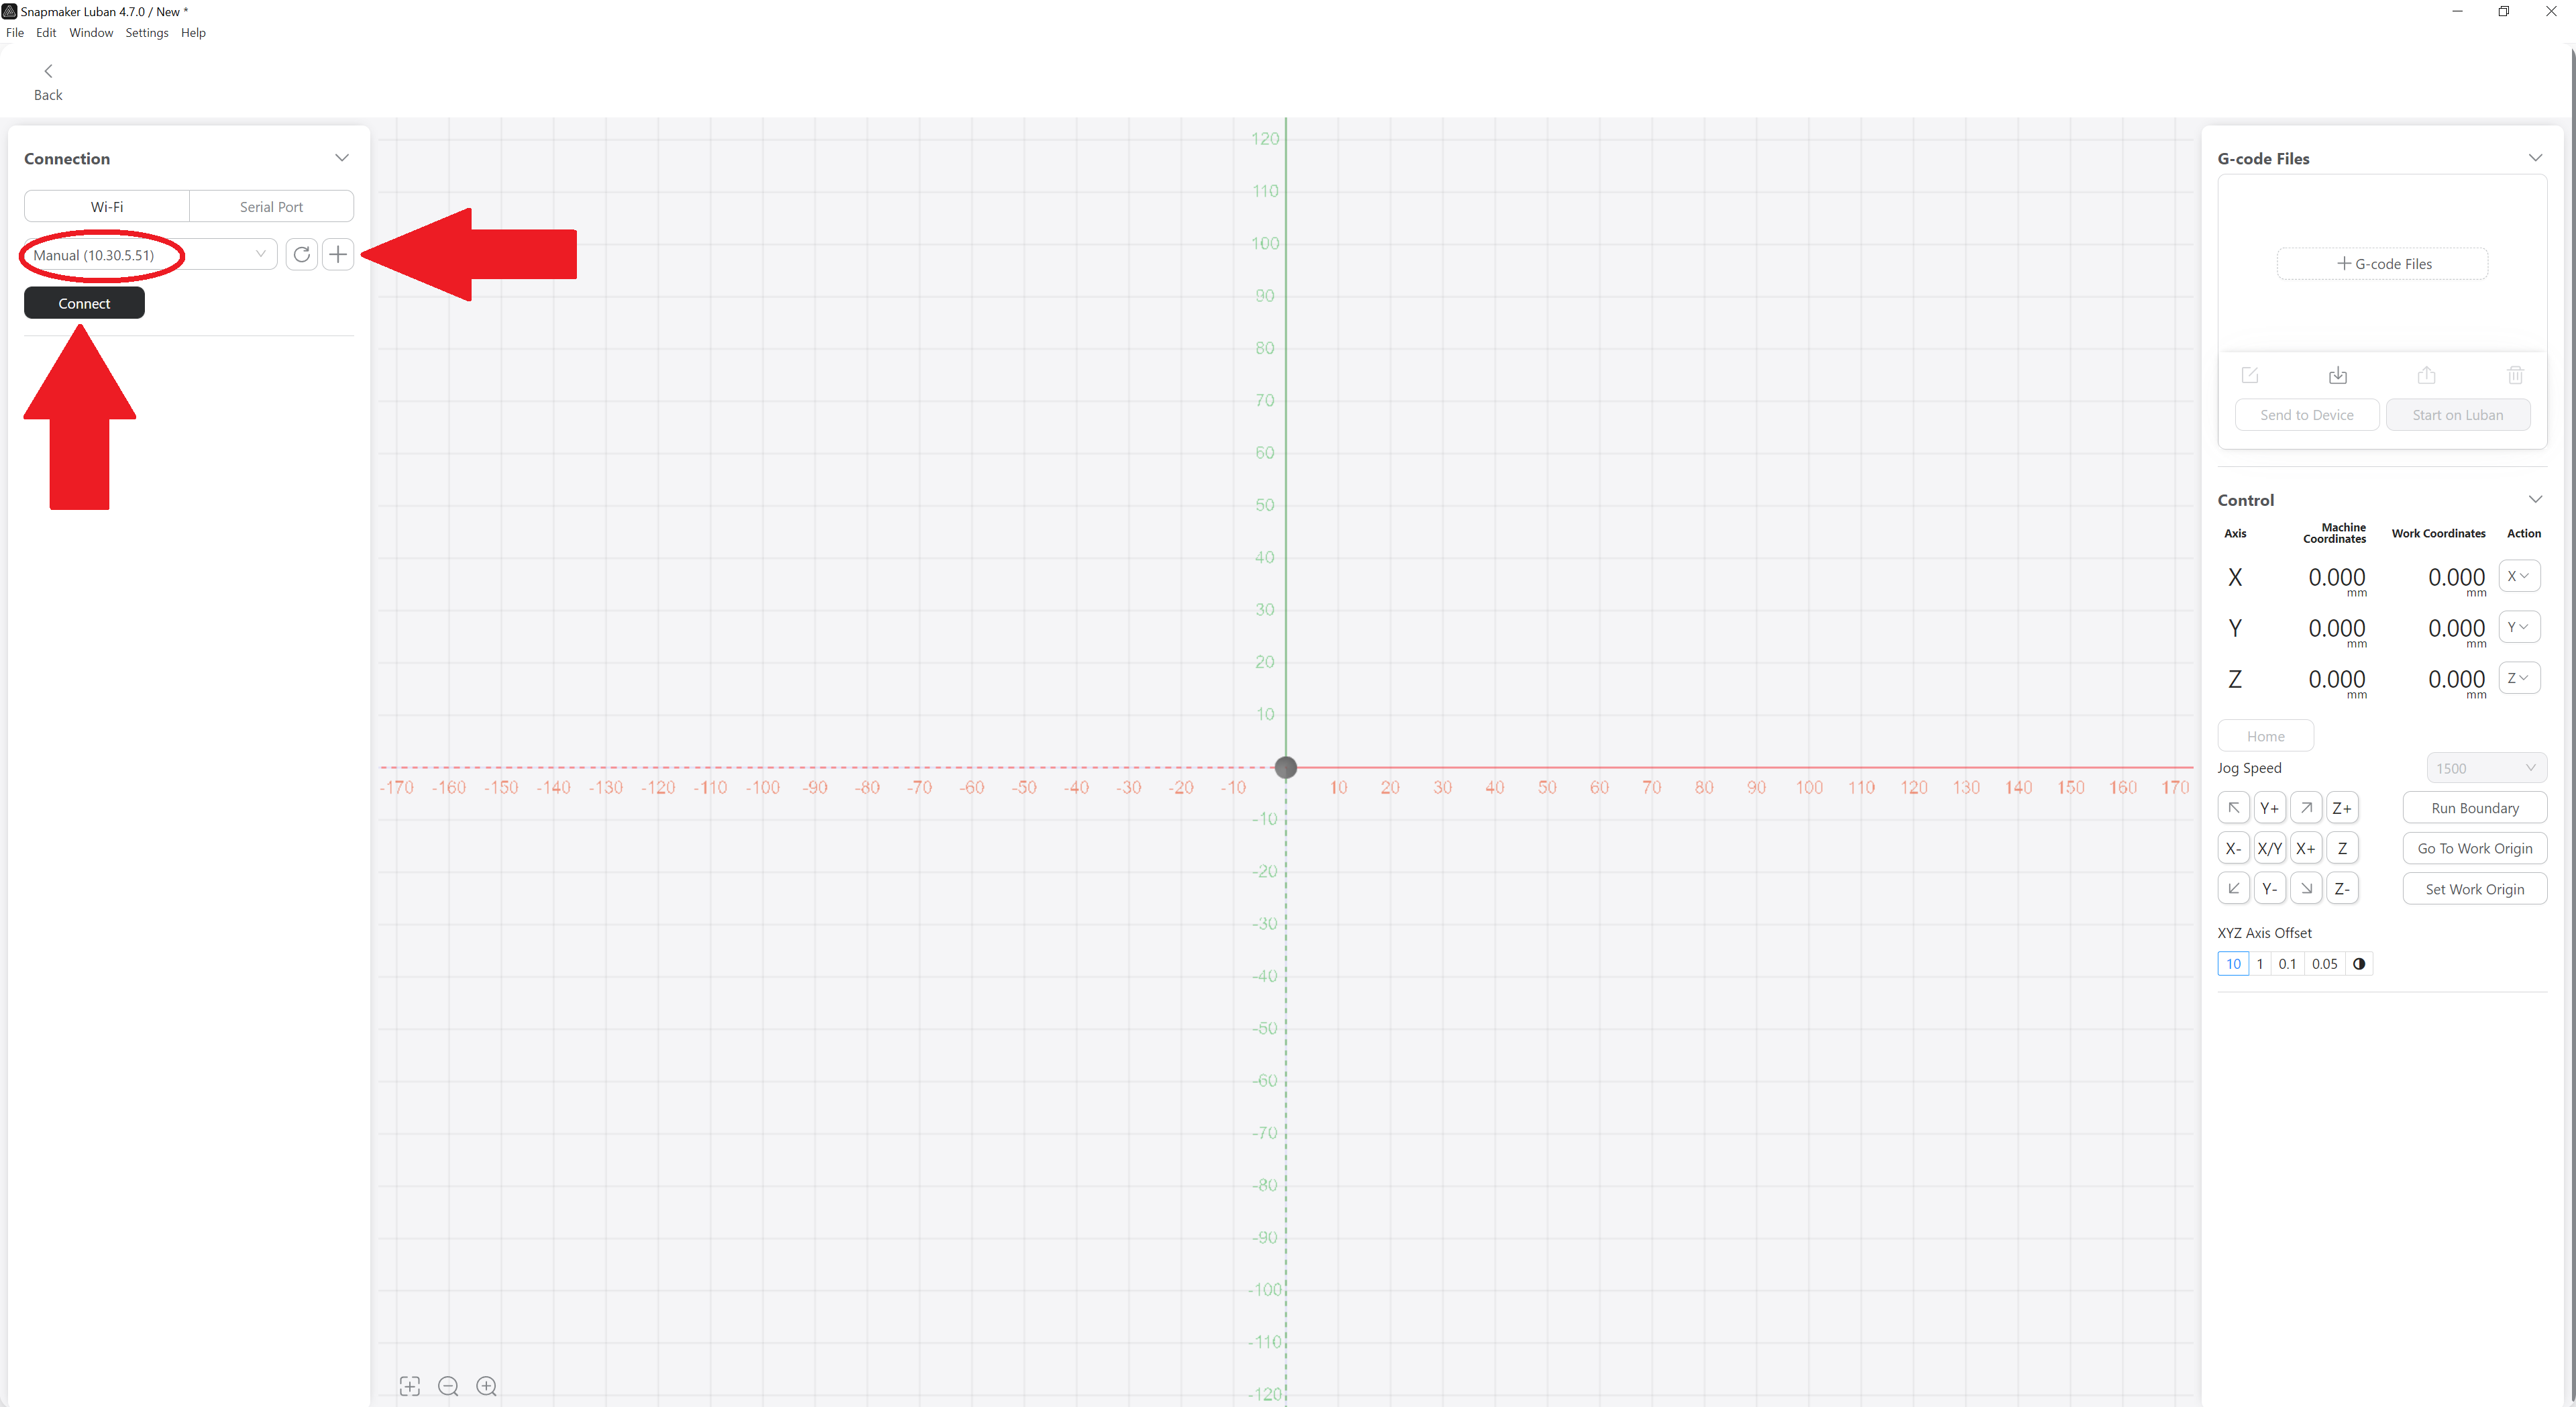
Step 6
Go back and click on Camera Capture, then click Add Background.
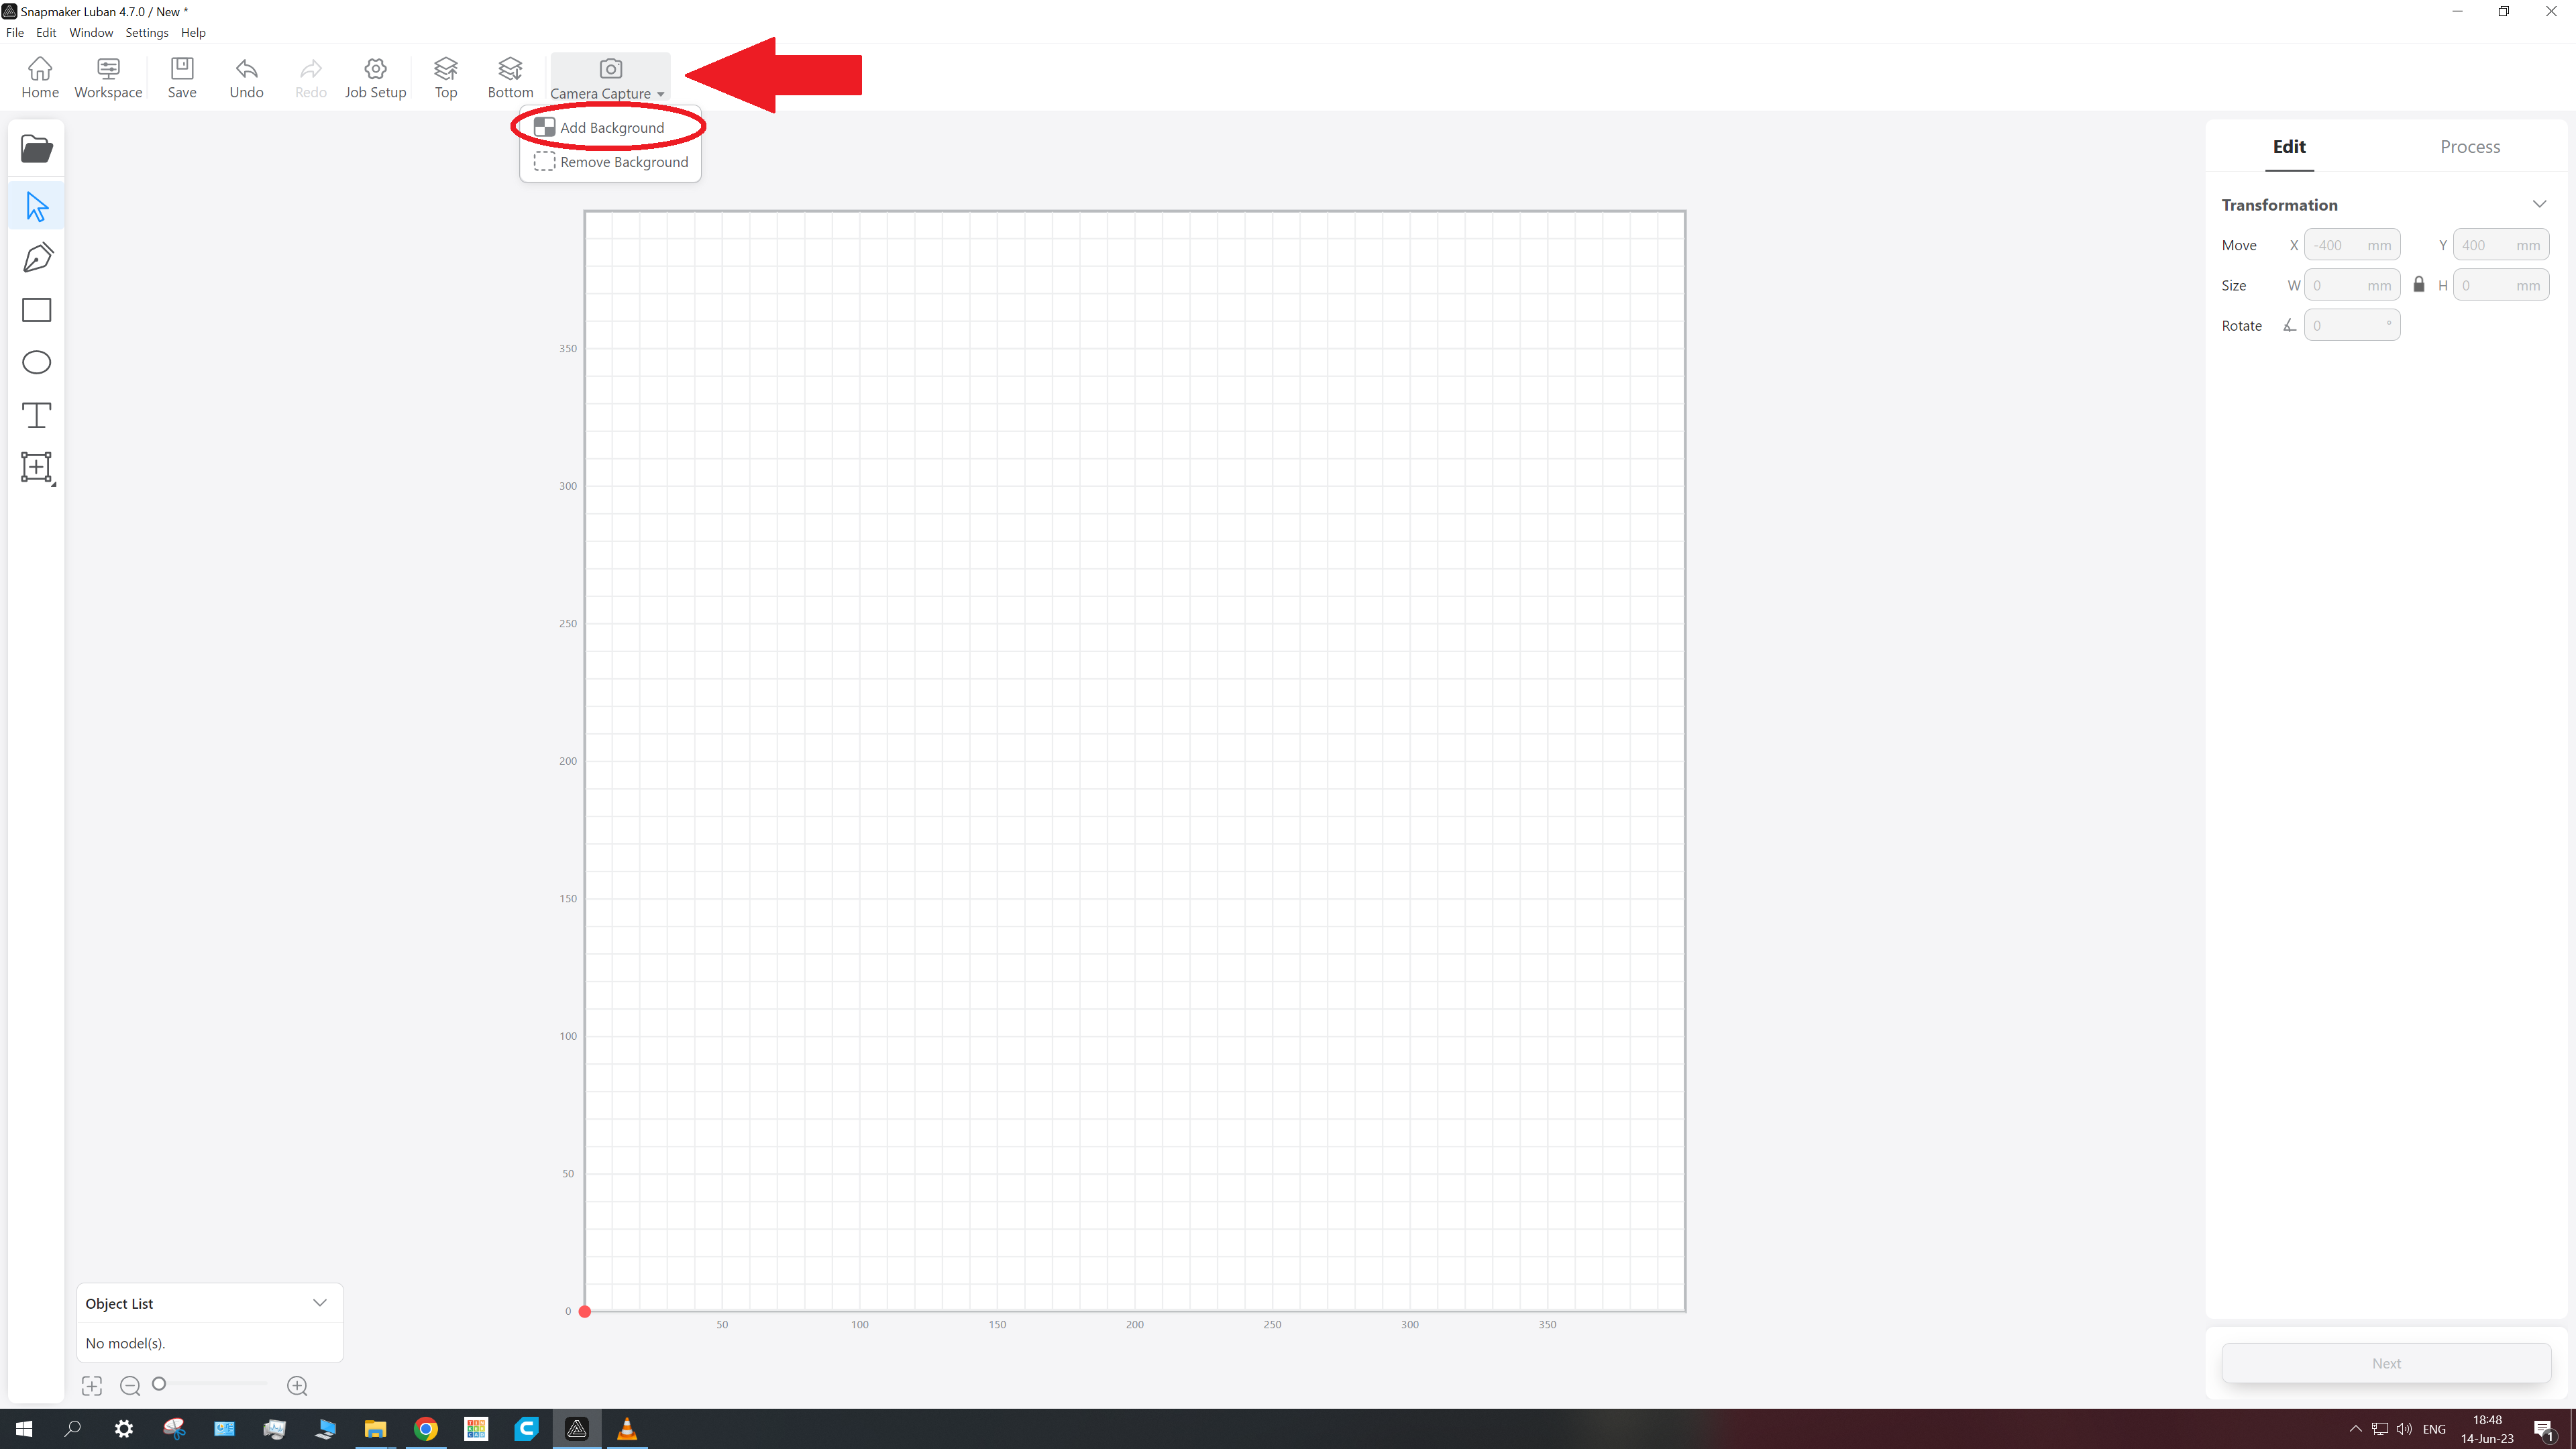
Step 7
a. Click on Normal Mode.
b. Click Start.
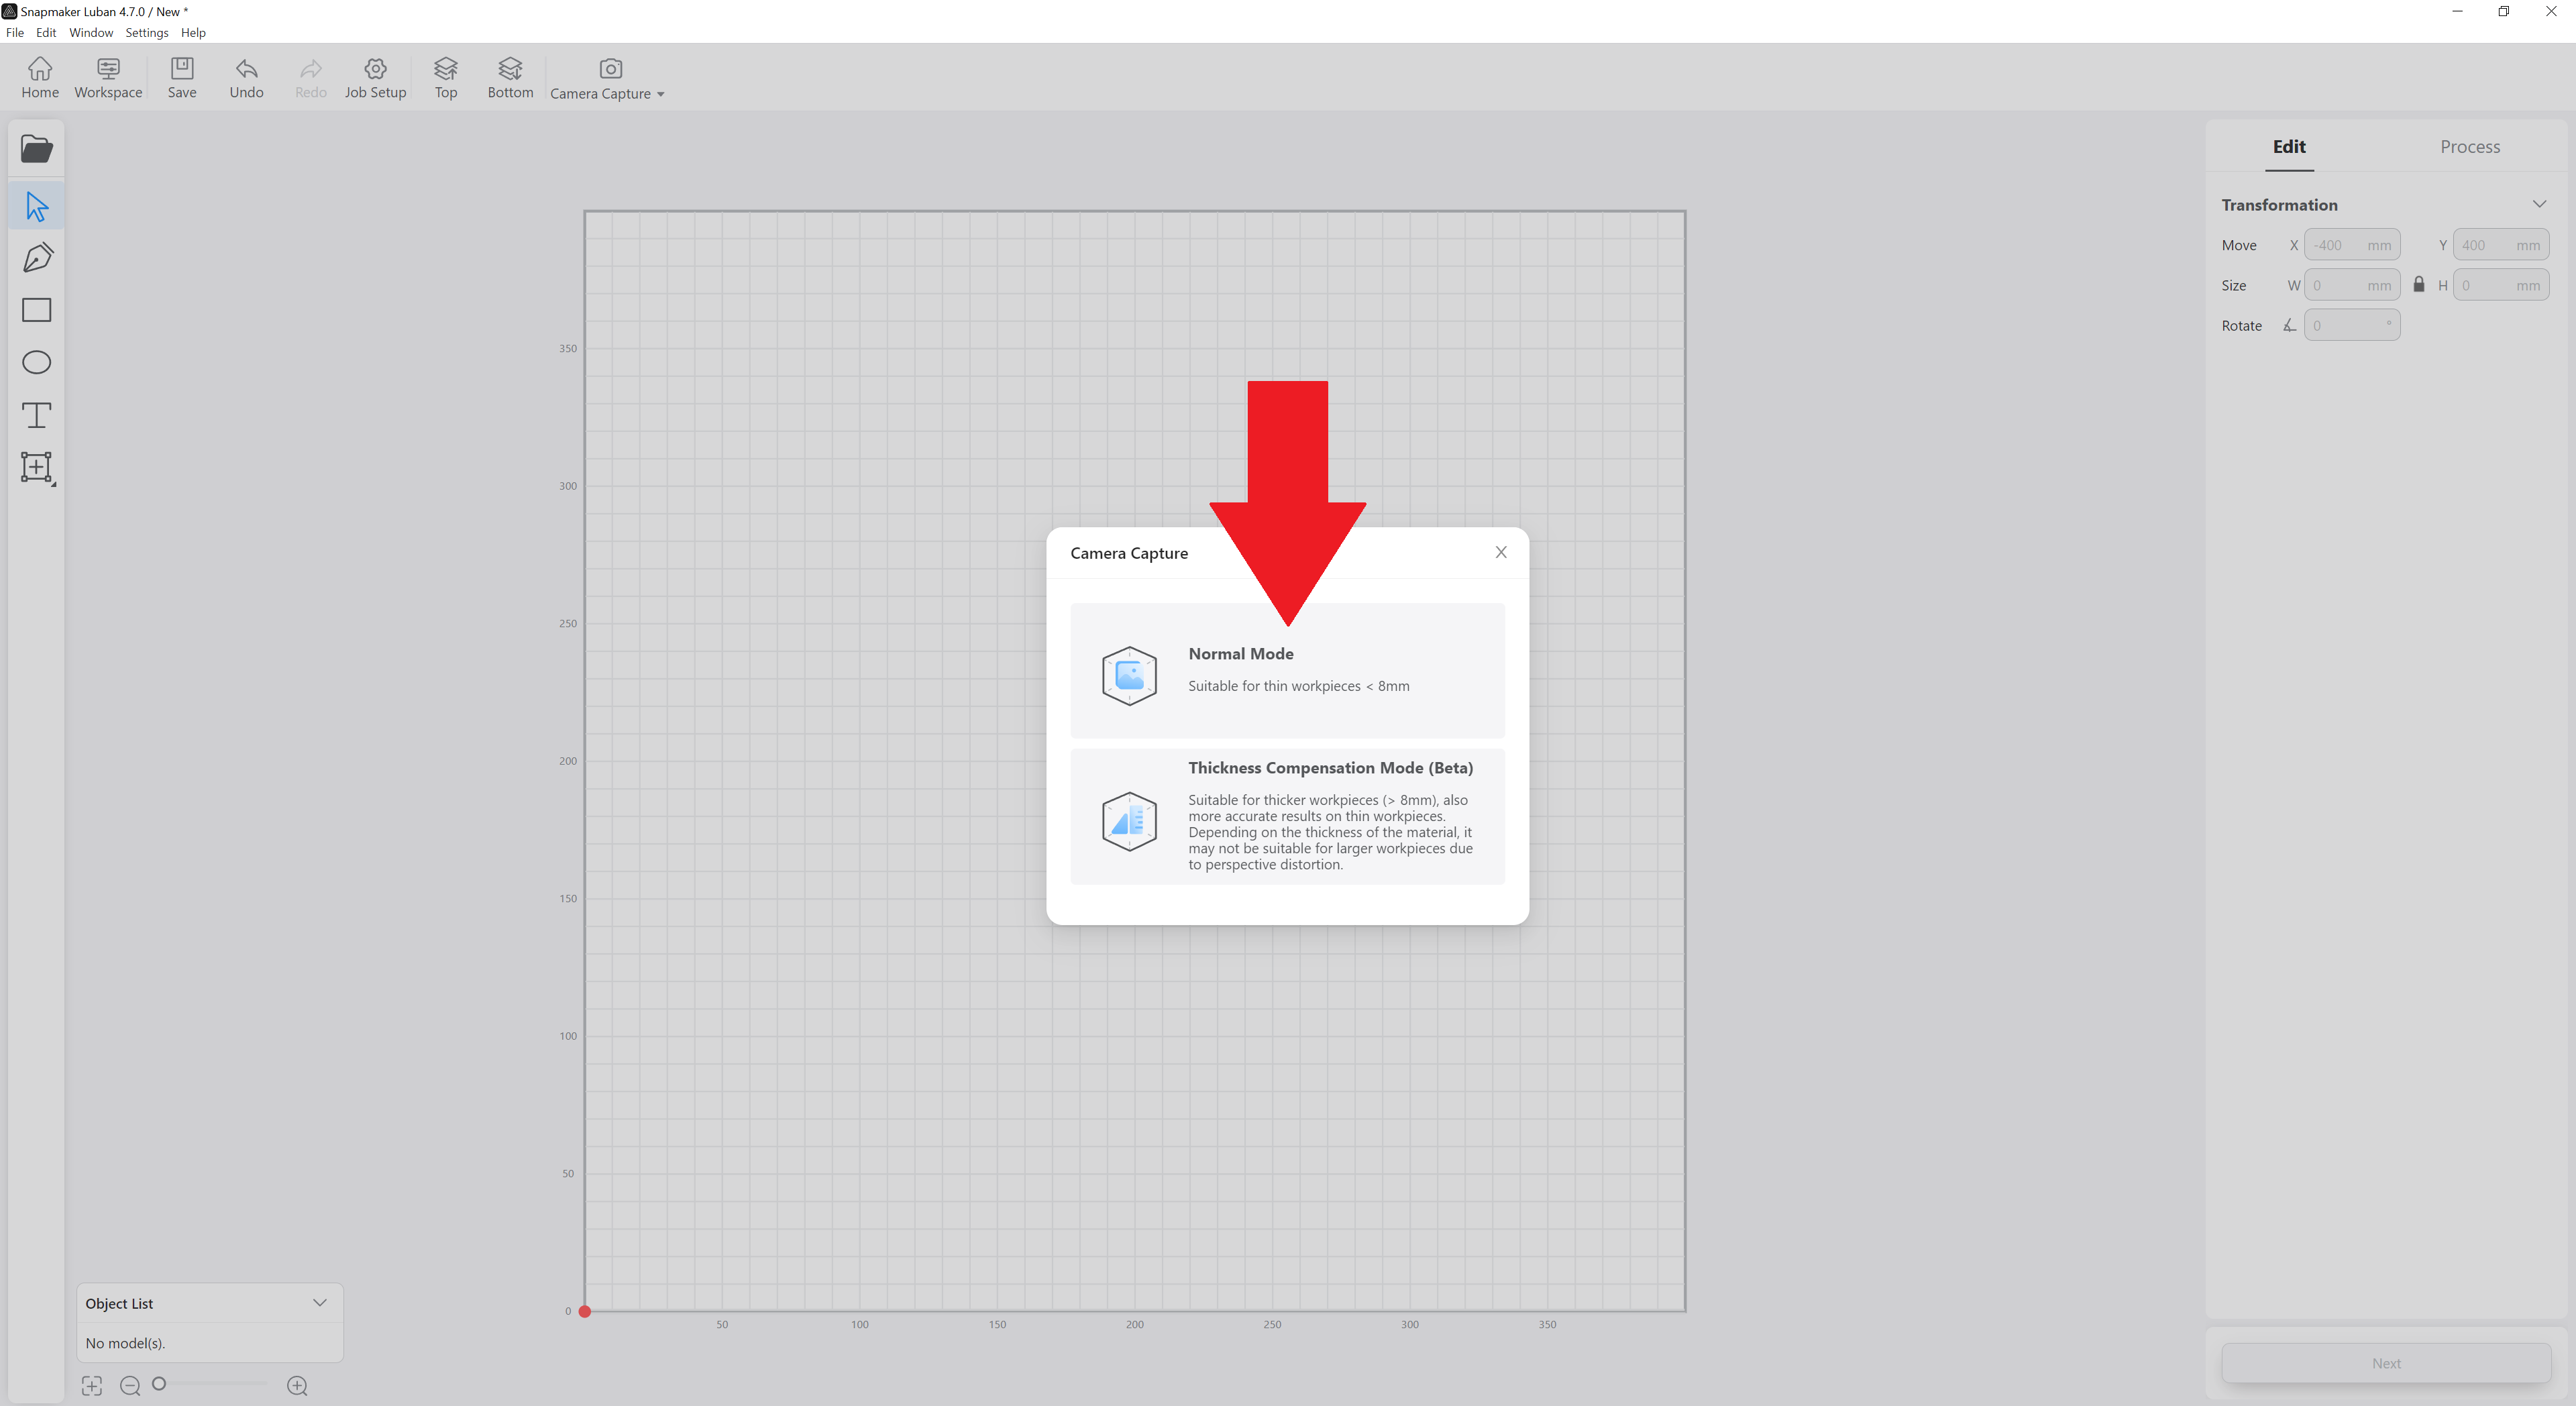
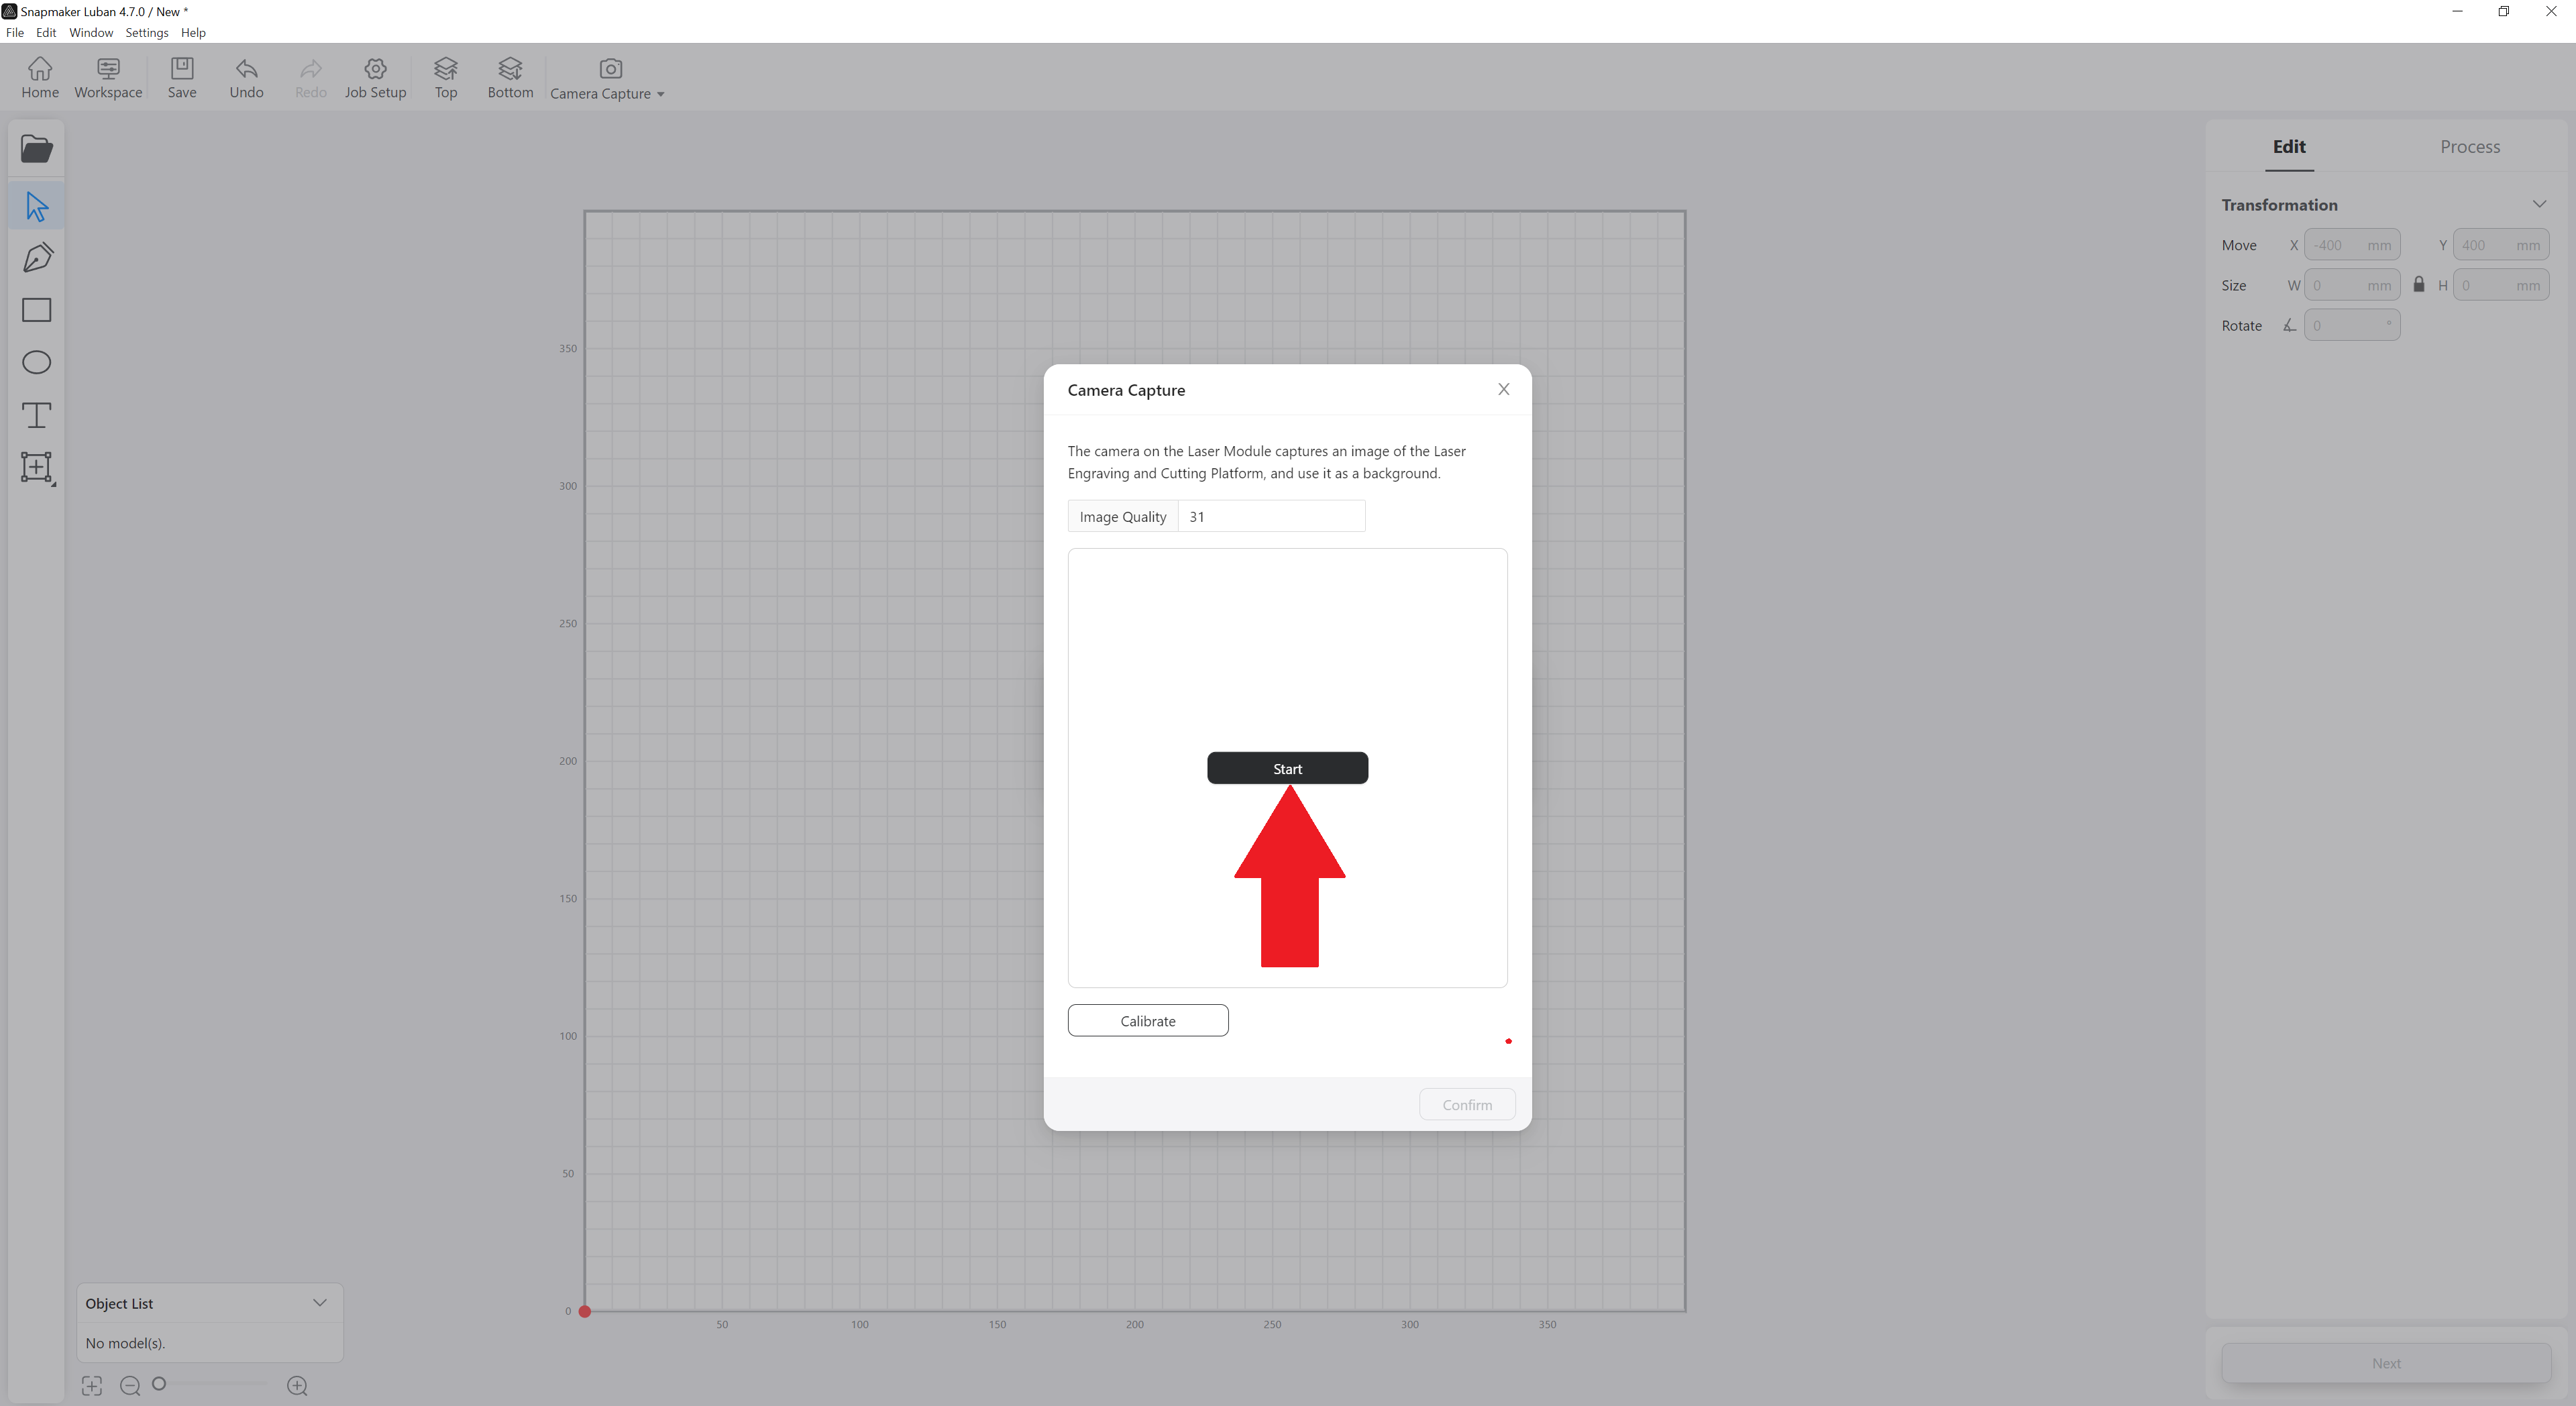
Step 8
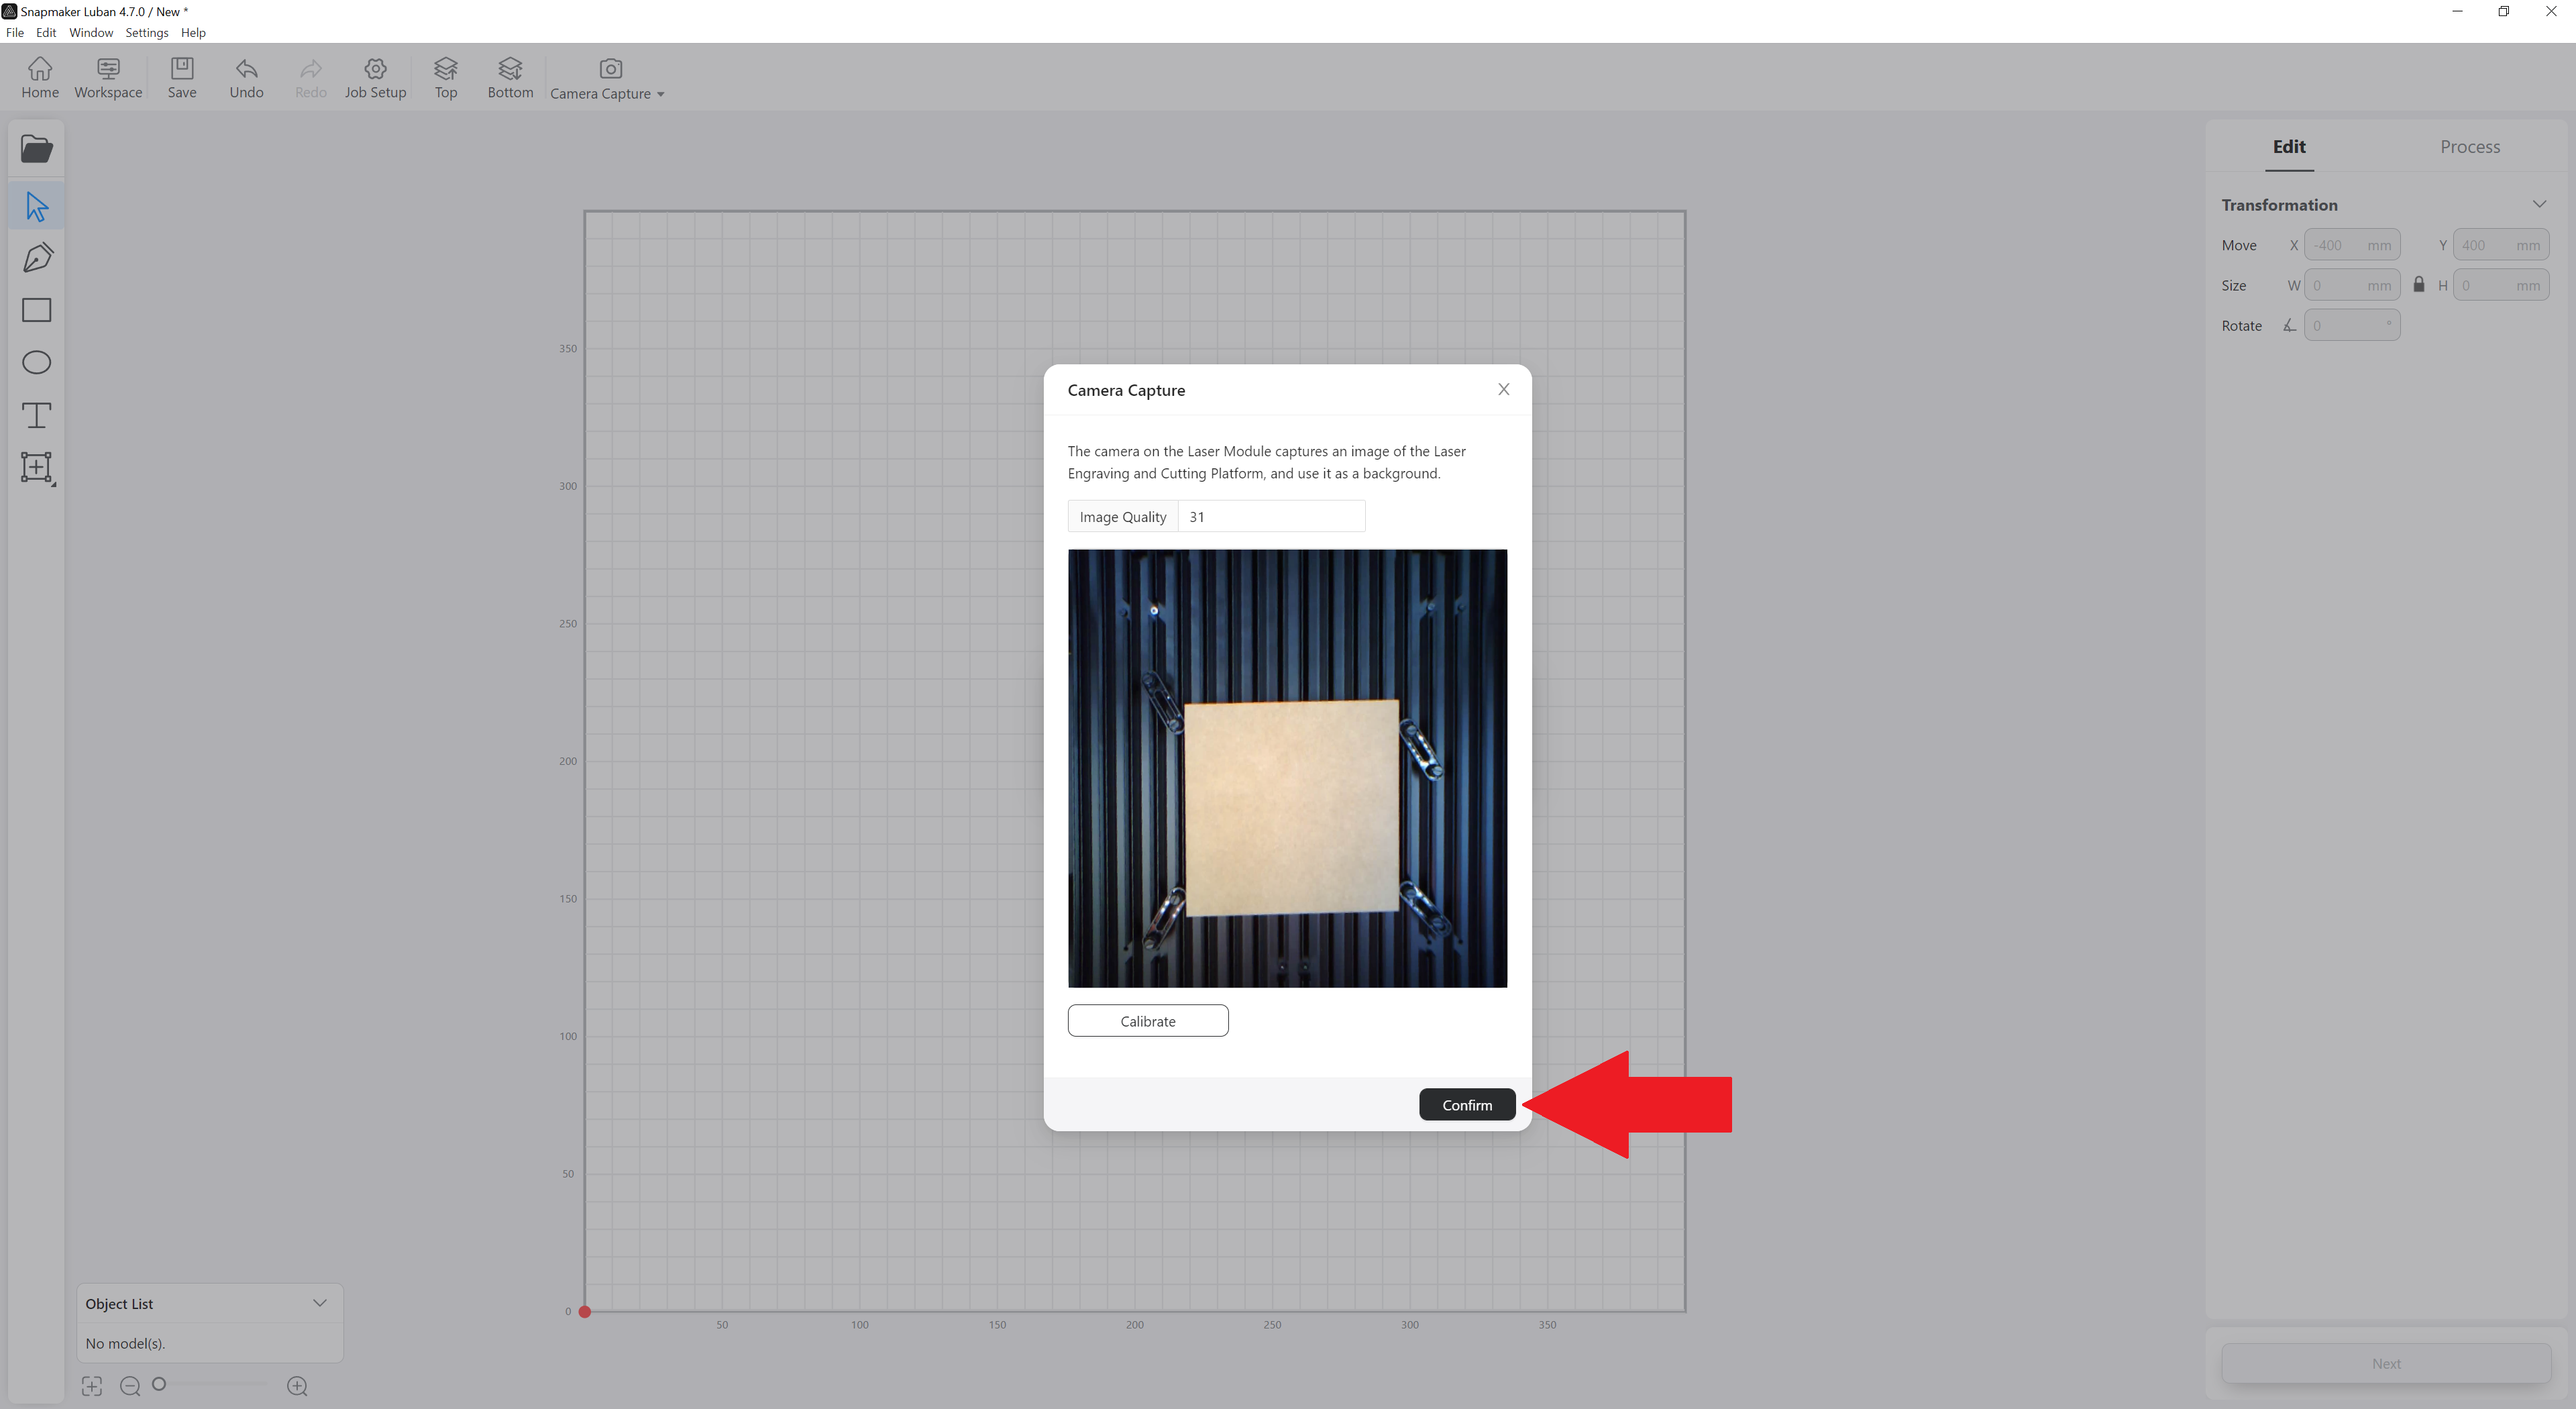
Click on Confirm if the photo is okay. If there is a problem with the photo, click on Calibrate and adjust the corners of the image.
Step 9
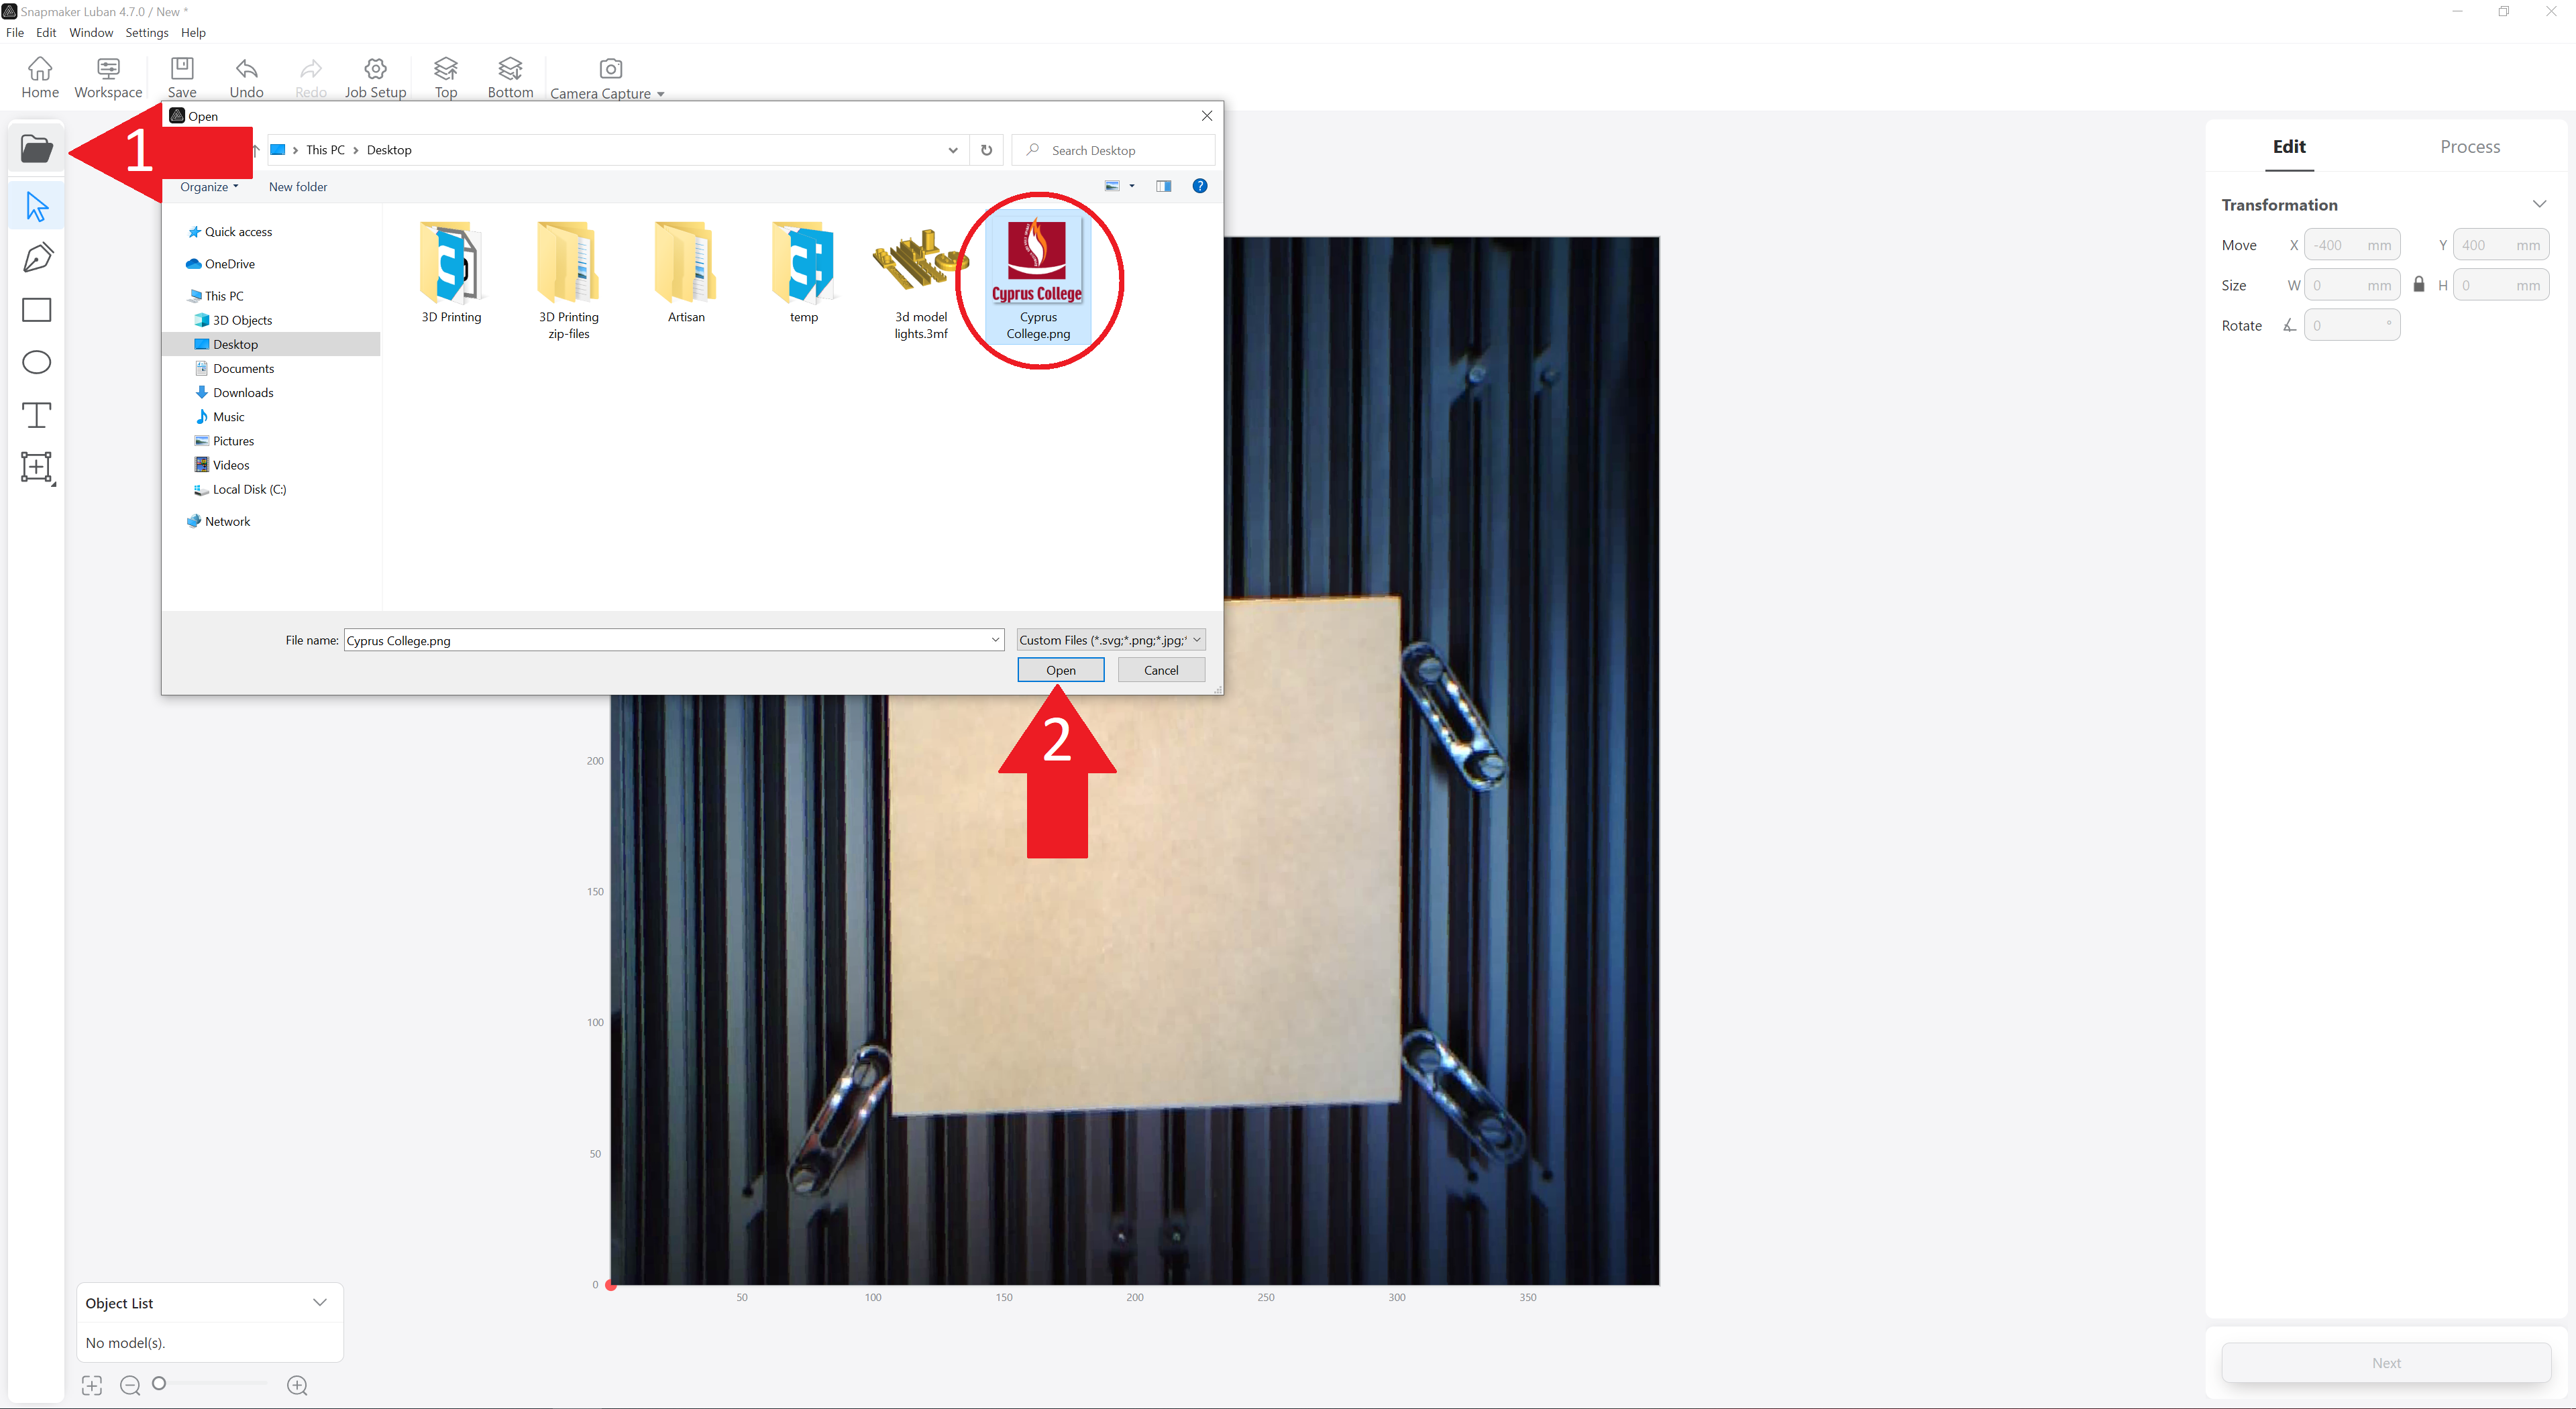
Import the file you want.
Step 10
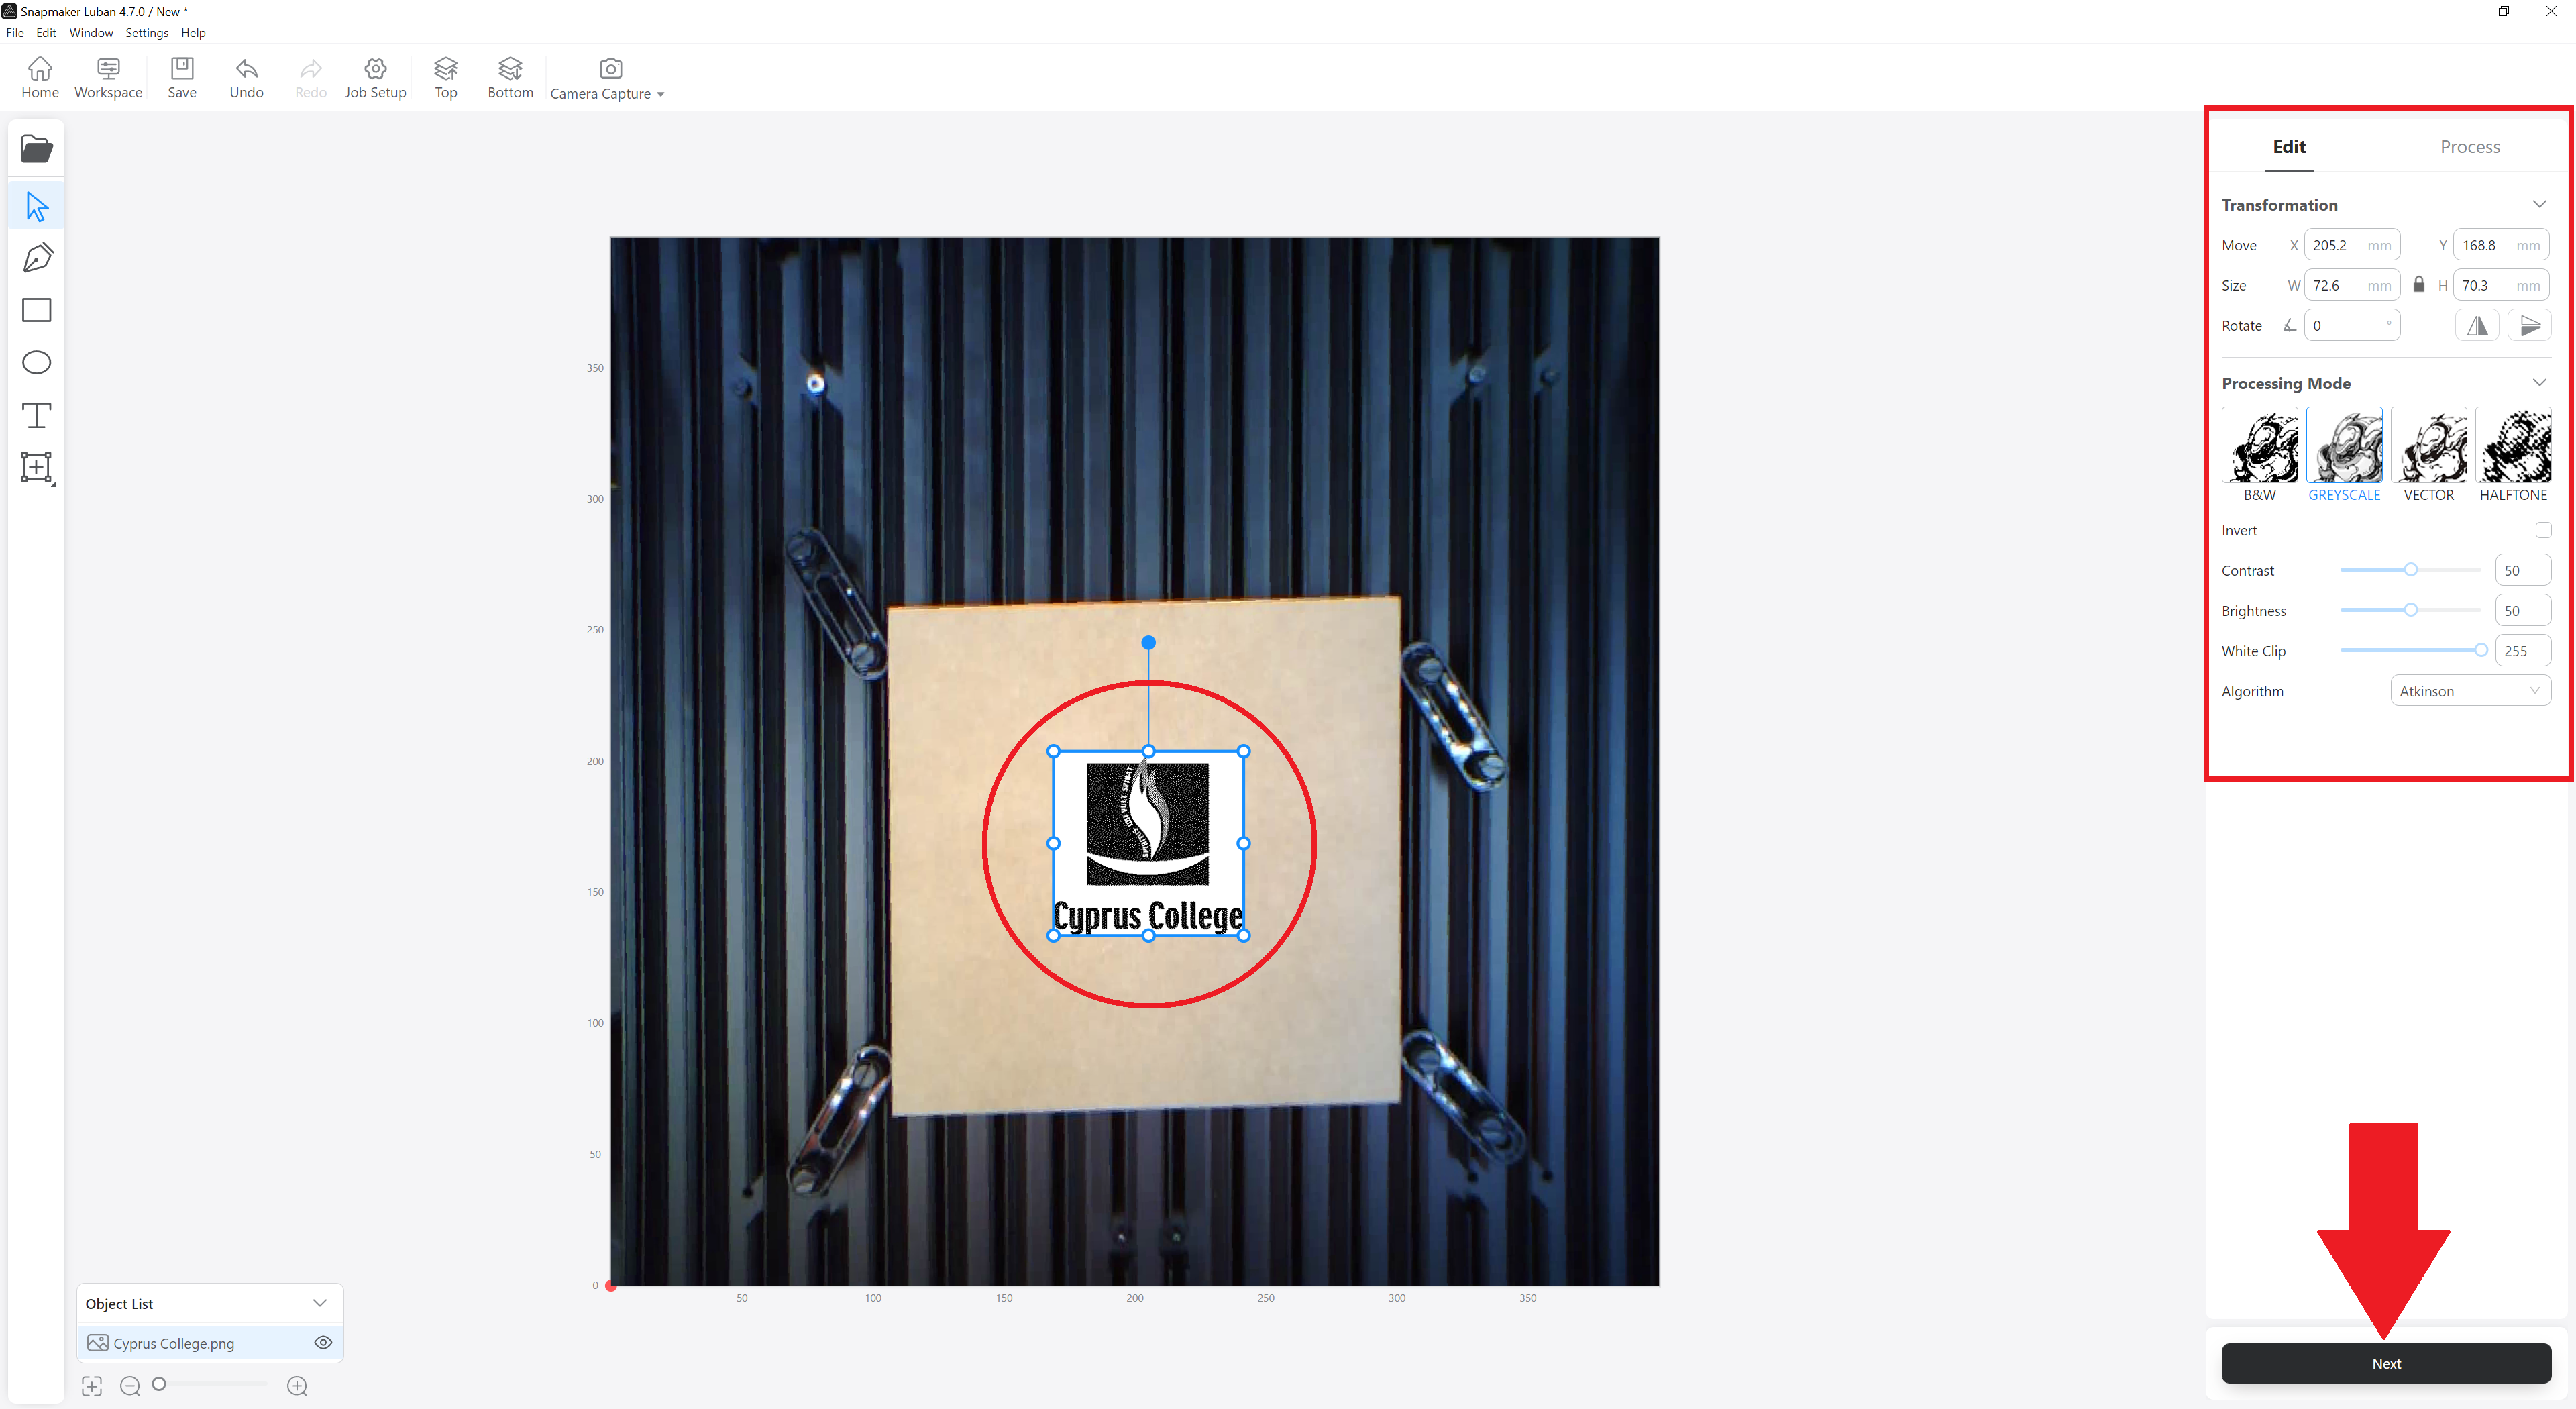
Place the file where you want, make the necessary settings, if needed and click on Next button.
Step 11
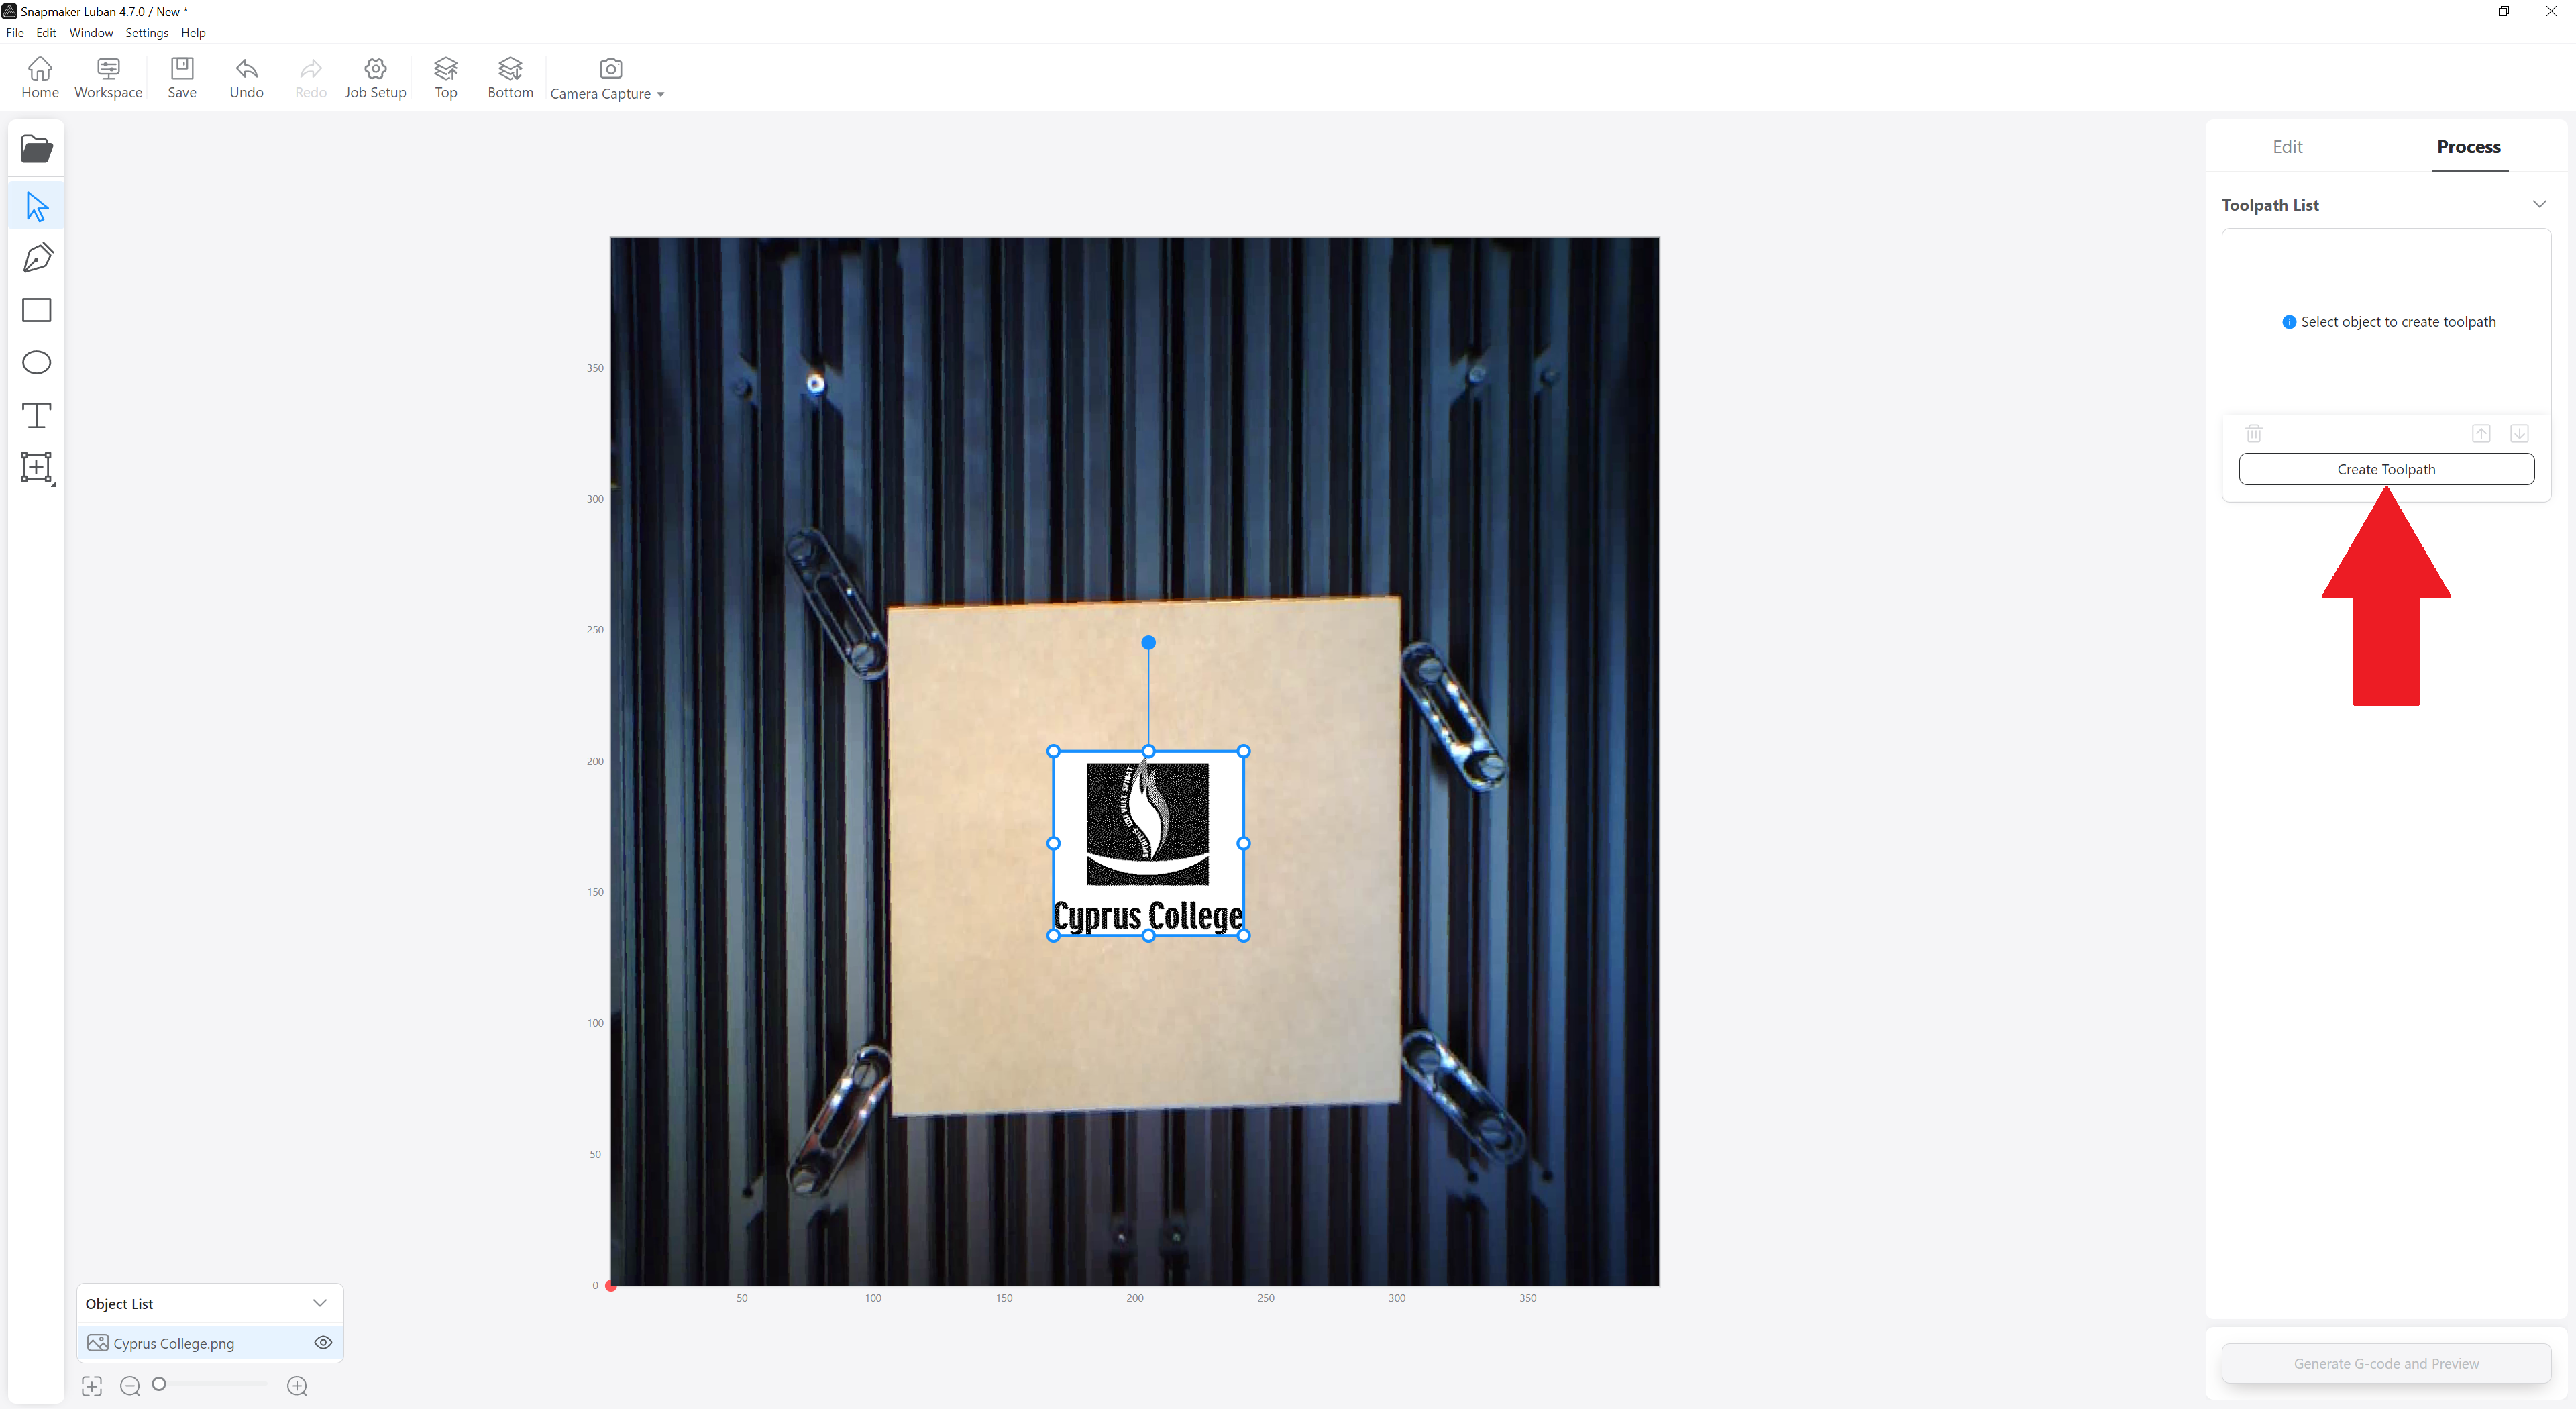
a. Click on Create Toolpath and
b. Make the settings you want (material you will use, if you want it to engrave with dots or lines, etc.) and click on Save.
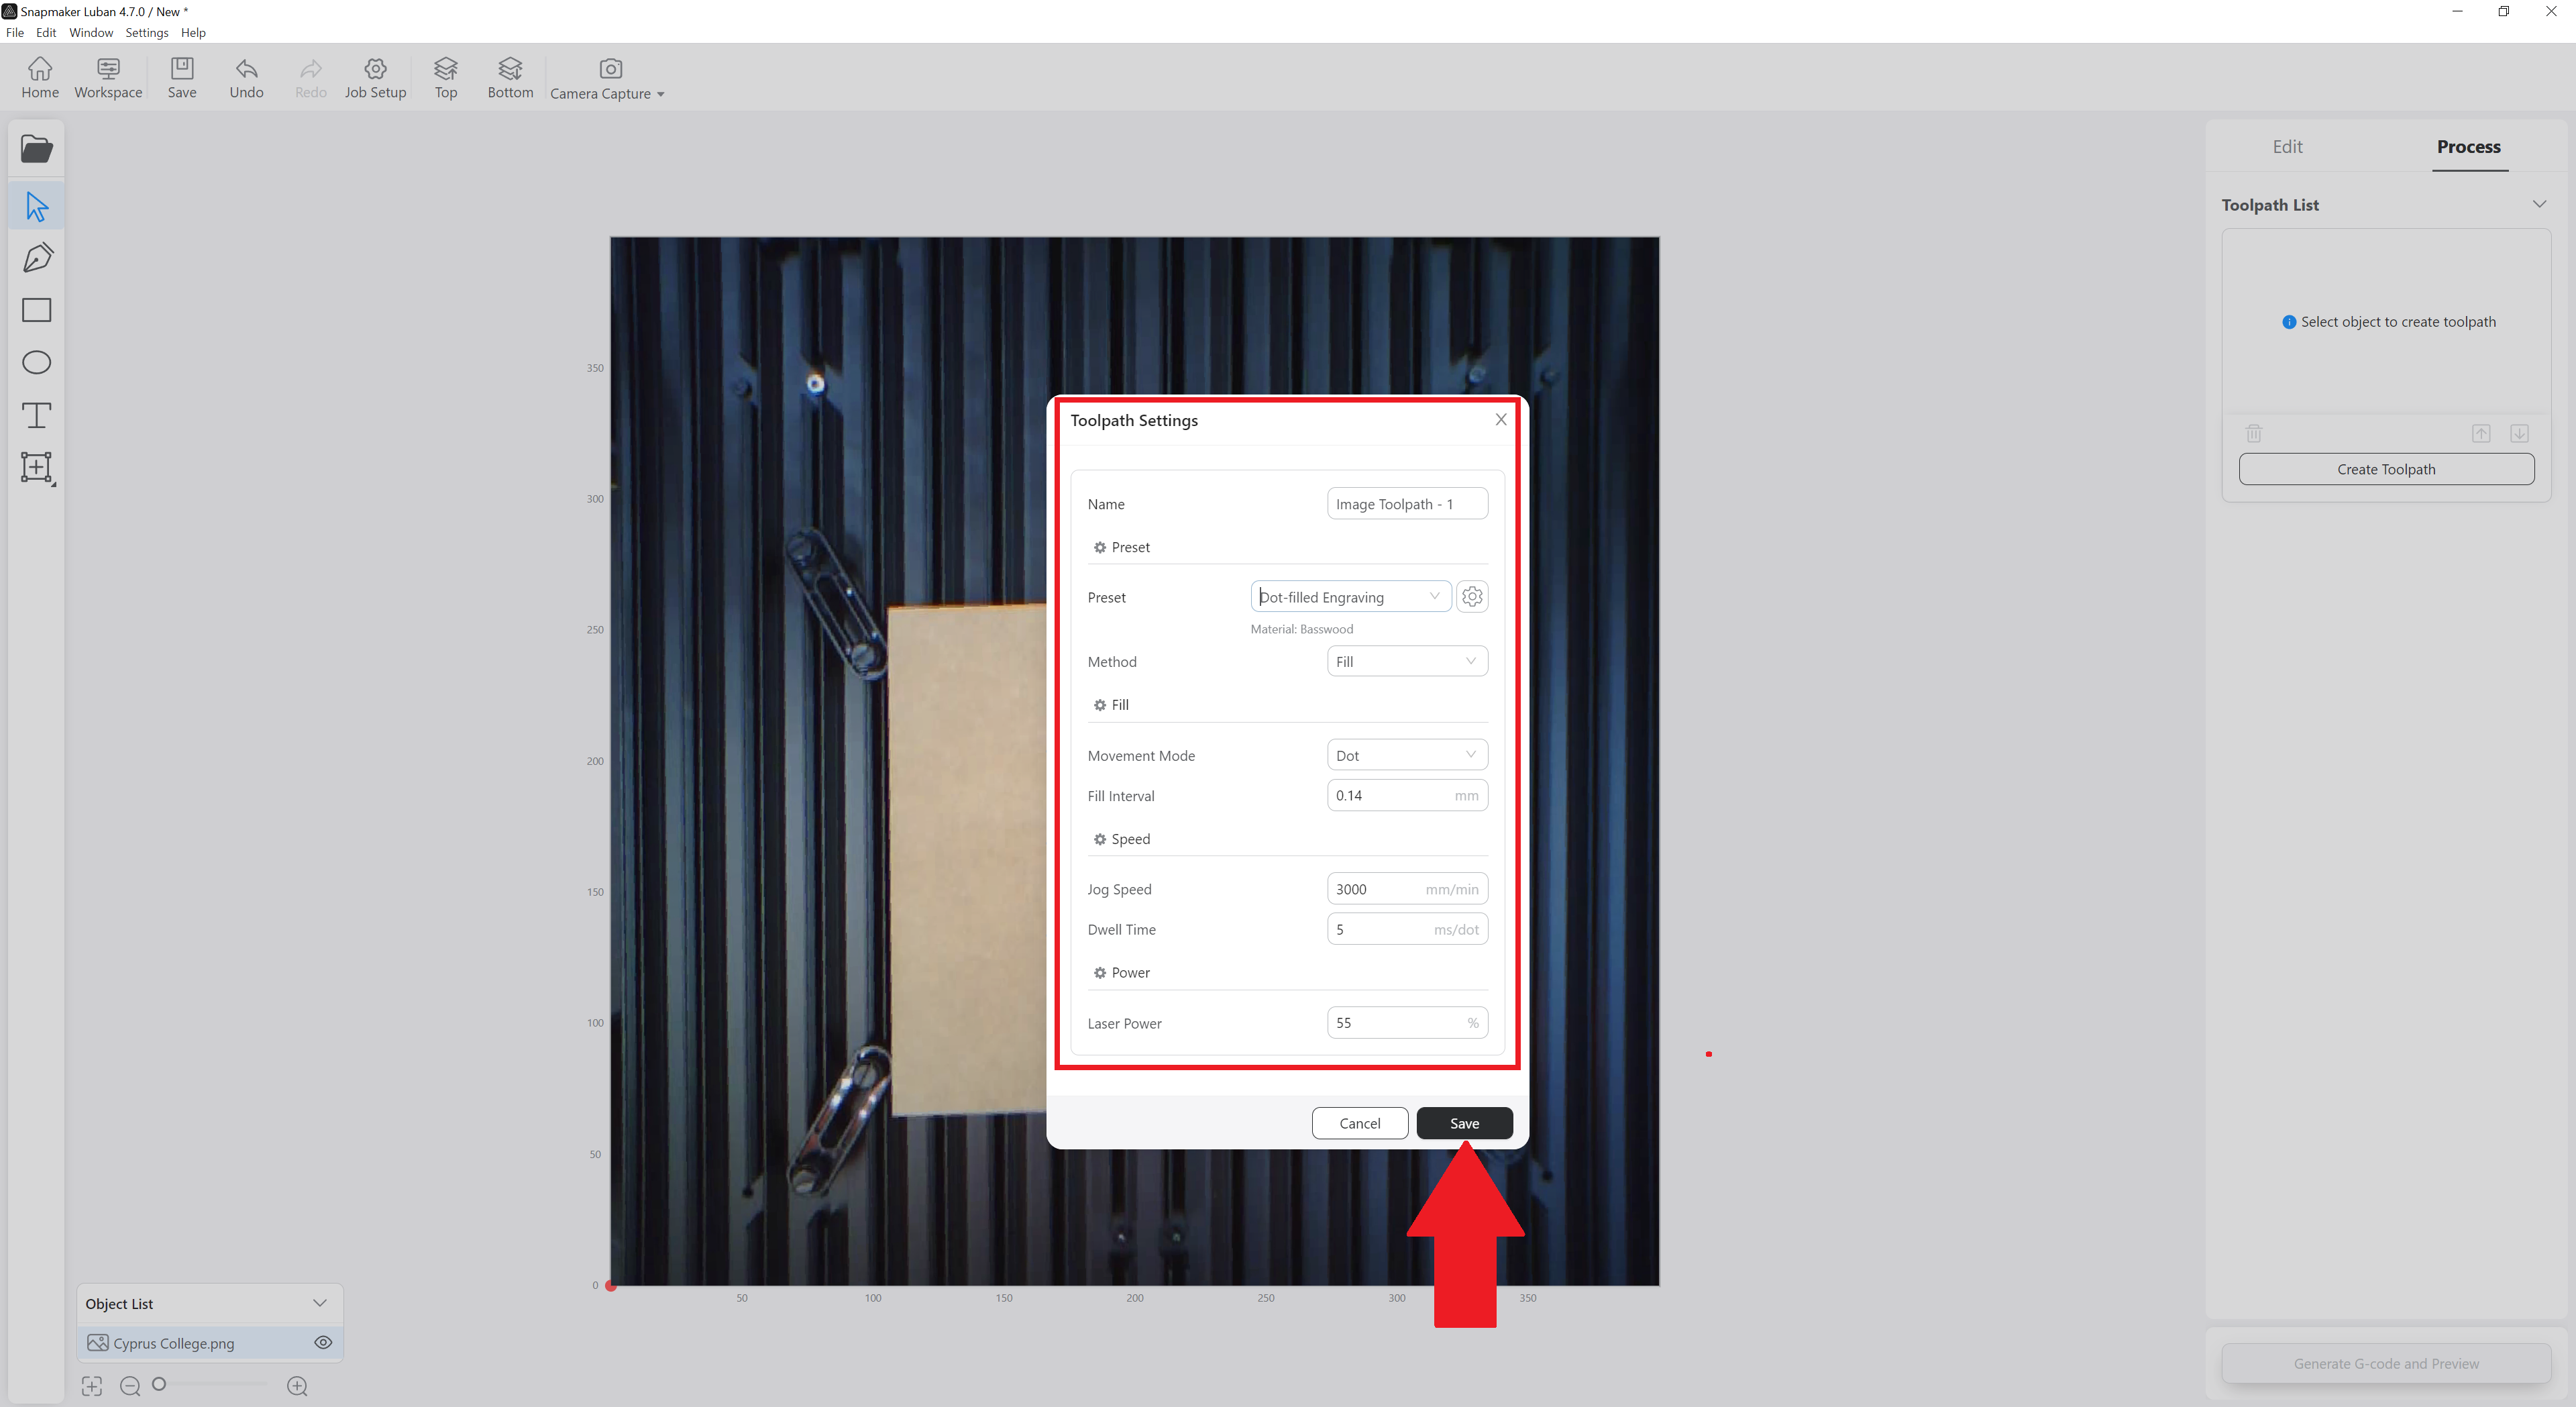
Step 12
Click on Generate G-code and Preview.
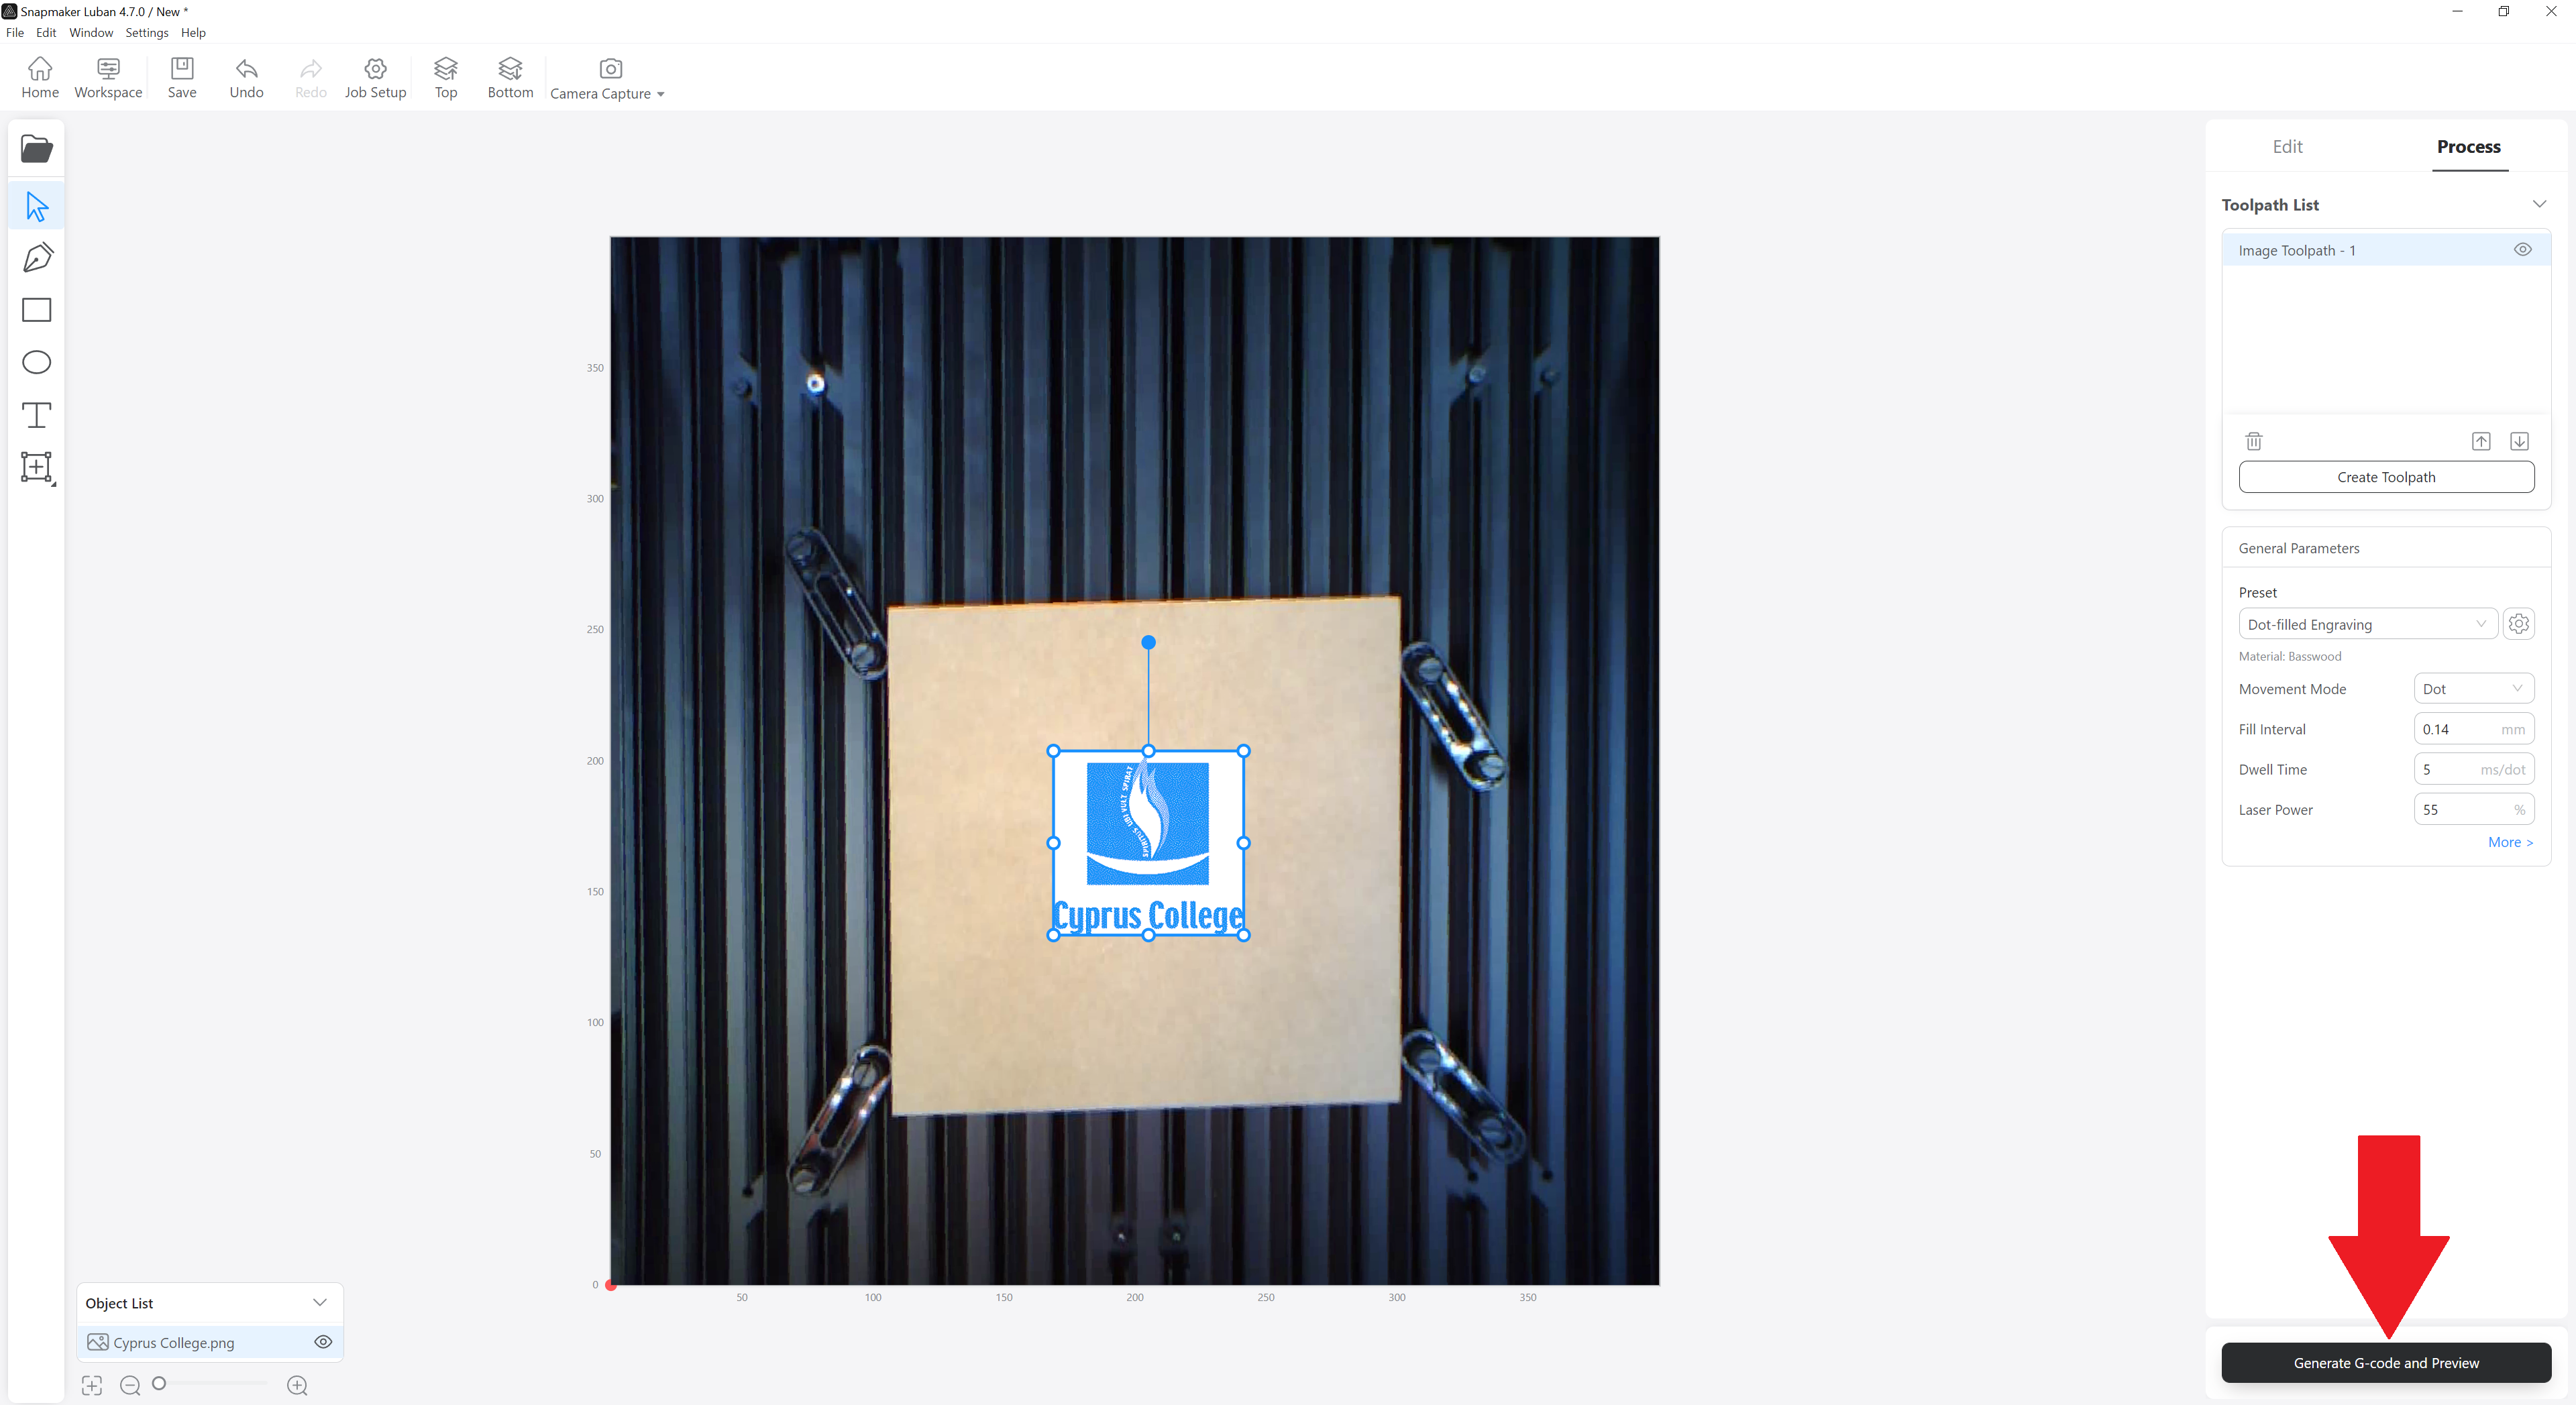
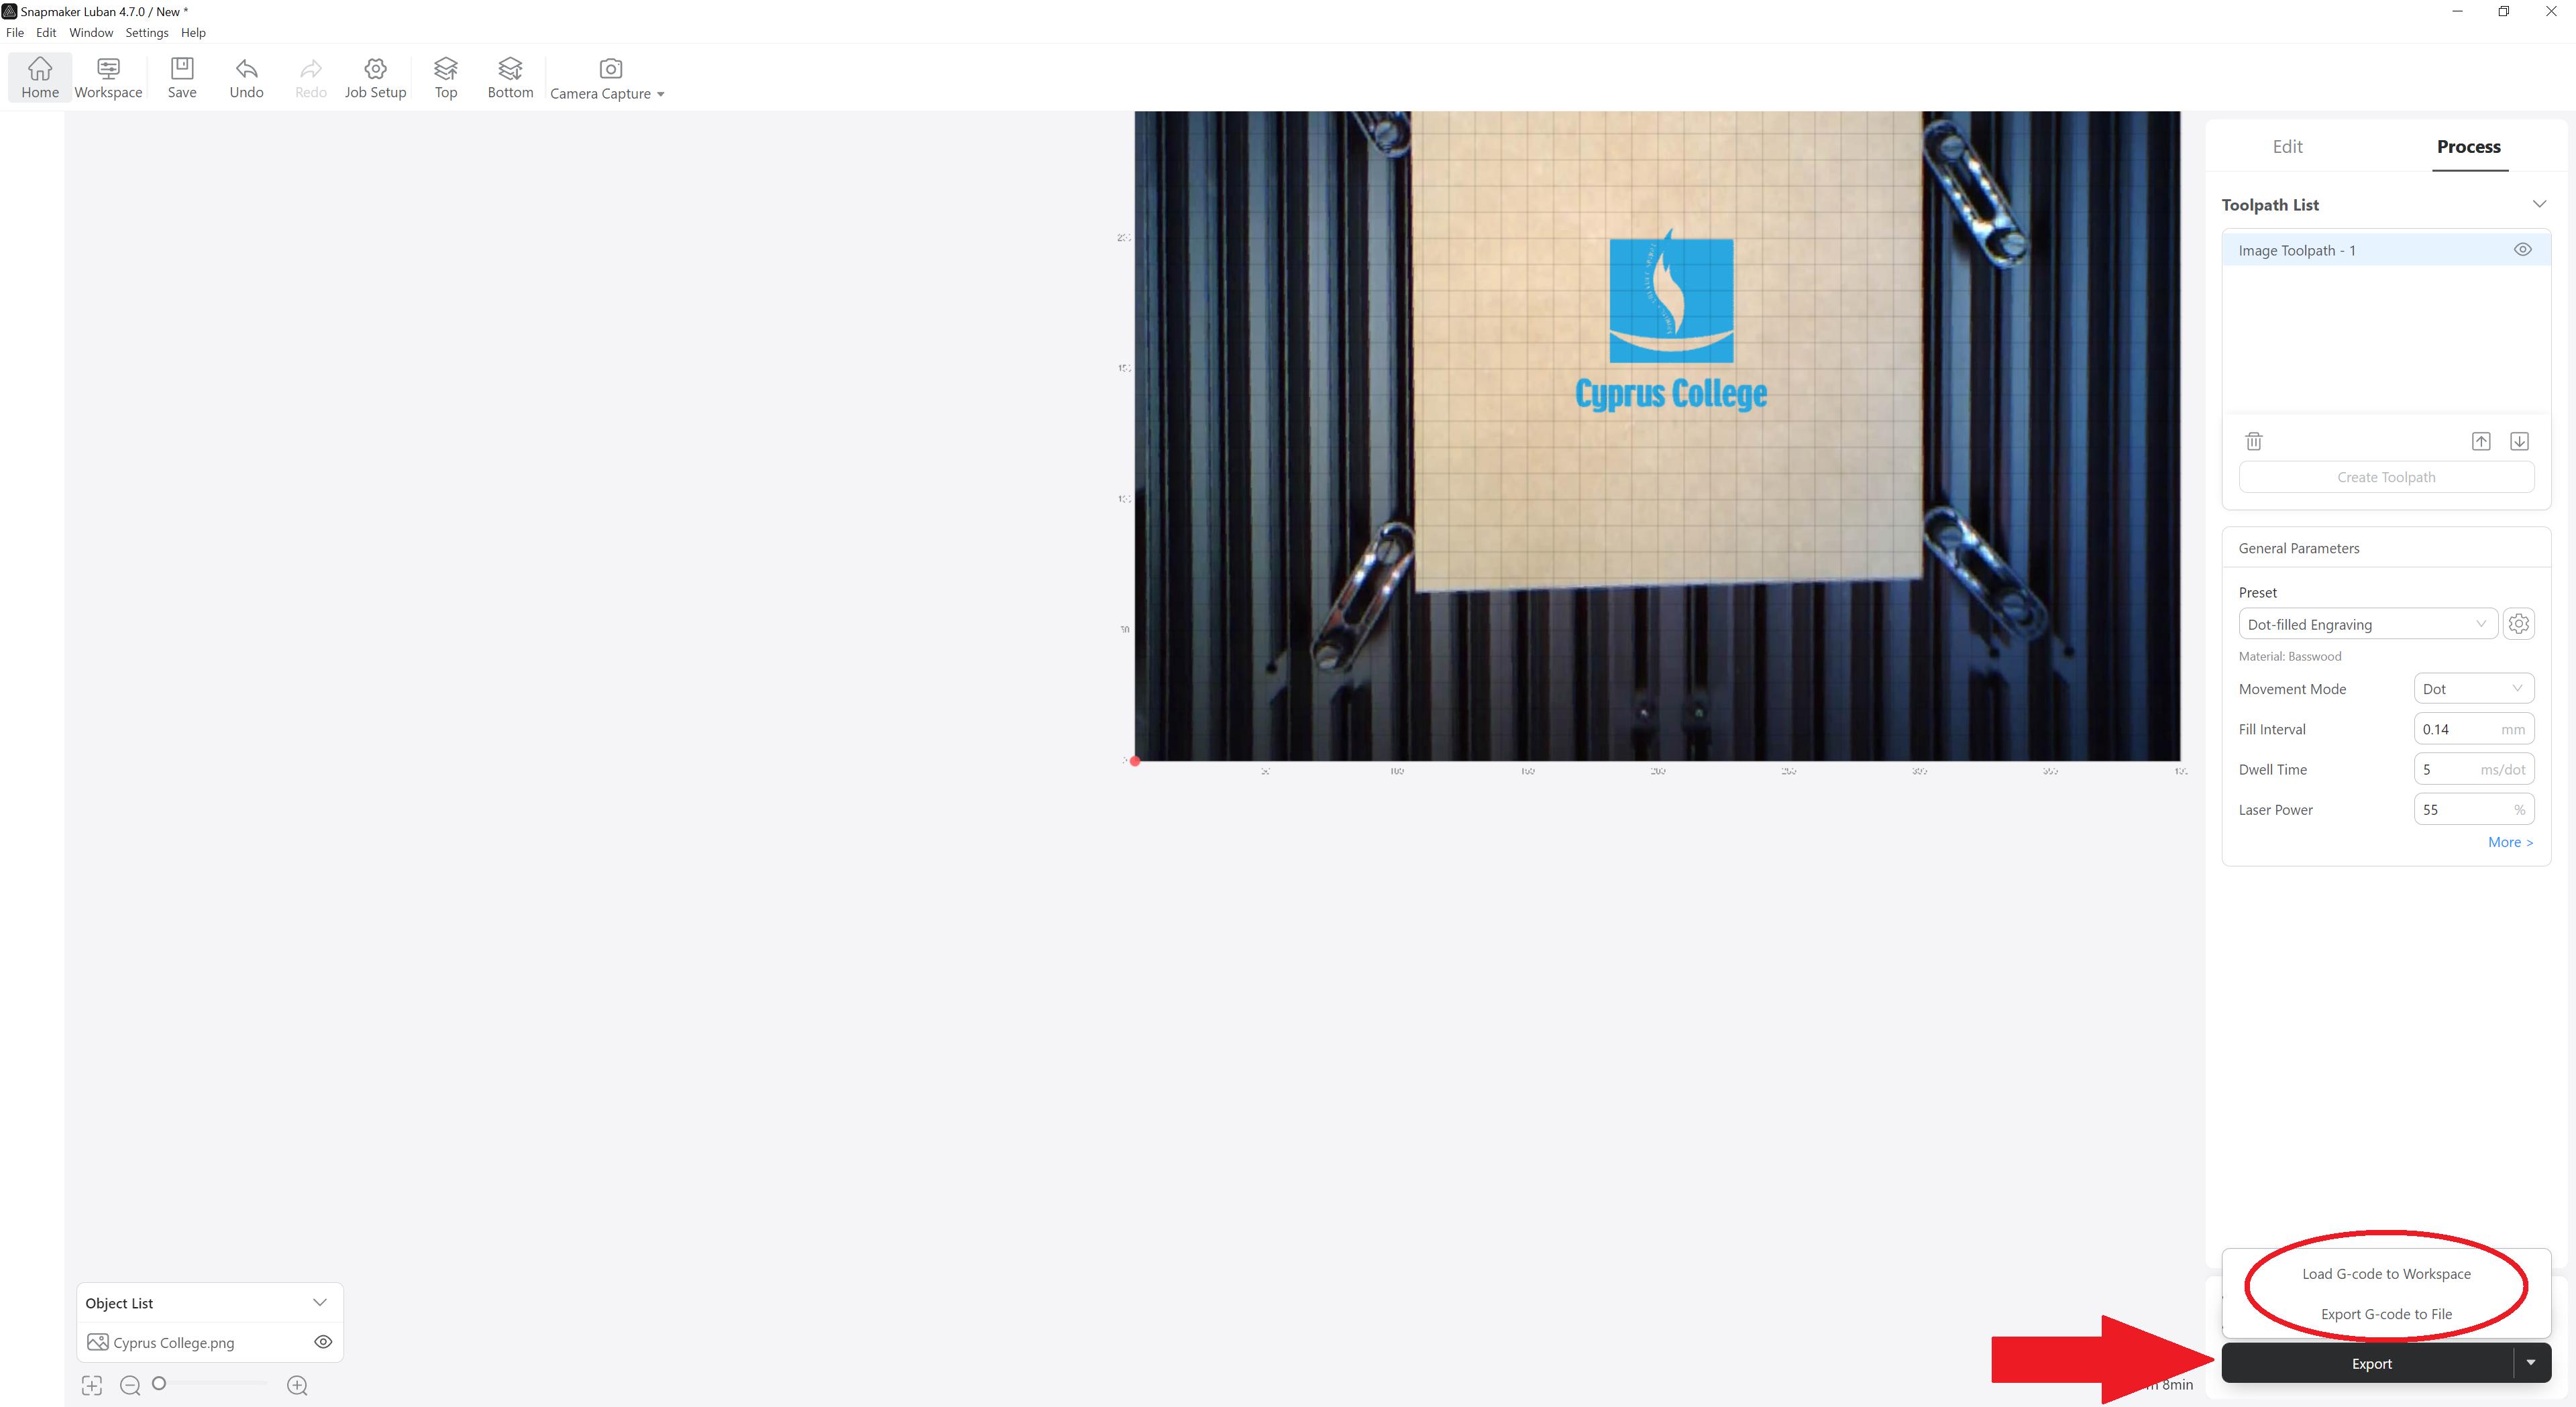
Step 13
Press Export and then it gives you two options:
- Load G-code to Workspace: If you choose this, a window will open in which you can connect to the Artisan via IP address and send the file for engraving or cutting.
- Export G-code to file: This will create a file which will contain the G-code. You will save this file to the USB Stick and manually put it in the Artisan Controller for engraving or cutting.
*Follow the Steps 14 and 15 only if you selected Load G-code to Workspace.
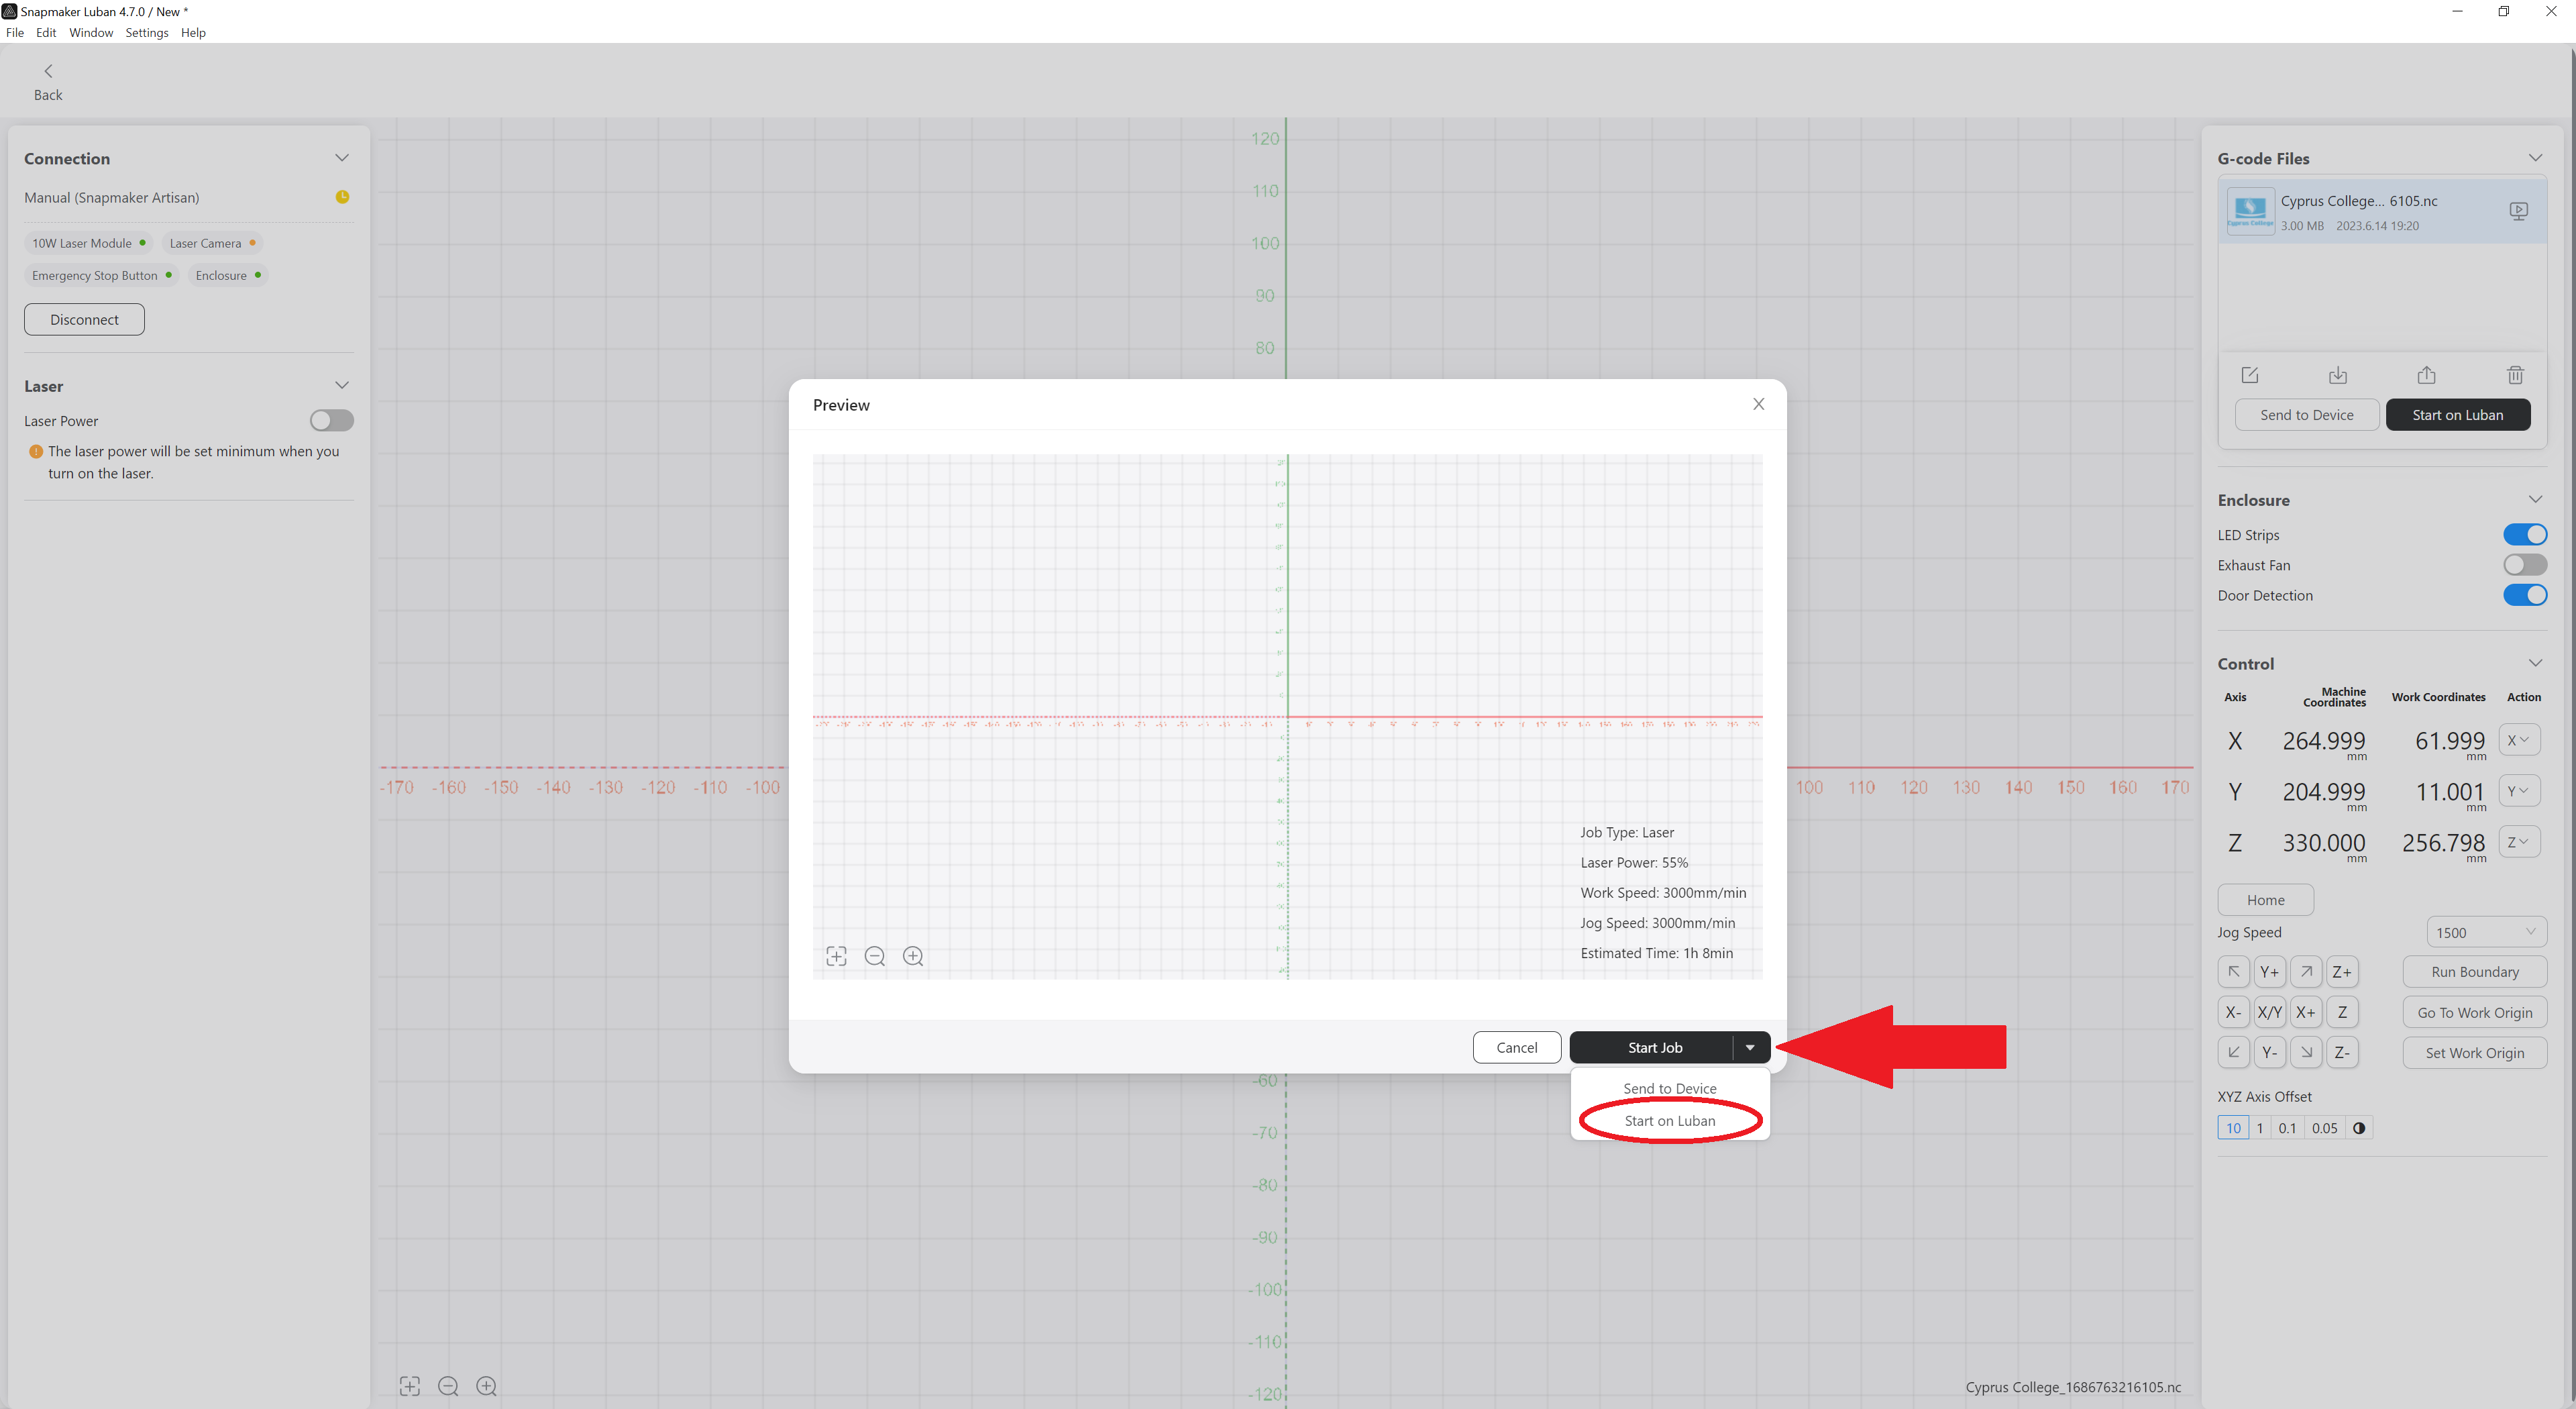
Step 14
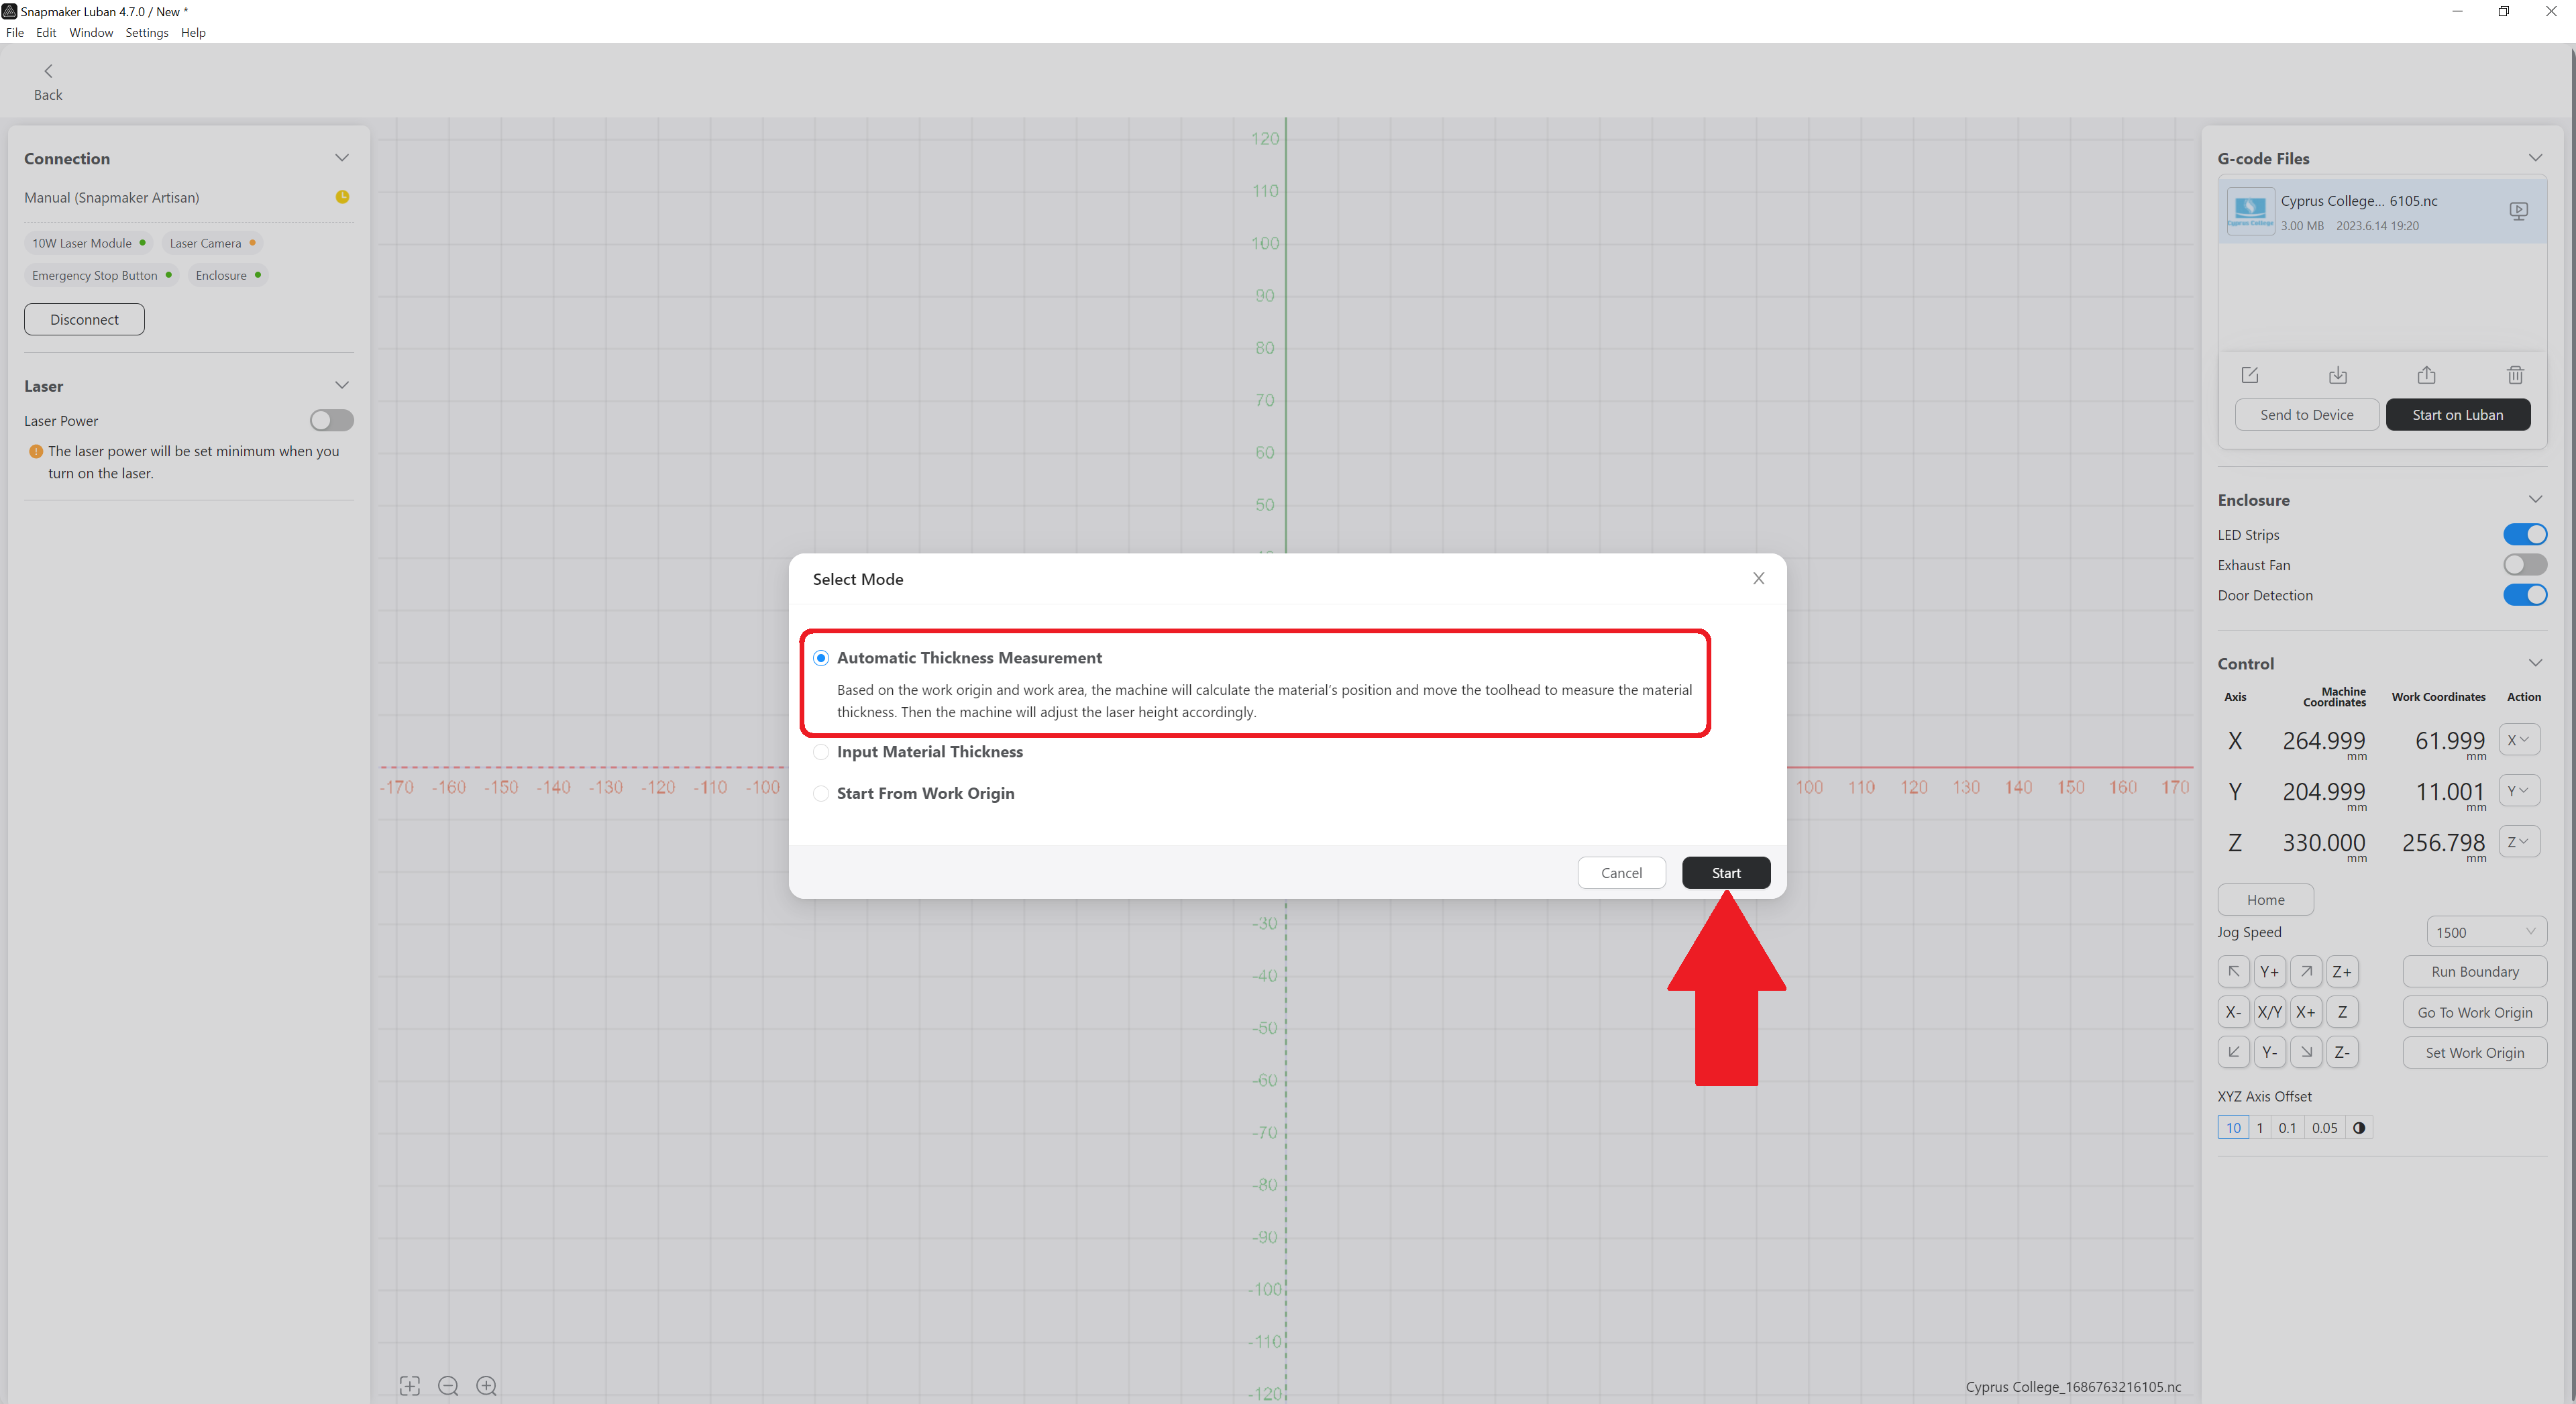
Click on Start Job and choose Start on Luban.
Step 15
Click on Automatic Thickness Measurement, then click on Start and the engraving – cutting will start.
*Follow the Steps 16, 17 and 18 only if you selected Export G-code to file.
Step 16
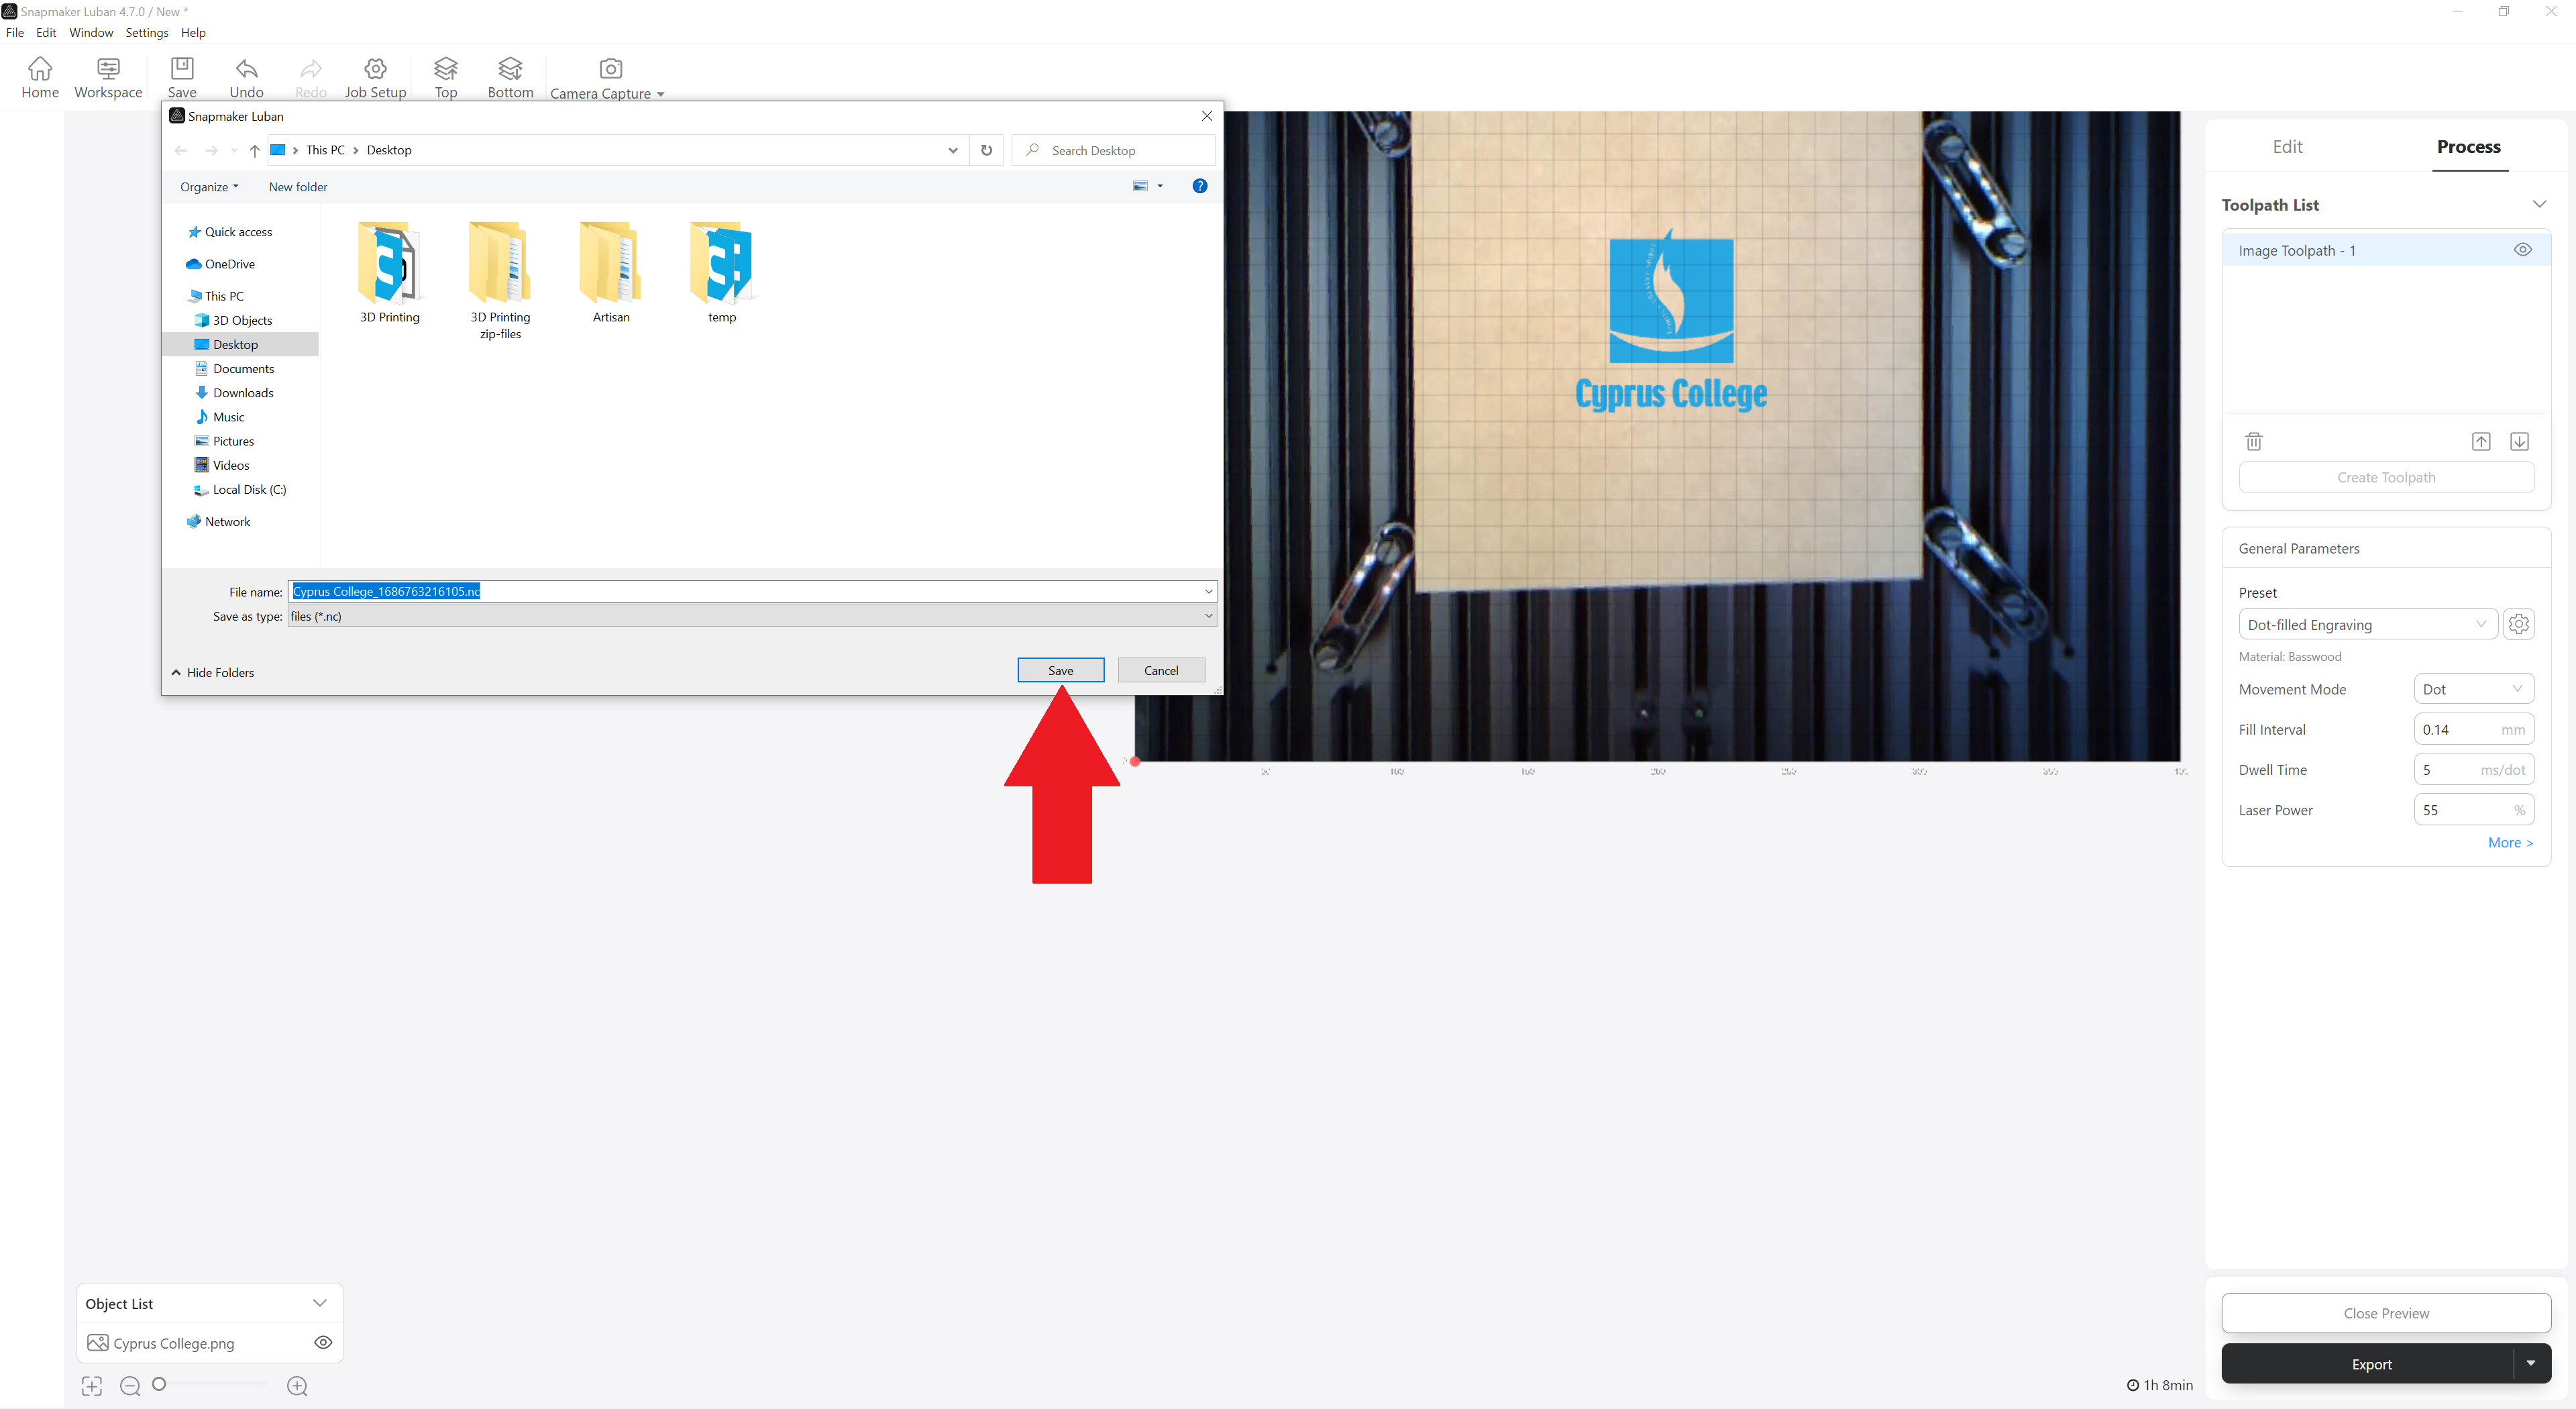
Choose where you want to save the file and then move it to the USB Stick or save it directly to the USB Stick.
Step 17
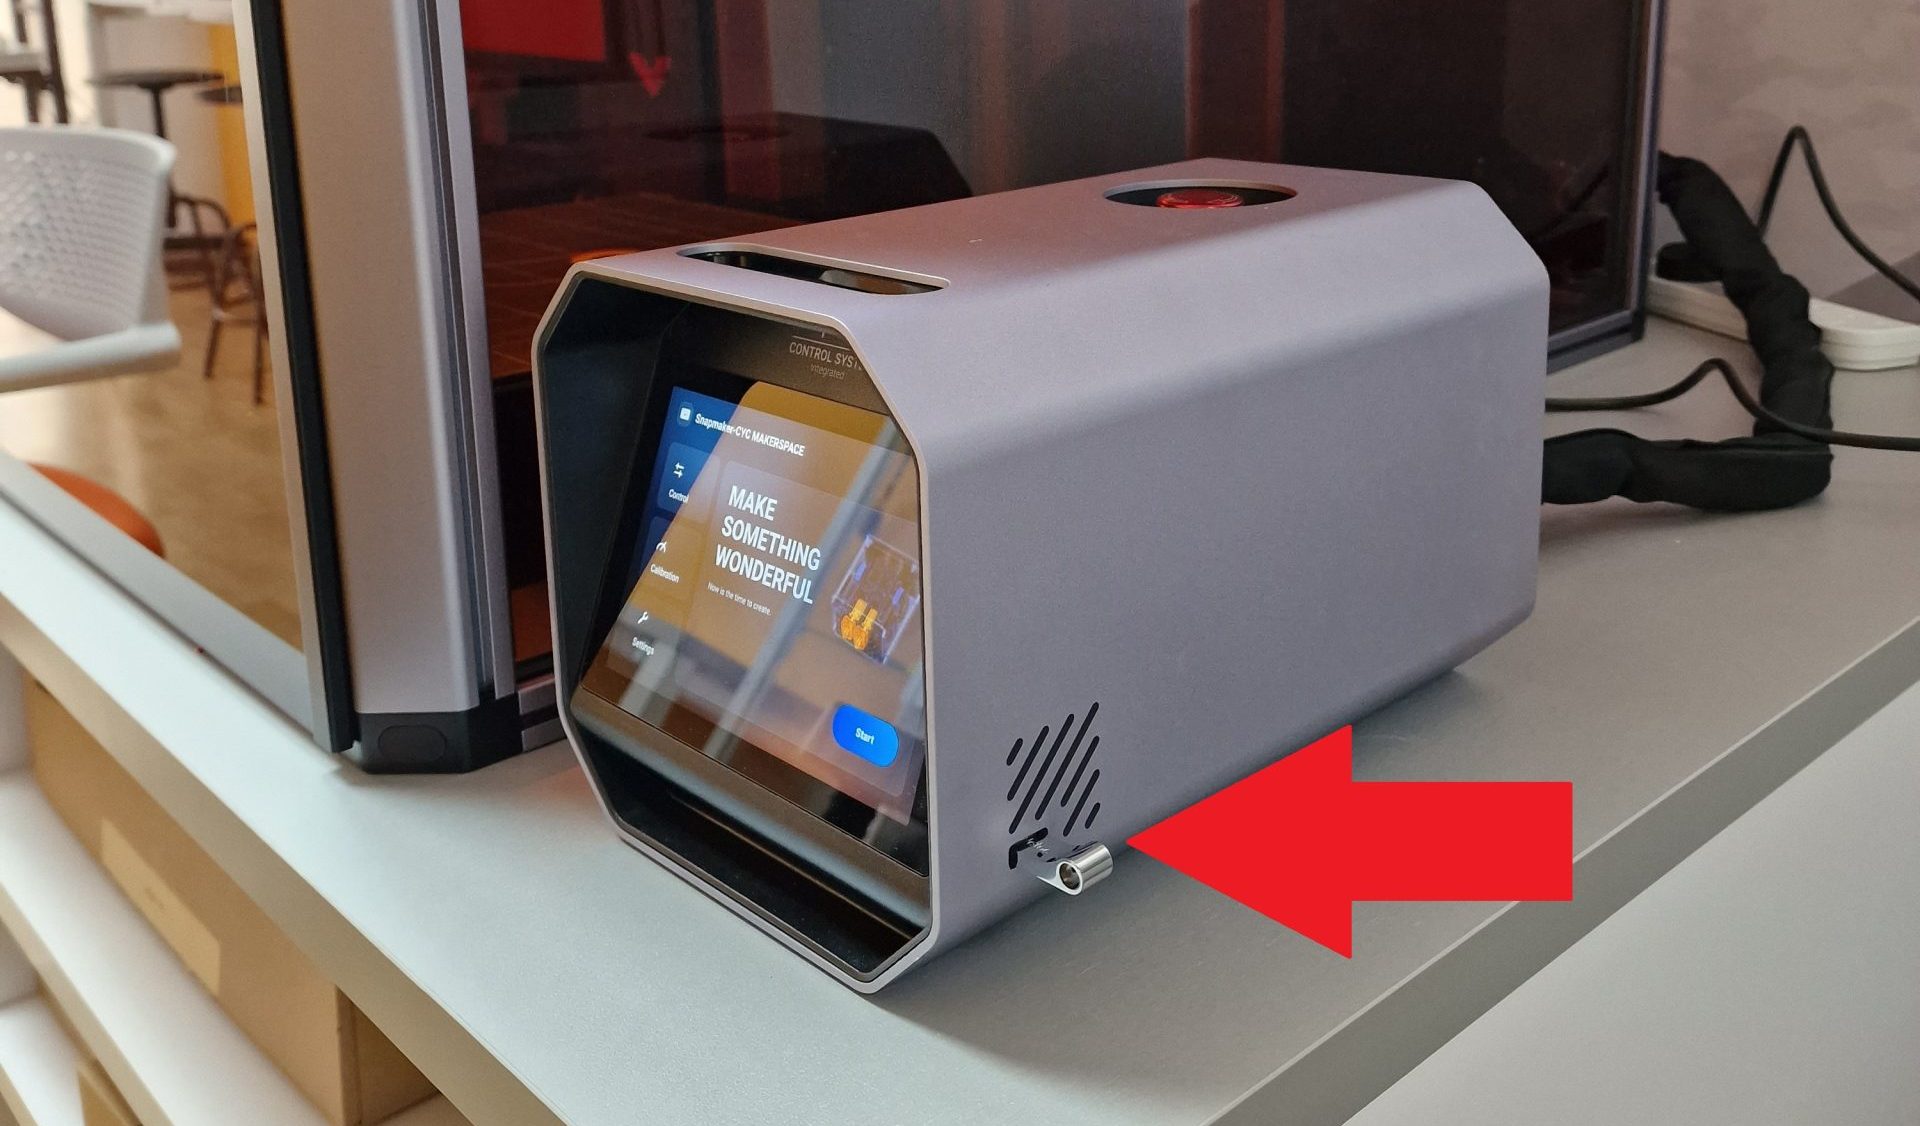
Insert the USB Stick in the Artisan Controller System.
Step 18
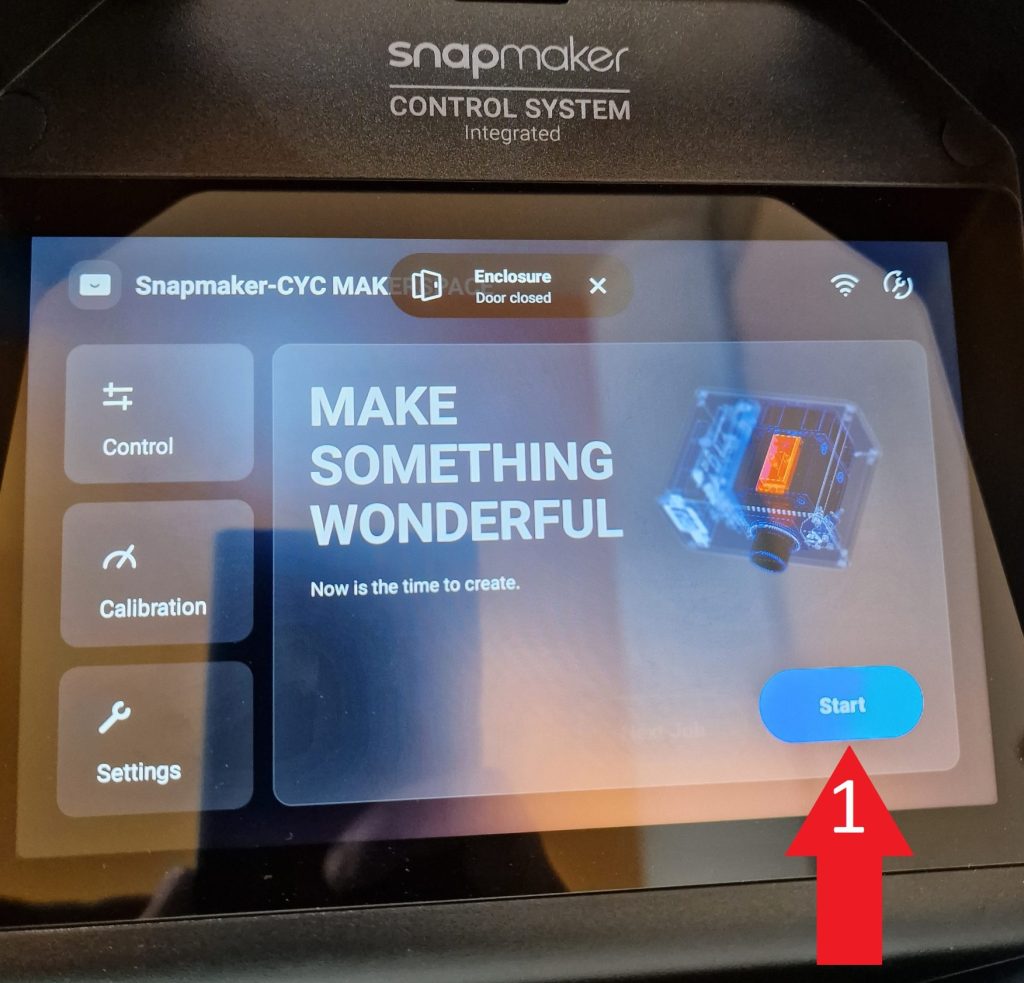
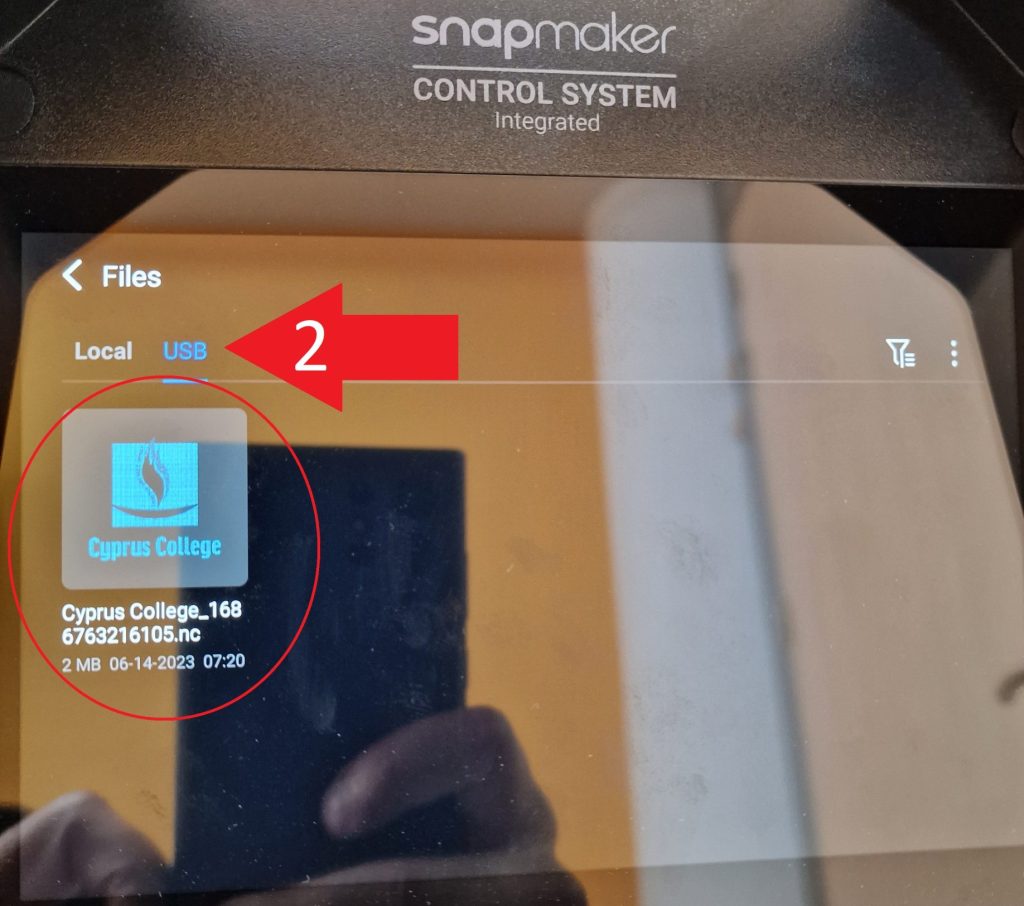
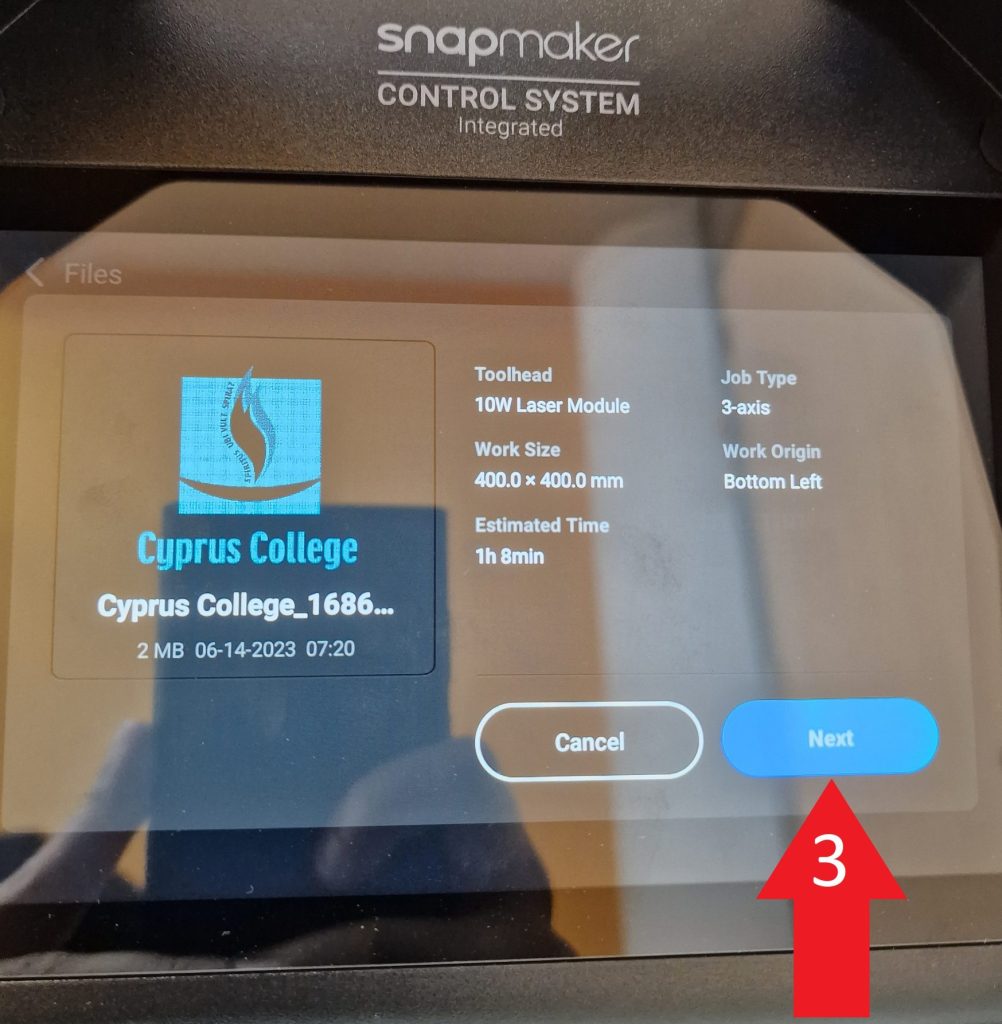
- Press the Start button.
- Select the USB option and click on your file.
- Press the Next button and the engraving – cutting will start.
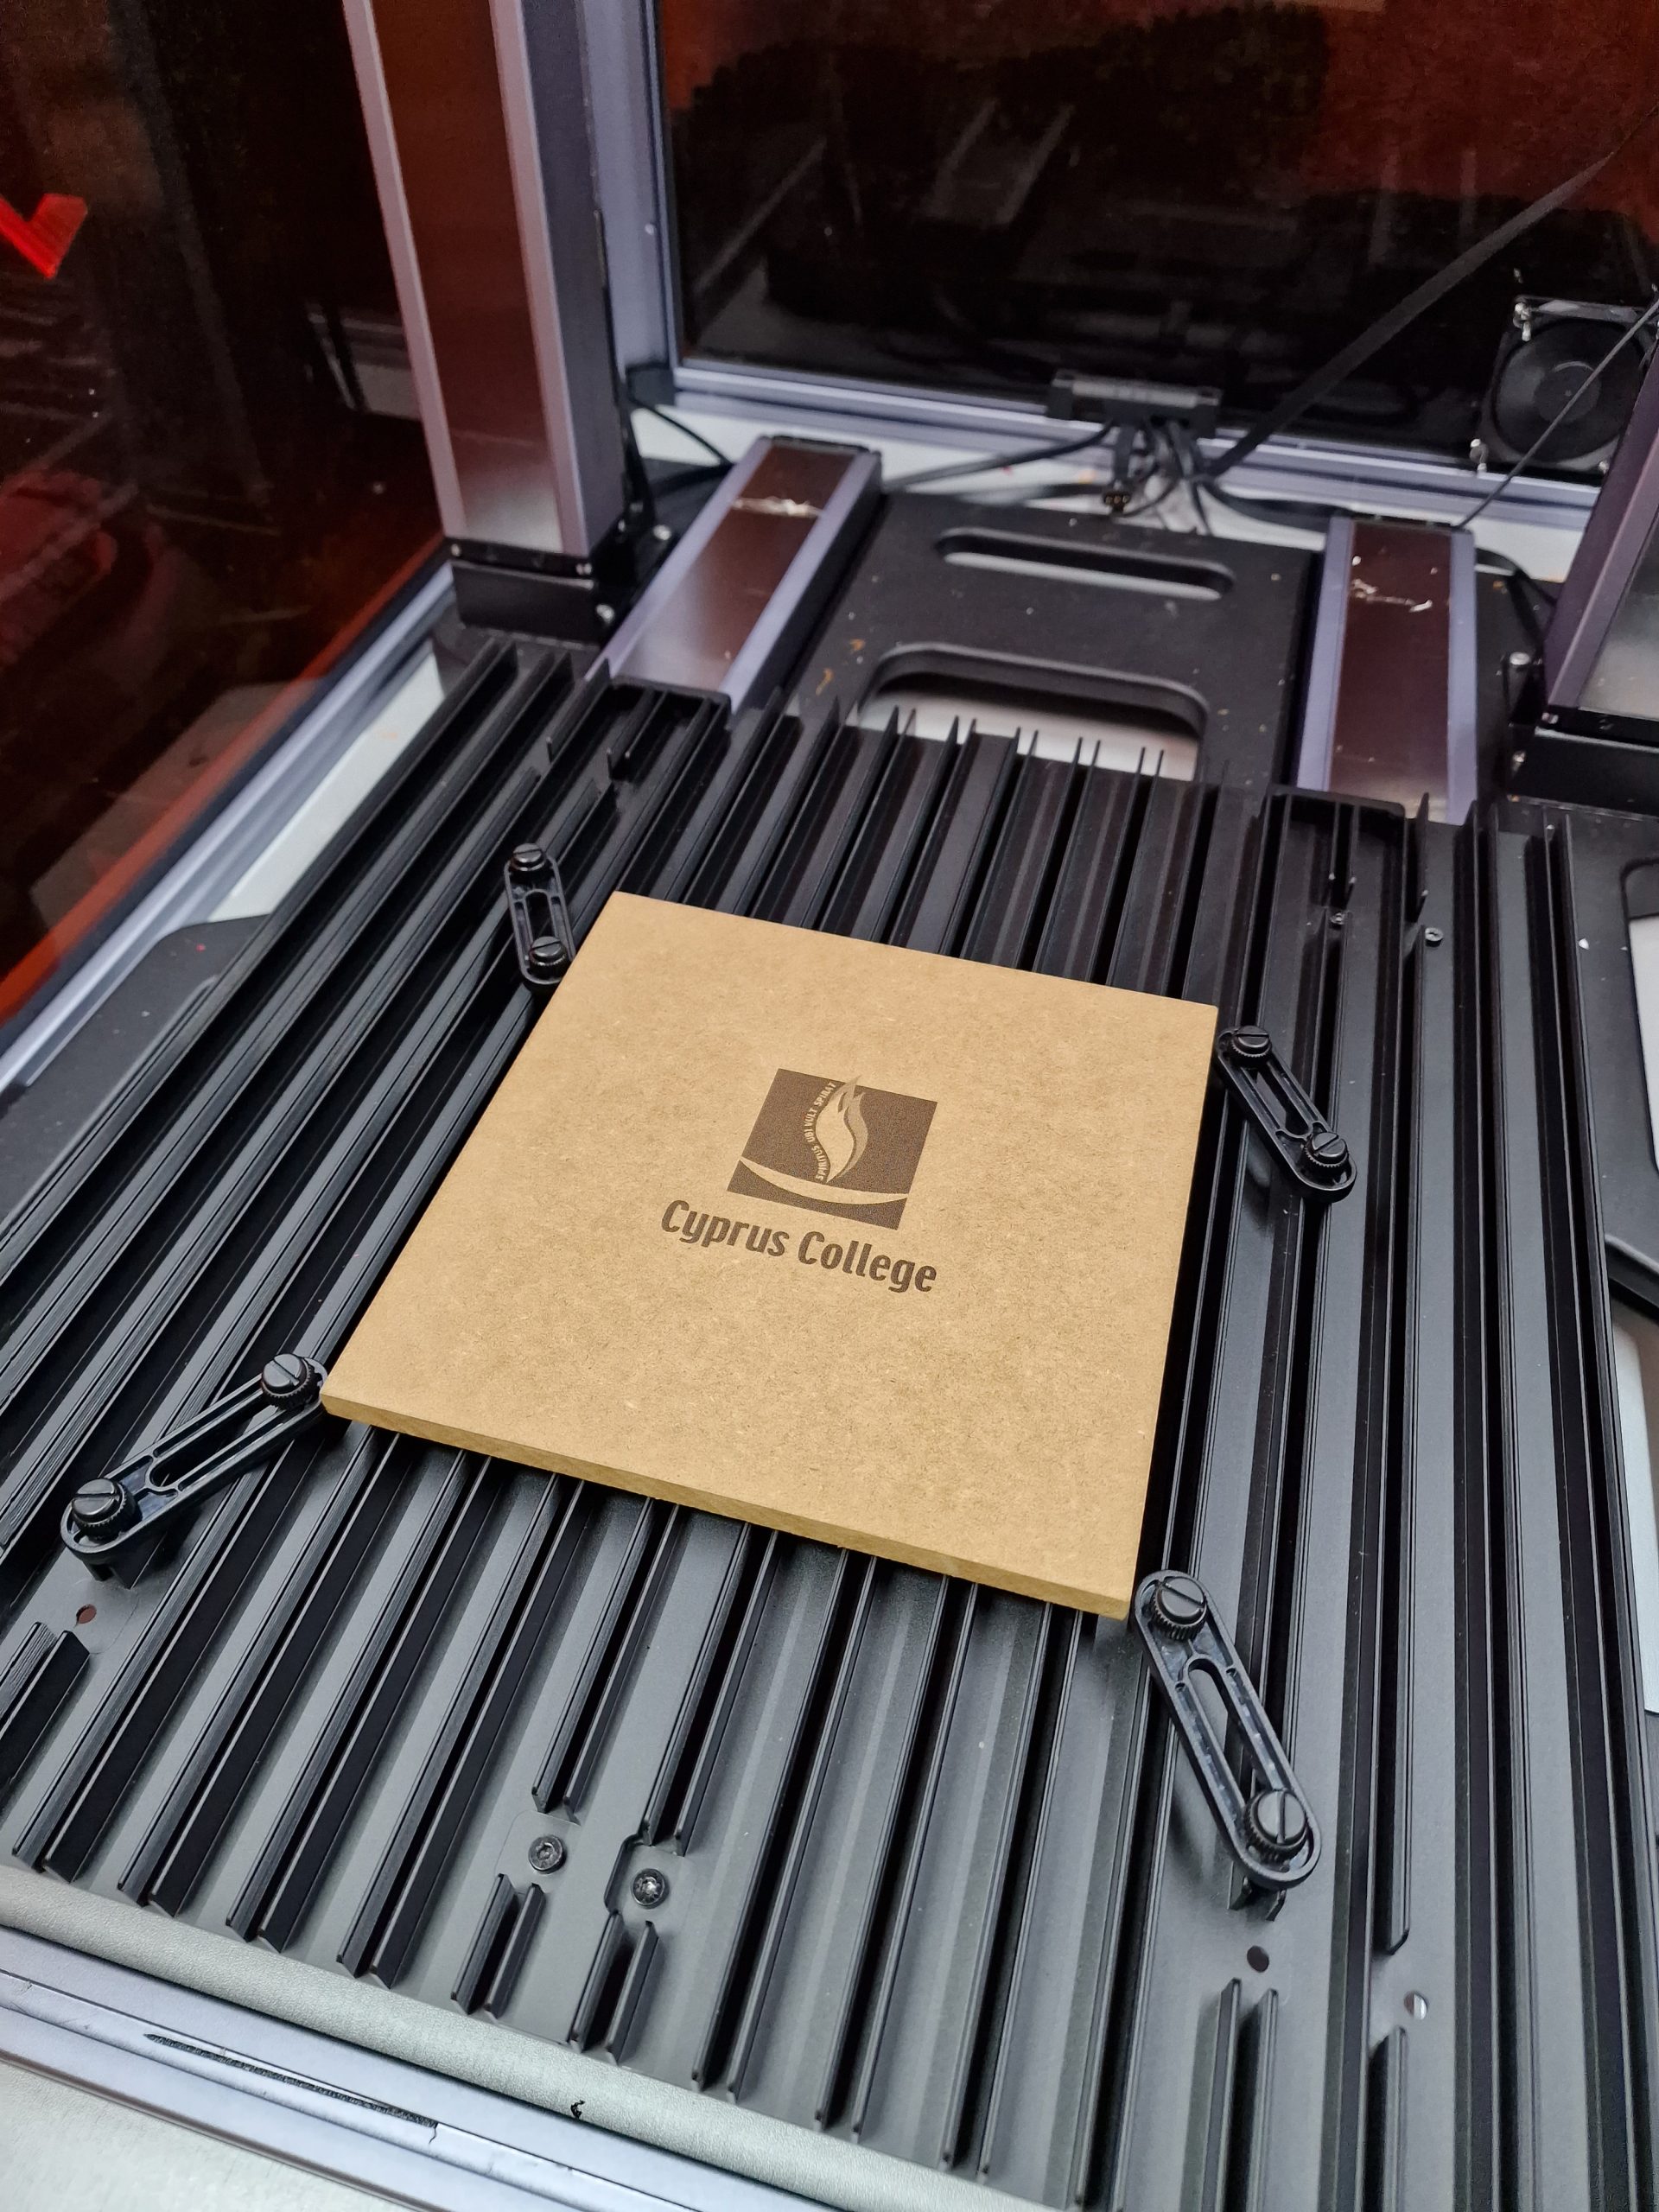
THE RESULT….
Laser Cutting & Engraving with Snapmaker Luban: Beginners Tutorial
